Say hello to the new Mud Monkey (Long overdue updates on P8)
-
konadog

- Posts: 1815
- Joined: Tue Feb 26, 2008 9:25 pm
- Vehicle: 1992 GLX L-300
- Location: Campbell River, BC
Re: Say hello to the new Mud Monkey (this one is for keeps!)
Just LOVIN' this thread! It's really cool to see the pictures of bits and pieces and stripped out delicas - Keep em coming Bruce! Very much looking forward to watching your project unfold. Thanks for the posts 


Happy Day!
-
Mystery Machine
- Posts: 510
- Joined: Fri Dec 08, 2006 12:06 pm
- Location: Bristol (UK)
Re: Say hello to the new Mud Monkey (this one is for keeps!)
Thanks Konadog.....and there was me thinking I was boring everyone to death with masses of photos??
Anyway - here is a bit more news:
Progress on the Mud Monkey has been slow this week due to poor weather, fitting a stereo in an L400 Royal Exceed (don't even go there, but have a look at THIS is you fancy owning a headache of a Delica to work on!!) and other distractions (like trying to clear a few cm's of space in my garage!) but the progress recently has consisted of fixing some broken wheel studs and chopping the arches ready for the 31" MT's.
When I got the car, it already had a broken wheel stud on the front, so this was going to be sorted while the front wheels were off for the arch treatment.
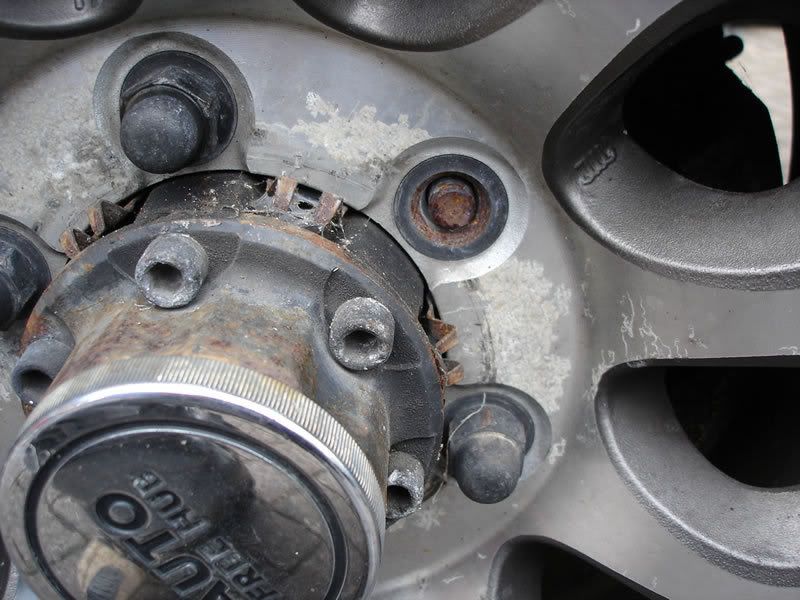
While taking the front wheel of, one of the nuts refused to budge after about 1/2 turn and I deduced that it had been previously cross-threaded. Putting a long lever bar on it soon confirmed my initial doubts because it decided to sheer off too....
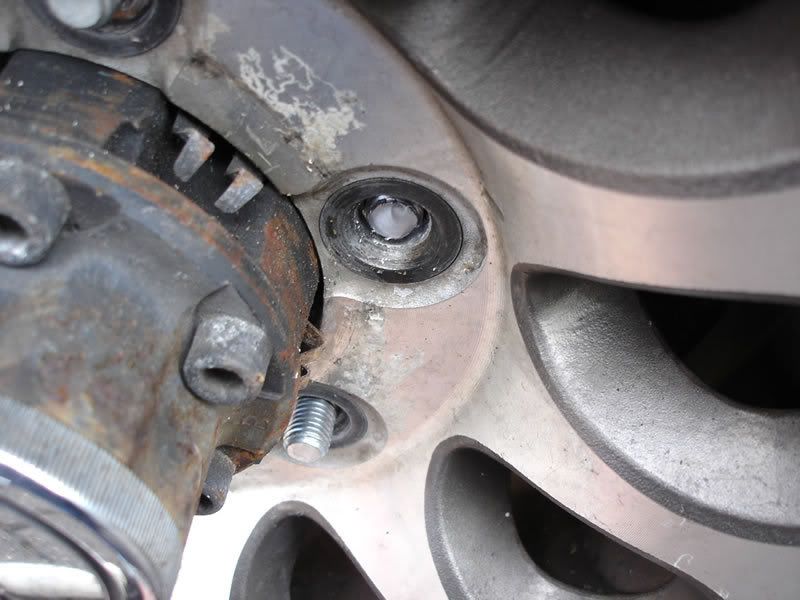
At least it was on the same hub! So off with the front hub (I'm getting quite good at these now :lol: )
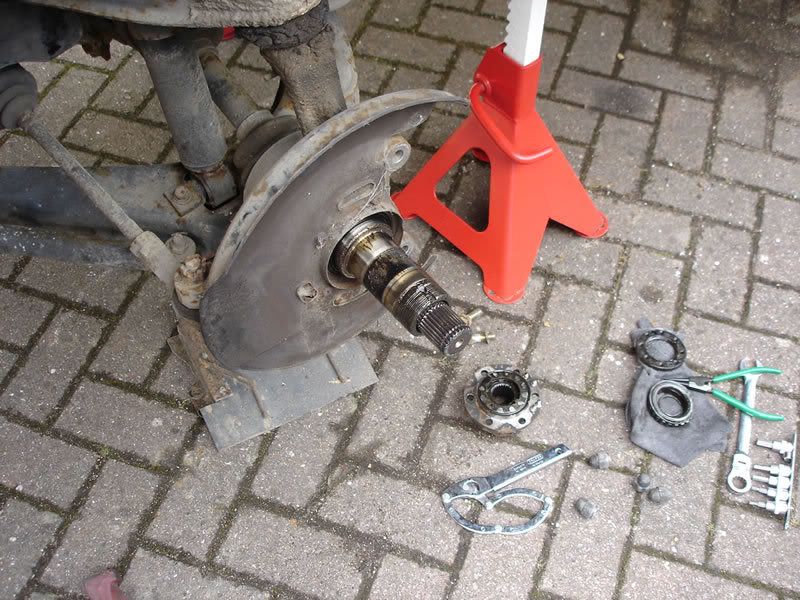
Split the hub from teh disk so that I could knock out the broken studs and fit the new ones:

Refit all the parts and back to a 6stud front axle.... :D :D
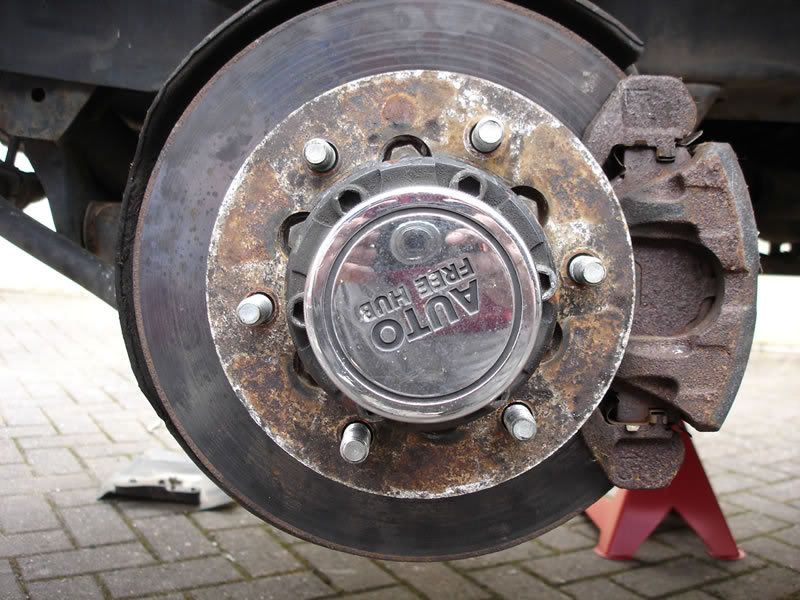
Next was the arch chopping - getting rid of all the unwanted metal/plastic that gets in the way of my 31's....here's a before shot:
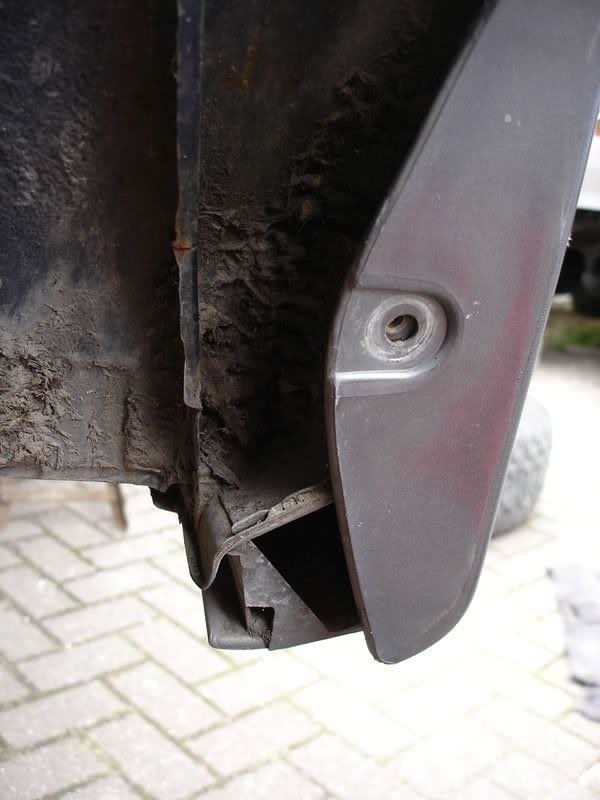
....and after I'd set-to with a grinder, file and lump hammer:
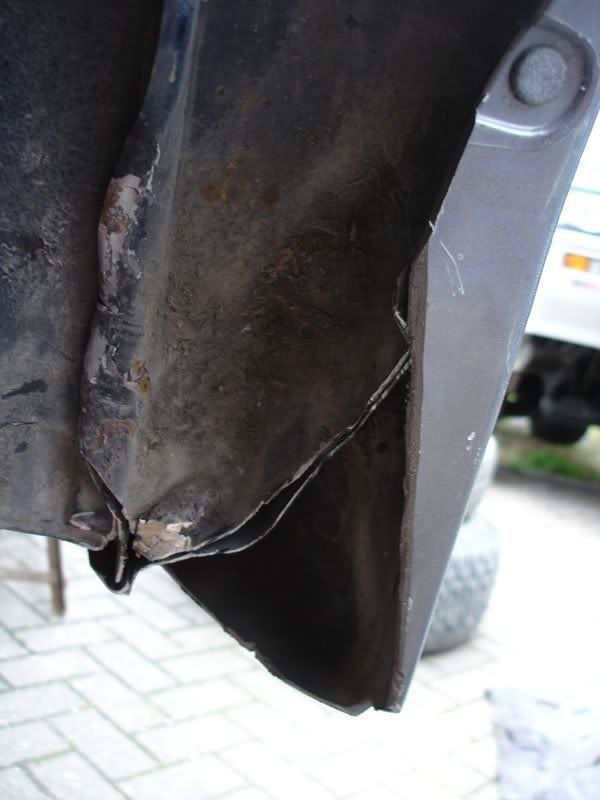
The 'opening' between the outer sill and the wheel arch isn't too much of a problem (nothing structural) and I've treated it all with a good dose of hammerite until I get around to having it all welded shut. Both sides were done in less than an hour and I then spent 40 mins running the hoover over the drive to get rid of all the burrs (to protect Jed's paws)
Here is the car just before putting the wheels back on and dropping it back on the deck:
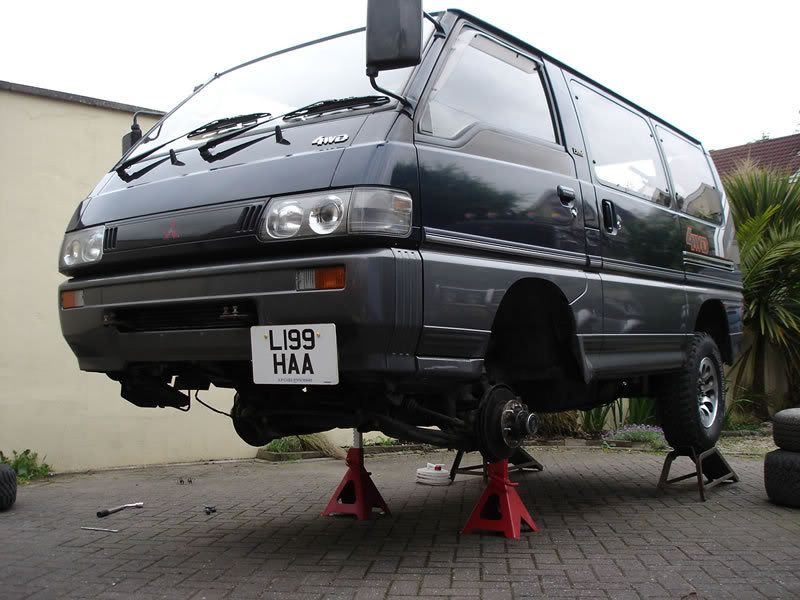
Just got to board out the back (floor & sides), refit the dash, install the cool box, CB, stereo, L400 rear seats and it'll be ready for action (oh - and fit the 31's)
So there you go - not too much to do and I'll have it on the road.
Gotta love these things....
Anyway - here is a bit more news:
Progress on the Mud Monkey has been slow this week due to poor weather, fitting a stereo in an L400 Royal Exceed (don't even go there, but have a look at THIS is you fancy owning a headache of a Delica to work on!!) and other distractions (like trying to clear a few cm's of space in my garage!) but the progress recently has consisted of fixing some broken wheel studs and chopping the arches ready for the 31" MT's.
When I got the car, it already had a broken wheel stud on the front, so this was going to be sorted while the front wheels were off for the arch treatment.
While taking the front wheel of, one of the nuts refused to budge after about 1/2 turn and I deduced that it had been previously cross-threaded. Putting a long lever bar on it soon confirmed my initial doubts because it decided to sheer off too....
At least it was on the same hub! So off with the front hub (I'm getting quite good at these now :lol: )
Split the hub from teh disk so that I could knock out the broken studs and fit the new ones:
Refit all the parts and back to a 6stud front axle.... :D :D
Next was the arch chopping - getting rid of all the unwanted metal/plastic that gets in the way of my 31's....here's a before shot:
....and after I'd set-to with a grinder, file and lump hammer:
The 'opening' between the outer sill and the wheel arch isn't too much of a problem (nothing structural) and I've treated it all with a good dose of hammerite until I get around to having it all welded shut. Both sides were done in less than an hour and I then spent 40 mins running the hoover over the drive to get rid of all the burrs (to protect Jed's paws)
Here is the car just before putting the wheels back on and dropping it back on the deck:
Just got to board out the back (floor & sides), refit the dash, install the cool box, CB, stereo, L400 rear seats and it'll be ready for action (oh - and fit the 31's)
So there you go - not too much to do and I'll have it on the road.
Gotta love these things....
L300 Mystery Machine (High Altitude Edition  )
)
L300 MudMonkey ($400 bargain banger!! )
)

L300 MudMonkey ($400 bargain banger!!
-
jessef

- Posts: 6459
- Joined: Tue Feb 26, 2008 1:27 pm
- Vehicle: JDM flavour of the month
- Location: Vancouver
- Location: Vancouver, BC
Re: Say hello to the new Mud Monkey (this one is for keeps!)
Looks great Bruce
Q.
Is it possible to remove 1/2 of the aircon ? ie. air in the back and keep the fronts ?
I'm looking at the motor/blower underneath down the middle for the rear air and have some thoughts of what I'd like to replace it with.
Thanks
Batman
Q.
Is it possible to remove 1/2 of the aircon ? ie. air in the back and keep the fronts ?
I'm looking at the motor/blower underneath down the middle for the rear air and have some thoughts of what I'd like to replace it with.
Thanks
Batman
-
mararmeisto

- Posts: 3276
- Joined: Wed Sep 19, 2007 10:00 am
- Vehicle: 2018 Ram EcoDiesel
- Location: Dartmouth, NS
Re: Say hello to the new Mud Monkey (this one is for keeps!)
Oh, yes. That is a most excellent question! Can it be done?jfarsang wrote:Looks great Bruce
Q.
Is it possible to remove 1/2 of the aircon ? ie. air in the back and keep the fronts ?
I'm looking at the motor/blower underneath down the middle for the rear air and have some thoughts of what I'd like to replace it with.
Thanks
Batman
JPL
I still miss my '94 Pajero!
I still miss my '94 Pajero!
-
Mystery Machine
- Posts: 510
- Joined: Fri Dec 08, 2006 12:06 pm
- Location: Bristol (UK)
Re: Say hello to the new Mud Monkey (this one is for keeps!)
Basically, yes it can be done, but there is a bit of a downside to it.....here is part of the PM I sent Jesse earlier regarding ripping out the AC unit from the rear:mararmeisto wrote:Oh, yes. That is a most excellent question! Can it be done?
"Yes you can remove the rear unit and have the front functioning (but you'll lose ALL blower functions to the rear though) ....I'll see what parts I can get for you and let you know. You basically blank off the high and low pressure feed to the rear unit. You also need to bypass the water feed (hot air) but this is dead simple as very obvious (I can get you a photo if you need)"
So if you are willing to sacrifice the whole rear ventilation system then you can remove the rear AC. You'll also gain space inside because you can do away with the rear heater controls which means you can fot something else in the space.
You will also need to make plates to cover the holes left in the sill panel when you remove the blower/AC etc....but I'll be making some of these in the next few days, so can supply templates to you guys if you wish??
Let me know what info you need and I'll get it all together....
L300 Mystery Machine (High Altitude Edition )
L300 MudMonkey ($400 bargain banger!! )
L300 MudMonkey ($400 bargain banger!!
-
josh
- Posts: 868
- Joined: Mon Jul 24, 2006 8:44 pm
- Member's Photo Album: http://www.delica.ca/Photos/
- Vehicle: L300 poptop gasser
- Location: Vancouver, bC
- Location: Vancouver, BC
Re: Say hello to the new Mud Monkey (this one is for keeps!)
Bruce,Mystery Machine wrote:Thanks Konadog.....and there was me thinking I was boring everyone to death with masses of photos??
Anyway - here is a bit more news:
Progress on the Mud Monkey has been slow this week due to poor weather, fitting a stereo in an L400 Royal Exceed (don't even go there, but have a look at THIS is you fancy owning a headache of a Delica to work on!!) and other distractions (like trying to clear a few cm's of space in my garage!) but the progress recently has consisted of fixing some broken wheel studs and chopping the arches ready for the 31" MT's.
When I got the car, it already had a broken wheel stud on the front, so this was going to be sorted while the front wheels were off for the arch treatment.
While taking the front wheel of, one of the nuts refused to budge after about 1/2 turn and I deduced that it had been previously cross-threaded. Putting a long lever bar on it soon confirmed my initial doubts because it decided to sheer off too....
At least it was on the same hub! So off with the front hub (I'm getting quite good at these now :lol: )
What I would have done for a post like that a couple weeks ago. James and I had to do the same on mine. I had one sheared right off and two on their way out on the front left side... can you believe I got the delica with only three usable lug bolts? Crazy hey. The first one took an hour to get off, second about 10 minutes... and minutes to put them back on as well. (glad I have a parts van) So we really got better quick.
Josh
-
Mystery Machine
- Posts: 510
- Joined: Fri Dec 08, 2006 12:06 pm
- Location: Bristol (UK)
Re: Say hello to the new Mud Monkey (this one is for keeps!)
Some more progress on the motor:
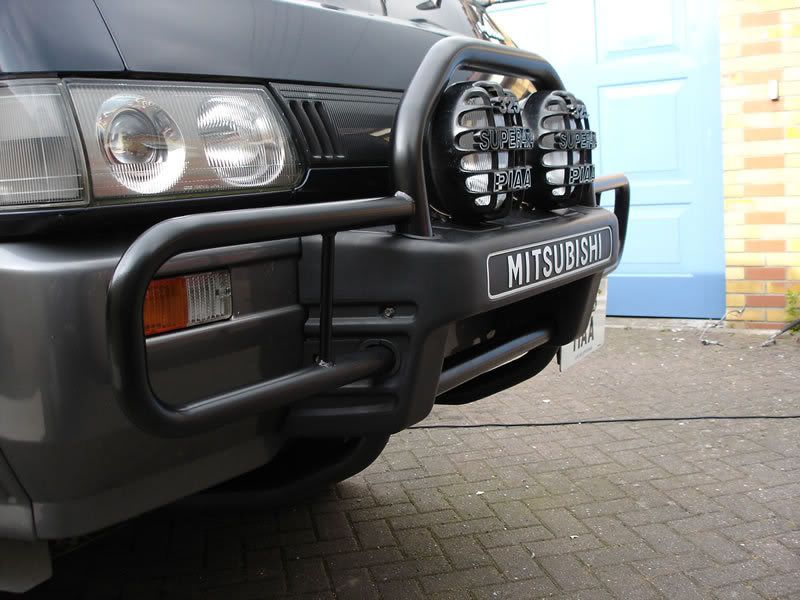
I had the bull bar powder coated in the end. I couldn't live with the red and was going to spray it myself....but managed to get it professionally done for £15.00!! Satin black and a stunning finish for the money......it would have cost me £10.00 just for some spray paint and the finish wouldn't have been as good - or as tough!

I also decided to attack the 'grey' plastic cover with a heat gun to bring it back to life. I'd always been a bit sceptical about this method, but have to say it works amazingly well and if you allow the plastic to 'sweat' it comes up brilliantly! It takes a bit of practice to get it really dark and even, but the end result was very pleasing. (the bit on the left was my initial trial....looks a lot patchier than the more confident attempt on the right! It's easy once you get the hang of it)

All fitted, but missing that 'little something'??
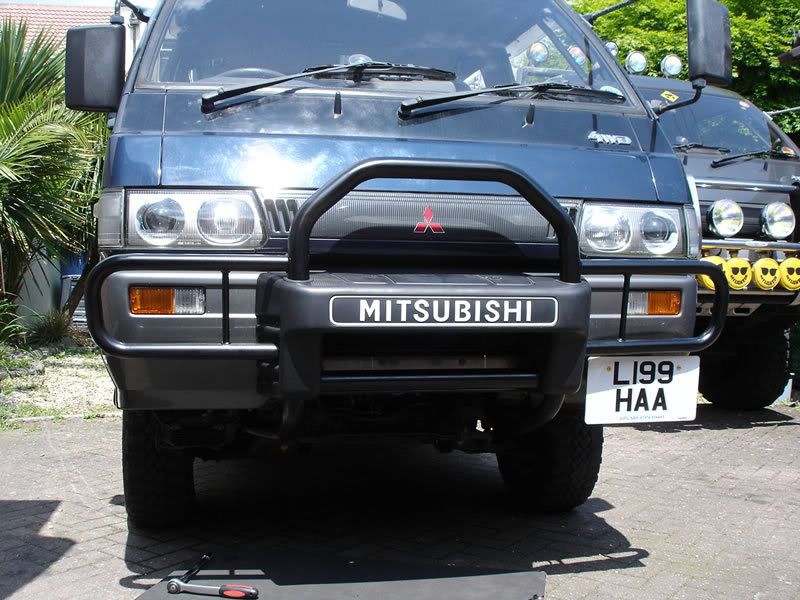
.....oh yes....some nice PIAA 8" spot lamps that I had in the garage. I chose the black covers instead of the chrome ones I also have as 'spares' because this L300 is going to be 'chrome free'
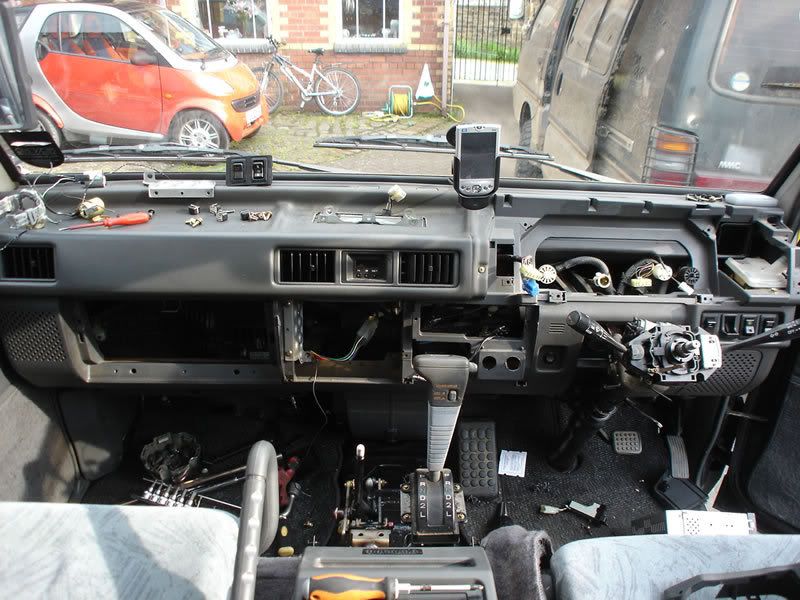
Turning to the inside, the front of the motor currently looks like this while I am sorting the fitment of all the parts/accessories I want and also doing away with all the bits I don't want to keep.
I had the bull bar powder coated in the end. I couldn't live with the red and was going to spray it myself....but managed to get it professionally done for £15.00!! Satin black and a stunning finish for the money......it would have cost me £10.00 just for some spray paint and the finish wouldn't have been as good - or as tough!
I also decided to attack the 'grey' plastic cover with a heat gun to bring it back to life. I'd always been a bit sceptical about this method, but have to say it works amazingly well and if you allow the plastic to 'sweat' it comes up brilliantly! It takes a bit of practice to get it really dark and even, but the end result was very pleasing. (the bit on the left was my initial trial....looks a lot patchier than the more confident attempt on the right! It's easy once you get the hang of it)
All fitted, but missing that 'little something'??
.....oh yes....some nice PIAA 8" spot lamps that I had in the garage. I chose the black covers instead of the chrome ones I also have as 'spares' because this L300 is going to be 'chrome free'
Turning to the inside, the front of the motor currently looks like this while I am sorting the fitment of all the parts/accessories I want and also doing away with all the bits I don't want to keep.
L300 Mystery Machine (High Altitude Edition )
L300 MudMonkey ($400 bargain banger!! )
L300 MudMonkey ($400 bargain banger!!
-
delicat

- Posts: 2331
- Joined: Thu Jul 26, 2007 6:26 pm
- Member's Photo Album: http://www.delica.ca/Photos/
- Vehicle: '92 Exeed '93 Safari '94 Pajero
- Location: New Westminster, BC
- Location: New Westminster, BC
Re: Say hello to the new Mud Monkey (this one is for keeps!)
Nice work, great pictures but the last one is pretty scary...
I still wonder where you get all the time to do so much work on your Delica, especially knowing that the Delica are just a few of your collection! (and that it's always raining!)
Cheers,
David
I still wonder where you get all the time to do so much work on your Delica, especially knowing that the Delica are just a few of your collection! (and that it's always raining!)
Cheers,
David
'93 Nissan Patrol
'94 Mitsubishi Pajero

"If it ain't broken, modify it!"
'94 Mitsubishi Pajero
"If it ain't broken, modify it!"
-
monstabishi
- Posts: 65
- Joined: Tue Jul 24, 2007 11:15 am
- Member's Photo Album: http://www.delica.ca/Photos/
- Vehicle: 1988 Delica L300td
- Location: Perth Western Australia.
Re: Say hello to the new Mud Monkey (this one is for keeps!)
All fitted, but missing that 'little something'?? A WINCH
Mick.
Mick.
-
mararmeisto
- Posts: 3276
- Joined: Wed Sep 19, 2007 10:00 am
- Vehicle: 2018 Ram EcoDiesel
- Location: Dartmouth, NS
Re: Say hello to the new Mud Monkey (this one is for keeps!)
Powder coated the bull bars, eh? Sweet! I concede it looks better than the red.
I'd love to see you cram those 31s into the other one without lifting it any... should prove interesting, and it looks like it will fit. But you'll definitely have to trim the fender wells in the front for tire-swing.
I'd love to see you cram those 31s into the other one without lifting it any... should prove interesting, and it looks like it will fit. But you'll definitely have to trim the fender wells in the front for tire-swing.
JPL
I still miss my '94 Pajero!
I still miss my '94 Pajero!
-
Schwa

- Posts: 480
- Joined: Tue May 01, 2007 5:16 pm
- Vehicle: 1992 Delica Exceed
- Location: Coquitlam
- Contact:
Re: Say hello to the new Mud Monkey (this one is for keeps!)
This reminds me of helping my friend install an LCD screen into his Prius, lolMystery Machine wrote:


-
jessef
- Posts: 6459
- Joined: Tue Feb 26, 2008 1:27 pm
- Vehicle: JDM flavour of the month
- Location: Vancouver
- Location: Vancouver, BC
Re: Say hello to the new Mud Monkey (this one is for keeps!)
Great minds think alikemonstabishi wrote:All fitted, but missing that 'little something'?? A WINCH
Mick.
-
MERLIN
- Posts: 12
- Joined: Fri May 16, 2008 2:12 pm
- Member's Photo Album: http://www.delica.ca/Photos/[IMG]http://i128.photo
- Vehicle: L-300
- Location: Sta. Coloma de Gramanet Barcelona-Spain
Re: Say hello to the new Mud Monkey (this one is for keeps!)
Holitas
impressive work
and much time spent
Saludos desde Barcelona-Spain
impressive work
and much time spent
Saludos desde Barcelona-Spain
-
Mystery Machine
- Posts: 510
- Joined: Fri Dec 08, 2006 12:06 pm
- Location: Bristol (UK)
Re: Say hello to the new Mud Monkey (this one is for keeps!)
Just a quick update....
Despite the lack of info on current progress, I have actually been working non-stop on the motor since the last update. Most of this has been working out and deciding out how to do the current 'job' (quite a tricky/complex one!) where to source the most appropriate materials & parts, and getting it all to tie in and work together!
When its finished it won't look anything amazing, but rest assured the work that has gone in behind the scenes and under the surface has been the biggest time killer! (along with interuptions due to bad weather! good old UK rain!)
I reckon I could have done it about 30% quicker if I didn't mind about the final fit & finish, but I'm a bit of a stickler for detail and like things to look as 'manufactured' as possible (despite my lack of appropriate tools and facilities!)
So what am I doing? Well I hope to have it 99% done by the end of the weeked...so photos and details will follow after that.
Right - where did I leave that drill??
L300 Mystery Machine (High Altitude Edition )
L300 MudMonkey ($400 bargain banger!! )
L300 MudMonkey ($400 bargain banger!!
-
jessef
- Posts: 6459
- Joined: Tue Feb 26, 2008 1:27 pm
- Vehicle: JDM flavour of the month
- Location: Vancouver
- Location: Vancouver, BC
Re: Say hello to the new Mud Monkey (this one is for keeps!)
At my place. Come and get it !Mystery Machine wrote:Right - where did I leave that drill??