Rear Bumper Project Underway

Mitsubishi Delica Camper vans, lift kits & other Delica Accessories!

Moderator: BCDelica

Post Reply
docsavage
Posts: 406
Joined: Sat Jul 22, 2006 2:48 pm
Member's Photo Album: http://www.delica.ca/Photos/
Vehicle: Deliless...
Location: Prince Rupert

Rear Bumper Project Underway

Post by docsavage »

Phase 1 of the new rear bumper is almost complete, one more piece to weld in. I had to maintain as much space as possible for the future veg tank, while making it strong enough for recovery points and occassional jacking. Here is the photo history to date.

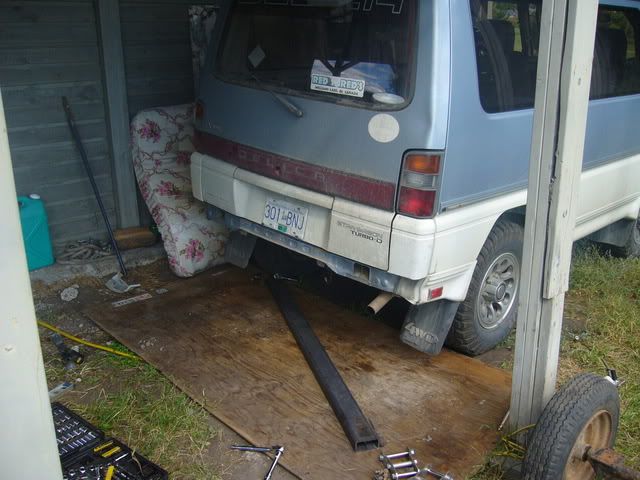
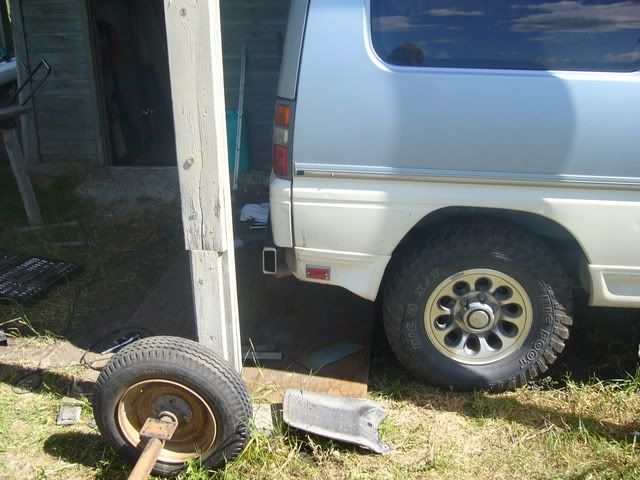
Remove all the plastic and this is what you get:

Image

Cut the corners:

Image

No bumper, but I have steel:

Image

Put the new one in place, this is a 4"x2"x3/16" piece of steel, I choose this thickness for strength, certainly not for weight saving - its heavy:

Image

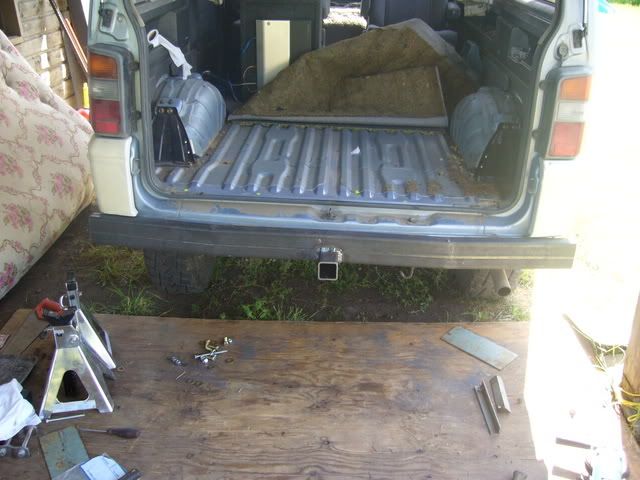
Close the hatch to make sure it fits:

Image

It is not straight across, there is a 7 degree bend:

Image

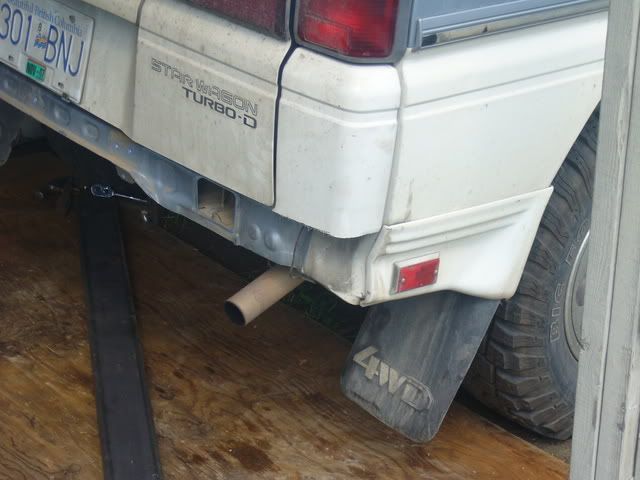
And from the side, the ends need finishing and there is a space to fill:

Image

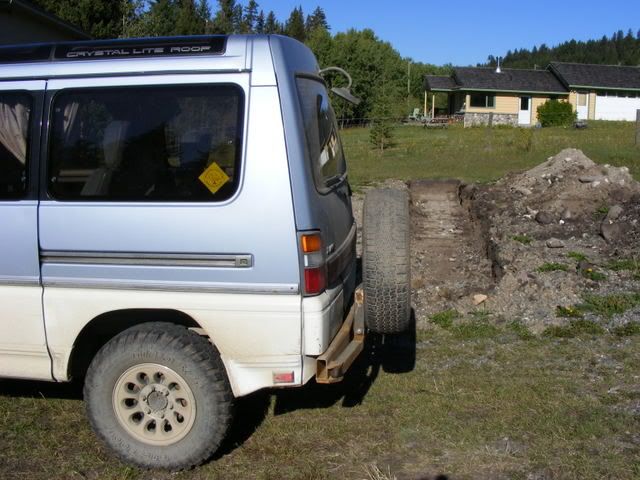
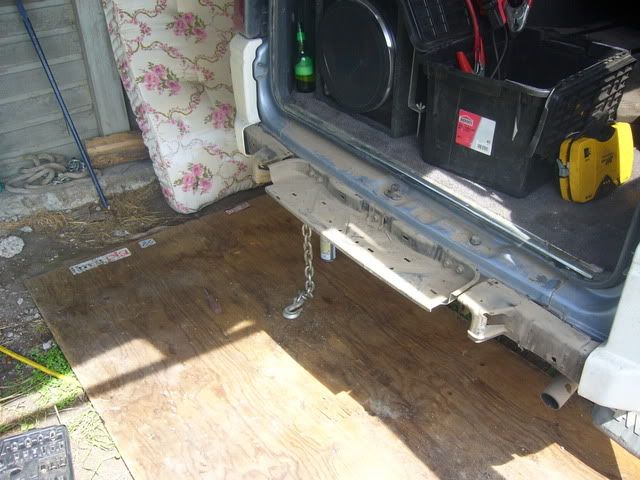
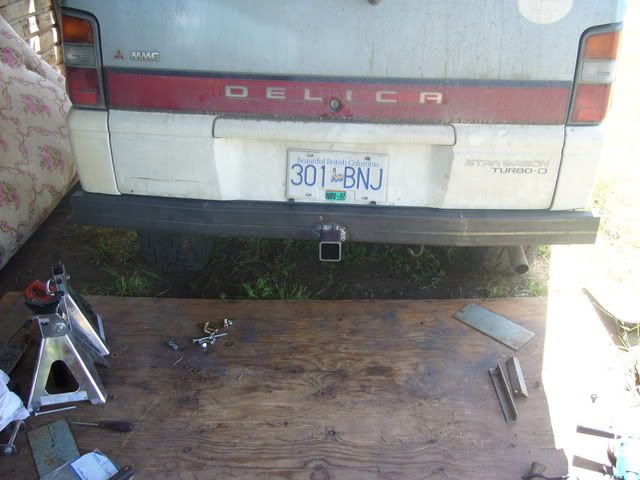
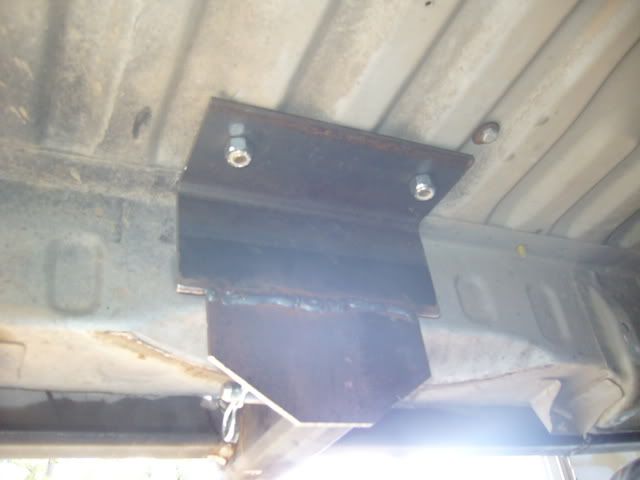
That is what you see from the outside, underneath the bracing is what adds the strength to jack, tow, and take impact. Behind the reciever is this plate bolted through the floor, I choose to pin the bumper to the plate so that it can be removed for whatever reason while still leaving all the under parts in place (they won't come out as easy once the tank is in):

Image

And on the uni-body frame:

Image

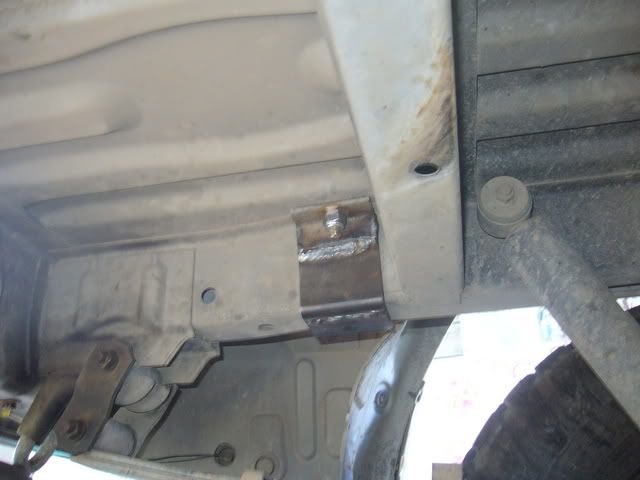
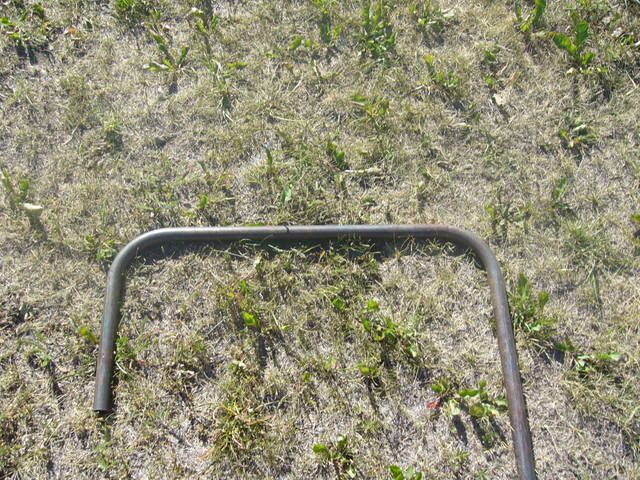
This bent pipe will connect the back of the reciever plate to the frame pieces for bracing:

Image

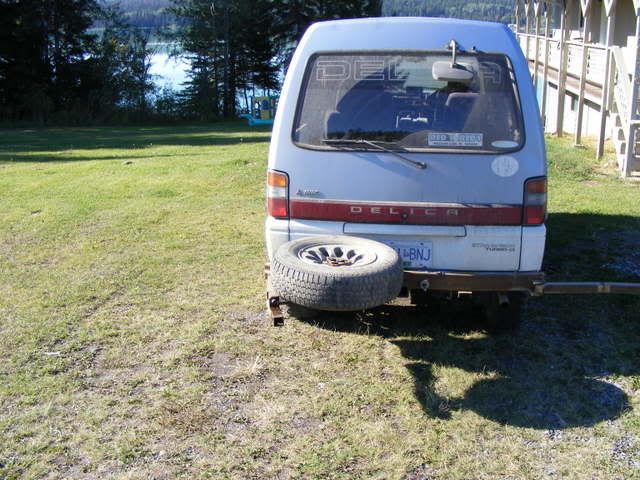
Under the carpet on the inside is a large steel plate (44" x 18" x 1/8") that acts to spread loads on the bolts across the floor. By spreading the load I hope that it is stout enough for my purposes. That is what is complete to date. The second stage will involve a swing out tire carrier on the passenger side and a fuel can holder on the other. Also grinding and painting when it is all done. I will continue to update progress.

James
James

1989 Delica P24W Exceed
Panasonic CQ-TX5500W

Our online fabric shop: http://www.fishskinfabric.com
josh
Posts: 868
Joined: Mon Jul 24, 2006 8:44 pm
Member's Photo Album: http://www.delica.ca/Photos/
Vehicle: L300 poptop gasser
Location: Vancouver, bC
Location: Vancouver, BC

Re: Rear Bumper Project Underway

Post by josh »

Looking sick already James, sweet job. Did you ever get to the bullbars yet too? Anyhow, it's going to be sweet. I appretiate the pics. Um, as Adam would ask, will you be my dad? 8-)

Is that chain still wedged there from when we had to skid that cattle guard out? (picture #1)

Josh
docsavage
Posts: 406
Joined: Sat Jul 22, 2006 2:48 pm
Member's Photo Album: http://www.delica.ca/Photos/
Vehicle: Deliless...
Location: Prince Rupert

Re: Rear Bumper Project Underway

Post by docsavage »

Hey Josh,

Decided to deal with the back first to figure out how much room there woould be for the tank. Now I know and I can look in the scrap yard for one.

That chain was still from the cattleguards (they are finally installed now) but I did manage to get it off.

James
James

1989 Delica P24W Exceed
Panasonic CQ-TX5500W

Our online fabric shop: http://www.fishskinfabric.com
User avatar
monstabishi
Posts: 65
Joined: Tue Jul 24, 2007 11:15 am
Member's Photo Album: http://www.delica.ca/Photos/
Vehicle: 1988 Delica L300td
Location: Perth Western Australia.

Re: Rear Bumper Project Underway

Post by monstabishi »

nice job James,but what does it all weigh ????


Mick.
docsavage
Posts: 406
Joined: Sat Jul 22, 2006 2:48 pm
Member's Photo Album: http://www.delica.ca/Photos/
Vehicle: Deliless...
Location: Prince Rupert

Re: Rear Bumper Project Underway

Post by docsavage »

Hey Mick,

I figure once all the steel is in place the whole bumper and mounting without the spare will weigh between 80-100 lbs. About the weight of the rear bench, which I no longer use. I was thinking of aluminum, but the amount of gravel road I travel, I wasn't positive aluminum would hold up to the vibration and weight of the spare and whatever else I hang back there.

On another note, I had a few suggestion for the spare carrier - have it swing out and rotate parallel to the ground and use it as a table/workbench with a sheet of plywood. Also mount a vise on a hitch reciever so it is removable. They sure come in handy for trailside repairs.

James
James

1989 Delica P24W Exceed
Panasonic CQ-TX5500W

Our online fabric shop: http://www.fishskinfabric.com
User avatar
monstabishi
Posts: 65
Joined: Tue Jul 24, 2007 11:15 am
Member's Photo Album: http://www.delica.ca/Photos/
Vehicle: 1988 Delica L300td
Location: Perth Western Australia.

Re: Rear Bumper Project Underway

Post by monstabishi »

great Idea's mate,maybe a riser bar for the vice at a comfortable working hight with a drop down foot to steady it ???? good luck.


Mick.
User avatar
BCDelica
Posts: 1808
Joined: Tue Jul 18, 2006 4:12 pm
Member's Photo Album: http://www.delica.ca/Photos/index.php?cat=10008
Vehicle: WVO Powered Tuk Tuk
Location: Central Van Isle
Location: Somewhere with plenty of sun

Re: Rear Bumper Project Underway

Post by BCDelica »

That's awesome James, can't wait to see the full assembly! :mrgreen:

I have wanted something like this - http://members.iinet.net.au/~t0mandan1t ... gaway.html for my van.

Cheers,
Kev
Image Call me BCDelica-less
docsavage
Posts: 406
Joined: Sat Jul 22, 2006 2:48 pm
Member's Photo Album: http://www.delica.ca/Photos/
Vehicle: Deliless...
Location: Prince Rupert

Re: Rear Bumper Project Underway

Post by docsavage »

I have finally almost finished phase 2. The spare is now rear mounted. All that is left is the jerry can holder, a few finishing details and painting. Here are some grainy pictures (my good camera tried out water sports):

Rear Shot

Image

From the side

Image

Swung open

Image

Open with tire flipped for table use

Image

When I can get a better camera, I will update the photos.

James
Last edited by docsavage on Sat Sep 08, 2007 10:35 am, edited 2 times in total.
James

1989 Delica P24W Exceed
Panasonic CQ-TX5500W

Our online fabric shop: http://www.fishskinfabric.com
josh
Posts: 868
Joined: Mon Jul 24, 2006 8:44 pm
Member's Photo Album: http://www.delica.ca/Photos/
Vehicle: L300 poptop gasser
Location: Vancouver, bC
Location: Vancouver, BC

Re: Rear Bumper Project Underway

Post by josh »

So James, when were you going to make one for me? :-) Have you gotten that 35gallons of filtered veg yet? Totally keep a template, I am interested in a bumper like yours... really interested. And I should do it before I install a tank also... I'm loving the updates. Keep up the good work.

Josh
User avatar
monstabishi
Posts: 65
Joined: Tue Jul 24, 2007 11:15 am
Member's Photo Album: http://www.delica.ca/Photos/
Vehicle: 1988 Delica L300td
Location: Perth Western Australia.

Re: Rear Bumper Project Underway

Post by monstabishi »

looks spot on James,keep up the good work.


Mick.
User avatar
BCDelica
Posts: 1808
Joined: Tue Jul 18, 2006 4:12 pm
Member's Photo Album: http://www.delica.ca/Photos/index.php?cat=10008
Vehicle: WVO Powered Tuk Tuk
Location: Central Van Isle
Location: Somewhere with plenty of sun

Re: Rear Bumper Project Underway

Post by BCDelica »

Awesome James, how about I come up there in about a week or two, deliver your veggie (more if need be - there lots available here in PR) and I'll take some clearer pictures of your bumper. Or maybe pictures of the one you can build for my van...... what's your charges? :-D

Wouldn't it be cool to mount a 20lb propane tank, instead of a jerry can, set up for propane injection AND a tap available for camp accessories. I would go for the nitrous type activation switch, with the injection system turning off via a timer relay activated by switch from WOT.

Cheers,
Kev
Image Call me BCDelica-less
docsavage
Posts: 406
Joined: Sat Jul 22, 2006 2:48 pm
Member's Photo Album: http://www.delica.ca/Photos/
Vehicle: Deliless...
Location: Prince Rupert

Re: Rear Bumper Project Underway

Post by docsavage »

Thanks for the compliments guys. I'm not sure how much there is in materials and time yet, I will have to figure that out. On these projects I spend a lot of time laying on the ground staring at where the next piece should fit, should I change this, how does that work, that was stupid and so on. But now that one is complete...

I was thinking of making the rear carrier for fuel cans or propane as I should have 130 or so litres of fuel carrying capacity.

I hope to go down to my sisters and get the oil late September, maybe I'll take the Sunshine Coast route for the return leg and visit.

James
James

1989 Delica P24W Exceed
Panasonic CQ-TX5500W

Our online fabric shop: http://www.fishskinfabric.com
User avatar
EnviroImports.com
Posts: 886
Joined: Thu Mar 15, 2007 2:48 pm
Member's Photo Album: http://www.delica.ca/Photos/
Vehicle: 94 ROYAL Exceed LWB W/air bag
Location: Victoria BC CANADA
Contact:

Re: Rear Bumper Project Underway

Post by EnviroImports.com »

Looks very nice, do you think you will catch any heat from the tire blocking a bit of the licence plate? or is it just the camera angle ? I really like the tilting tire mount for a work space/table, very clever. any thoughts on making the bumper a sealed unit to use it for a air tank? we used to do that 4x4ing, make tube bumpers, tap them for air drains and a quick connect for trail air. they dont hold a whole lot but enough to air the tires back up or as a res holding tank from a small compressor.
Noel
docsavage
Posts: 406
Joined: Sat Jul 22, 2006 2:48 pm
Member's Photo Album: http://www.delica.ca/Photos/
Vehicle: Deliless...
Location: Prince Rupert

Re: Rear Bumper Project Underway

Post by docsavage »

The licence plate will be partially blocked, they don't tend to mind up here to much as most plates are covered in mud most of the time. I will likely have to move it though.

I am going to seal the bumper, just makig sure everything is as I like it before I take it off again for finishing details and painting. A little bit if air in the bumper could go a long way, that is true.

With propane injection, I think you can set iot to kick in with turbo boost - more boost more propane. That is how I understood the commercial site I was looking at.

James
James

1989 Delica P24W Exceed
Panasonic CQ-TX5500W

Our online fabric shop: http://www.fishskinfabric.com
Adam
Posts: 848
Joined: Mon May 07, 2007 2:37 am
Member's Photo Album: http://www.delica.ca/Photos/
Vehicle: RIP WVO '91 Super Exceed
Location: Nanaimo, BC

Re: Rear Bumper Project Underway

Post by Adam »

Damn, that is an excellent looking bumper/tire carrier. Let me know if you are thinking of building them for profit, if so put me on the list. I've still got the WVO tank behind the rear row of seats, but hopefully I'll find a suitable tank in the next few month to fit in the current spare tire spot, which means I'll need a new tire carrier. I want to avoid sticking it on top for mileage and ferry over height concerns.
Image
Post Reply

Return to “Delica Modifications”