Check Out My Rear!

Mitsubishi Delica Camper vans, lift kits & other Delica Accessories!

Moderator: BCDelica

asorensen
Posts: 165
Joined: Fri Jan 12, 2007 11:28 am
Member's Photo Album: http://www.delica.ca/Photos/
Location: Port McNeill BC, Canada

Check Out My Rear!

Post by asorensen »

Here are a few of the latest modifications I have done.

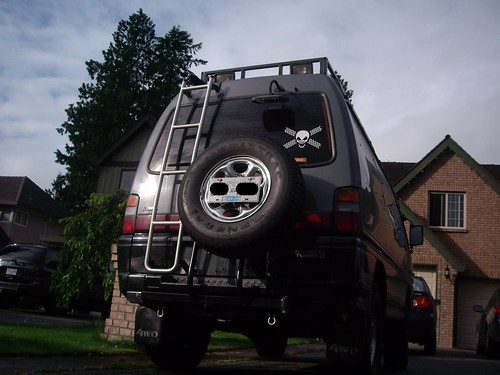
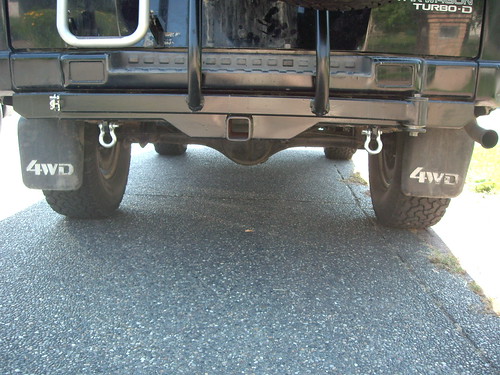
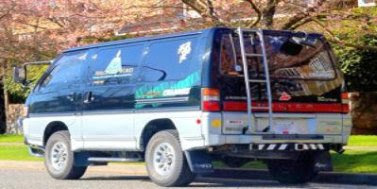
I built a tire carrier to deal with my spare issue. I would of had pictures of the process but I was working like a mad man in order to get it finished before my summer holidays.


ImageImage

I have also pretty much finished my camper modules. The unit on the left I made a while back (sink, stove 5lb propane tank, 20 litre water tank) but this is a better pic.

Image


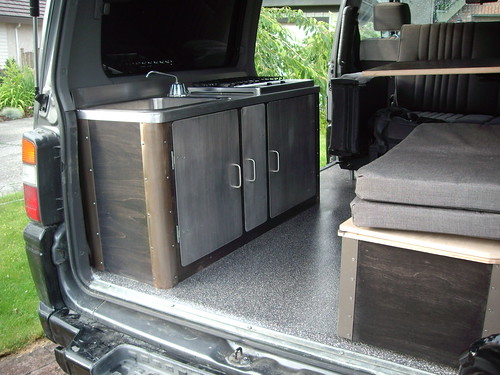
I just finished the unit on the right which is multi function.
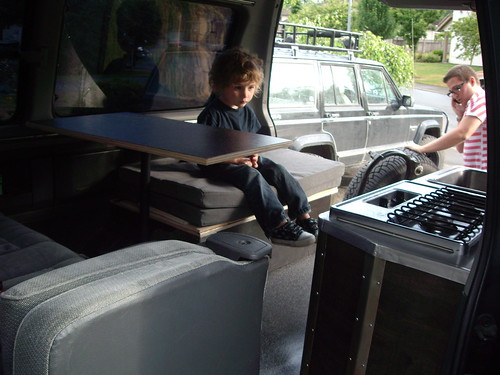
It is a bench:

Image


It is the storage for the parts and holds the table:

Image


ImageImage


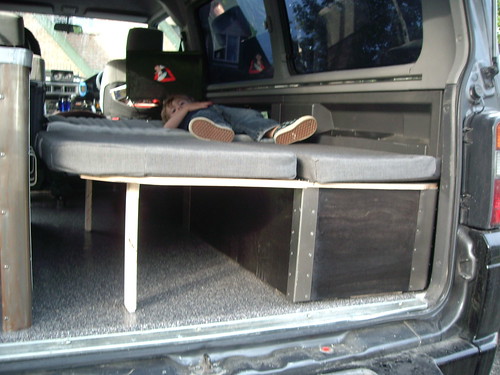
It folds out to complete the bed:


ImageImage

And it is a twelve volt cooler:

ImageImage

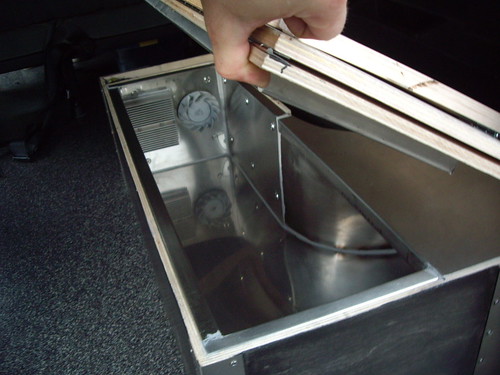
I robbed the guts out of a Can Tire unit and built the stainless liner and insulation to fit the space.


I also linoed the floor with a nice industrial lino to make food scrap and beach cleanup a breeze.

Image
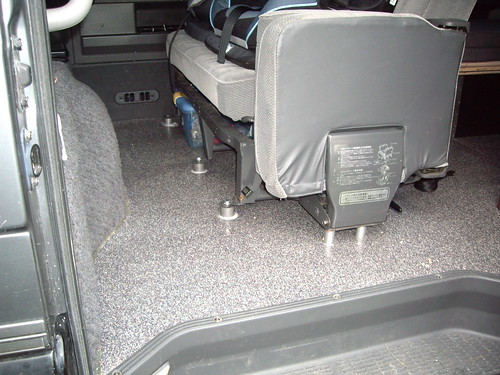
You may also notice my bench sits up on risers to: a) make the space underneath more usable and b) to maximize the space inside the cooler unit. Kind of a silly mod but I have a two inch lift yah!


I have also finished an awning for the side built from a sail boat mast and some awning material I got from ebay. It is really good marine awing material and
I got enough to make the awing, cushions and a few other incomplete projects for $30 (Plus $30 for shipping).

ImageImage


These are a few of the things that I have been working on lately.

Andy
User avatar
Todd64
Posts: 160
Joined: Wed Jun 11, 2008 7:07 pm
Member's Photo Album: http://www.delica.ca/Photos/
Vehicle: '07 Subaru Outback
Location: Newfoundland

Re: Check Out My Rear!

Post by Todd64 »

Man I'm lovin' your floor. What is it. *** nevermind...I missed the "linoed" part. DOH! :-D ***
Last edited by Todd64 on Sun Jul 06, 2008 10:24 am, edited 1 time in total.
Image
User avatar
konadog
Posts: 1815
Joined: Tue Feb 26, 2008 9:25 pm
Vehicle: 1992 GLX L-300
Location: Campbell River, BC

Re: Check Out My Rear!

Post by konadog »

Nice work! Hazel and I want to come and play at your house - er SHOP that is!! :M :-D
Image
Happy Day!
delica 304
Posts: 322
Joined: Sun Dec 23, 2007 7:19 am
Member's Photo Album: http://www.delica.ca/Photos/
Vehicle: 1992 delica GLX
Location: Lower left hand of Canada, surrounded by a moat!

Re: Check Out My Rear!

Post by delica 304 »

Holy Cylon Jesus! :o :shock: :o

That is awesome!! Well done!
User avatar
delicat
Posts: 2331
Joined: Thu Jul 26, 2007 6:26 pm
Member's Photo Album: http://www.delica.ca/Photos/
Vehicle: '92 Exeed '93 Safari '94 Pajero
Location: New Westminster, BC

Re: Check Out My Rear!

Post by delicat »

Voted best interior design!
'93 Nissan Patrol
'94 Mitsubishi Pajero
Image

"If it ain't broken, modify it!"
User avatar
mararmeisto
Posts: 3276
Joined: Wed Sep 19, 2007 10:00 am
Vehicle: 2018 Ram EcoDiesel
Location: Dartmouth, NS

Re: Check Out My Rear!

Post by mararmeisto »

All we have to do is wait for a couple of the kids to leave home (we've got four) and then we can start doing that sort of thing to Moon Machine. :-D It's either that or make some of them ride in the roof rack when we go places! :shock:

Nice job. Might do the lino mod before the children leave, for the same reasons - would make cleaning up a breeze. Did you leave the underlay in place, or is it mounted onto sheets of plywood? How is the noise (if you removed the underlay)?
JPL
I still miss my '94 Pajero!
User avatar
The Pinkfingers
Posts: 483
Joined: Sat Apr 12, 2008 9:55 pm
Member's Photo Album: http://www.delica.ca/Photos/
Vehicle: '94 Exceed
Location: North Van, BC

Re: Check Out My Rear!

Post by The Pinkfingers »

mararmeisto wrote:All we have to do is wait for a couple of the kids to leave home (we've got four) and then we can start doing that sort of thing to Moon Machine. :-D It's either that or make some of them ride in the roof rack when we go places! :shock:
Us too. Though we have five...

Andy, that's amazing.
asorensen
Posts: 165
Joined: Fri Jan 12, 2007 11:28 am
Member's Photo Album: http://www.delica.ca/Photos/
Location: Port McNeill BC, Canada

Re: Check Out My Rear!

Post by asorensen »

Thanks for the responses.

marameisto asked:
Did you leave the underlay in place, or is it mounted onto sheets of plywood? How is the noise (if you removed the underlay)?

I left the front rubber underlay and added some 3/16 birch ply in the rear to make it all even. I used a liberal quantitiy of the marine sealant Sikaflex to glue the plywood and lino down. It is a very good product if a little expensive and I don't expect to much noise from rattling plywood. If was going to do it again I would have done the whole thing with plywood first but live and learn.

Andy
User avatar
jessef
Posts: 6459
Joined: Tue Feb 26, 2008 1:27 pm
Vehicle: JDM flavour of the month
Location: Vancouver
Location: Vancouver, BC

Re: Check Out My Rear!

Post by jessef »

Nice :M
User avatar
jrman
Posts: 506
Joined: Thu Aug 16, 2007 12:29 pm
Member's Photo Album: http://www.delica.ca/Photos/
Vehicle: 1991 MMC Delica Exceed - Scoobus

Re: Check Out My Rear!

Post by jrman »

Love the work you do. Did you do the receiver hitch setup yourself as well? I've seen James (Doc Savage) post on his setup and am collecting as much info on this as possible in hopes of building similar receiver / spare tire carrier in near future. Would love to see more closeups on the tire carrier portion either way.
Many tks in advance and keep up the great work.
Sean in North Van
1991 Delica Exceed - Scoobus
asorensen
Posts: 165
Joined: Fri Jan 12, 2007 11:28 am
Member's Photo Album: http://www.delica.ca/Photos/
Location: Port McNeill BC, Canada

Re: Check Out My Rear!

Post by asorensen »

Here are some pictures.


The first pictures are fairly self explanatory. I wanted the back to be as seamless as possible hence the pivot inboard of the actual door which mean that a secondary pivot is necessary to get the door around the tire. I wish I had made the bar which comes up from the pivot a little beefier. It is 1 1/2" and I should have made it 2". The end result is the tire is a little bouncy which bugs me! Not only that but I need to learn how to Paint! Note the run. I rocker guarded the rear part of the bumper and sprayed with tremcad. Several people have asked me about powder coating and my opinion through some experience (I powder coat in my shop) is it is to brittle for this type of application. It seems to chip through quite a lot where there are rocks thrown at it constantly hence the rocker guard. Just my thoughts.
Image Image

Image Image

Image Image


These pictures show the secondary pivot which actually serves two functions. It allows the door to get around the tire and also means that I (or my wife!) won't have to lift the spare as high if it is ever needed. The drawback of course is every time I want to get in the back I now have two things which I need to do.


Image Image

Image Image


Booth of the pivot points ride on greasable tapered roller bearings.

Image Image


The latch mechanism for the drop down arm came from an old Ford Van. It feels very strong but I have thought about adding a secondary failsafe just to be sure. The latch is lockable which is nice to avoid tampering in fact both are lockable but I am not sure if I would want to lock them both. In the long run adding complexity leads to complexity!

Image Image


Image


Finally the whole bumper is supported not only by the stock mounts, which we all know don't amount to much, but also by 1"x2" x1/8" bars which go back to 3/8" C channel bolted to the unibody rails.
Image Image

Image Image

Image


Well that's that. I'll try it out this summer and probably make some changes or a new bumper when I get back to the shop in the fall.

Andy
Last edited by asorensen on Wed Jul 09, 2008 9:42 am, edited 3 times in total.
User avatar
FalcoColumbarius
Site Admin
Posts: 5983
Joined: Tue Jan 22, 2008 1:55 pm
Member's Photo Album: http://www.delica.ca/Photos/index.php?cat=11103
Vehicle: Delica; Chamonix GLX ('92 P25W)
Location: North Van, BC, eh?

Re: Check Out My Rear!

Post by FalcoColumbarius »

:o :!: :idea:
Sent from my smart pad, using a pen.

Seek Beauty... Image Good Ship Miss Lil' Bitchi

...... Vision without action is a daydream. Action without vision is a nightmare. ~ Japanese Proverb
User avatar
DelicaMark
Posts: 330
Joined: Mon Aug 20, 2007 9:37 am
Member's Photo Album: http://www.delica.ca/Photos/
Vehicle: L400
Location: Duncan, BC

Re: Check Out My Rear!

Post by DelicaMark »

Okay this is one of the nicest machines I have seen! Nice work! Do you want to take care of my van for a while.... :-)
josh
Posts: 868
Joined: Mon Jul 24, 2006 8:44 pm
Member's Photo Album: http://www.delica.ca/Photos/
Vehicle: L300 poptop gasser
Location: Vancouver, bC
Location: Vancouver, BC

Re: Check Out My Rear!

Post by josh »

Andy,

I never thought I would admit this, but man... nice rear!

Josh
asorensen
Posts: 165
Joined: Fri Jan 12, 2007 11:28 am
Member's Photo Album: http://www.delica.ca/Photos/
Location: Port McNeill BC, Canada

Re: Check Out My Rear!

Post by asorensen »

Thanks Josh.

I also have a confession I have been checking out your rack!

I added explanations for the Tire carrier for anyone interested.

Andy
Post Reply

Return to “Delica Modifications”