100 Amp Alternator Install - Long
-
- Posts: 406
- Joined: Sat Jul 22, 2006 2:48 pm
- Member's Photo Album: http://www.delica.ca/Photos/
- Vehicle: Deliless...
- Location: Prince Rupert
100 Amp Alternator Install - Long
Finally got around to doing the install of a 1 wire Delco style alternator and electric vacuum pump to replace the stock 75 amp alternator with integrated vacuum pump. Anyways here's what I did:
Step 1 - Vacuum Pump:
The electric vacuum pump can be found on many early 80 General Motors products. Unfortunately they are no longer available new. I was unable to locate one at the wreckers around here so I decided to buy a new pump from Stainless Steel Brake Company as follows:
I choose an electric pump as there is no space under the hood to mount a belt driven pump. Belt driven pumps are much cheaper - I have a spare now, but there isn't space.
I mounted the pump under the drivers footwell above the little radiator. It is quite dry and mud free up there:
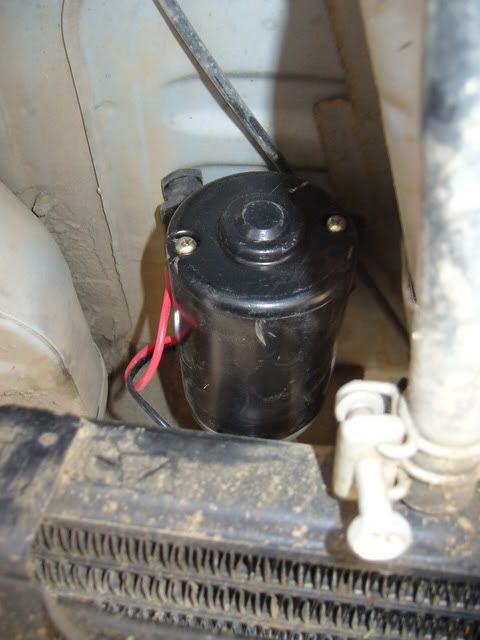
The kit include lots tubing and wire to go from there. I did need a bit more wire for the relay though. There is a vacuum switch which turns the pump on and off at set vacuum levels. It is mounted in the tube from the pump before it goes into the brakes. Here under the drivers seat:
The relay is in the access panel behind the drivers seat:
There is T in the line after the switch to split the vacuum to the brakes and the little line to various other switches and whatever. I have a small vacuum resevoir out of my Range Rover on there now, but am going to find a bigger resevoir. This will reduce the number of times the pump cycles.
2. Alternator
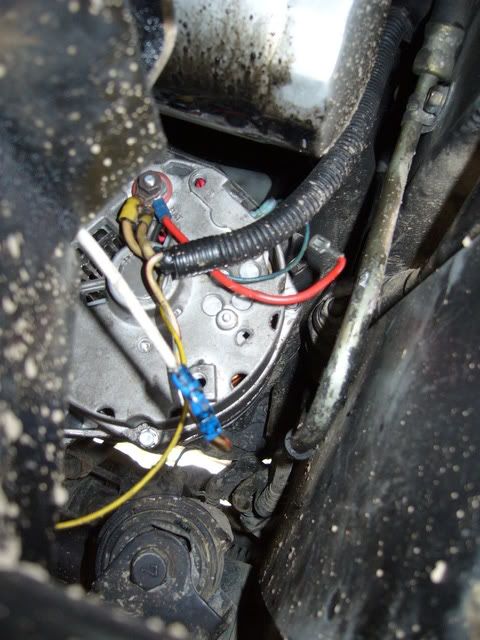
The alternator is a standard 100 amp Delco style internally regulated one. I had a tach post put on as well. I used the double pulley's from the factory alternator on the new one - this maintained the same spacing and diameter to keep the tach accurate. The mount had to be fabbed up but was very simple. The top tensioner bolt was able to be retained. Here are some pics of the alternator in place:
oops - I see a loose wire to fix
Wiring the alternator is simple. There are four posts - 3 spade and 1 threaded. Post 1 as labelled goes to the dash light (red and white factory loom), but will be on a voltmeter shortly. Post 2 goes back to the threaded post (red wire added). Post 3 is to the tachometer (blue wire in factory loom). The threaded post to the batteries.
Removed and plugged the old vacuum pumps oil feeds. There is a banjo fitting off the oil filter mount for one - an appropriate bolt was put in the hole - being careful to tighten a little then test for leakage - didn't want to strip out the threads. A drain also goes directly into the engine sump. This easily blocked with a bolt and hose clamp.
3. Testing.
The alternator works good, all the vacuum devices work the same, and I don't have to monitor my power usage anymore. Only problem is the dash light stays on (it also causes the drain light and A/T Temp light to stay on). I will wire in the voltmeter and skip the light.
4. Cost
Electric Vacuum Pump - SSBC $375
Alternator (100 amp) - $135
Various fittings and connectors - $10
Three new teeth - $3500
Total - $4020 - only $520 dollars without dental work.
Replacement Mitsubishi Alternator
Special Order - about $600
The cost can be reduced if you are able to find a used electric vacuum pump in a wreckers - they are on E- Bay occasionally but usually cost about $175 I'd rather have new and warrantied for that price.
5. Time.
The vacuum pump took 6 hours to install including trying to figure out where to put it. Removing the old alternator and pump should be1 hour but we had a terrible time trying to get a bolt to thread into the hole for the oil feed. It would probably be easier to block out the other end of the fitting and let it dangle. Installing the new alternator 1 hour. Checking for leaks and checking etc 1 hour.
6. Things I learned.
There is very little space in the engine compartment and under the chassis for mounting additional things. I wanted a belt driven vacuum pump but there is nowhere to put it. Watch out when pulling the alternator it is heavy and gets caught on things. As I was pulling it across me it hit something and swung down and tapped my front teeth breaking three.
People considering mods suchas intercoolers, bigger tturbos, etc should look carefully for space to mount these things before investing in them.
Hope this was useful.
James
Step 1 - Vacuum Pump:
The electric vacuum pump can be found on many early 80 General Motors products. Unfortunately they are no longer available new. I was unable to locate one at the wreckers around here so I decided to buy a new pump from Stainless Steel Brake Company as follows:
I choose an electric pump as there is no space under the hood to mount a belt driven pump. Belt driven pumps are much cheaper - I have a spare now, but there isn't space.
I mounted the pump under the drivers footwell above the little radiator. It is quite dry and mud free up there:
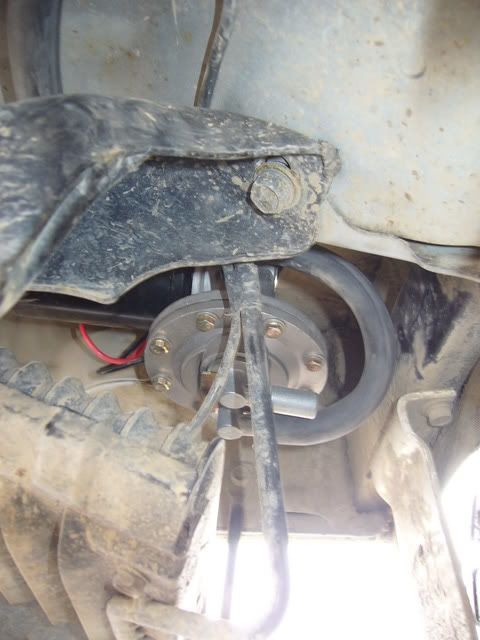
The kit include lots tubing and wire to go from there. I did need a bit more wire for the relay though. There is a vacuum switch which turns the pump on and off at set vacuum levels. It is mounted in the tube from the pump before it goes into the brakes. Here under the drivers seat:
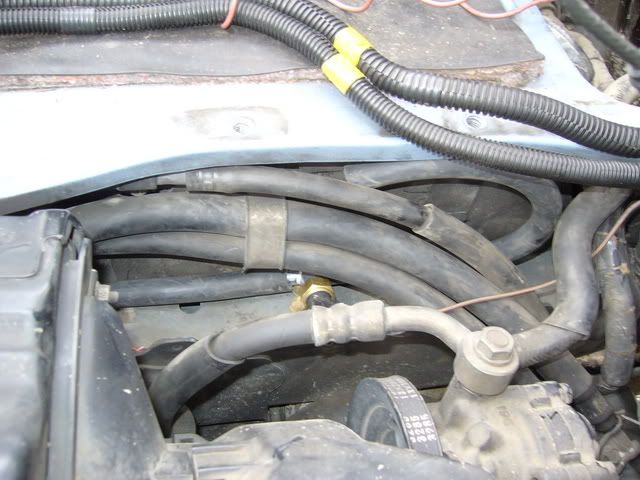
The relay is in the access panel behind the drivers seat:
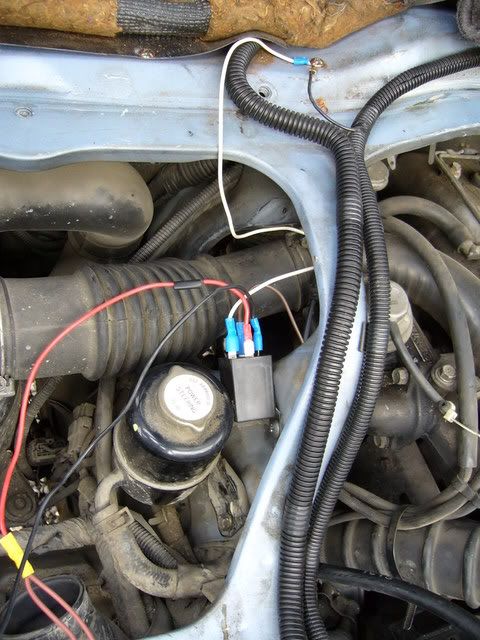
There is T in the line after the switch to split the vacuum to the brakes and the little line to various other switches and whatever. I have a small vacuum resevoir out of my Range Rover on there now, but am going to find a bigger resevoir. This will reduce the number of times the pump cycles.
2. Alternator
The alternator is a standard 100 amp Delco style internally regulated one. I had a tach post put on as well. I used the double pulley's from the factory alternator on the new one - this maintained the same spacing and diameter to keep the tach accurate. The mount had to be fabbed up but was very simple. The top tensioner bolt was able to be retained. Here are some pics of the alternator in place:
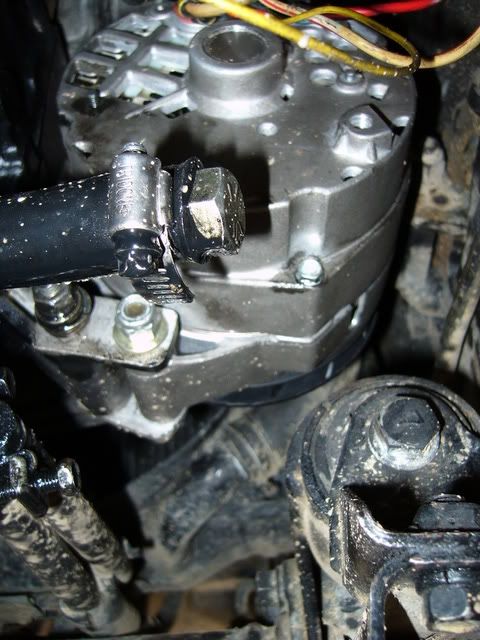
oops - I see a loose wire to fix
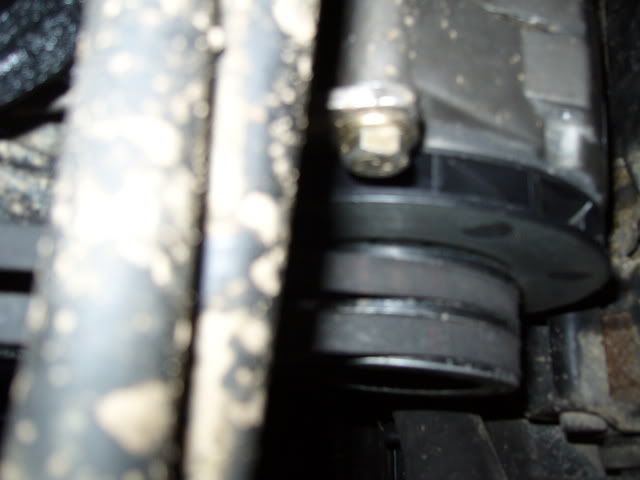
Wiring the alternator is simple. There are four posts - 3 spade and 1 threaded. Post 1 as labelled goes to the dash light (red and white factory loom), but will be on a voltmeter shortly. Post 2 goes back to the threaded post (red wire added). Post 3 is to the tachometer (blue wire in factory loom). The threaded post to the batteries.
Removed and plugged the old vacuum pumps oil feeds. There is a banjo fitting off the oil filter mount for one - an appropriate bolt was put in the hole - being careful to tighten a little then test for leakage - didn't want to strip out the threads. A drain also goes directly into the engine sump. This easily blocked with a bolt and hose clamp.
3. Testing.
The alternator works good, all the vacuum devices work the same, and I don't have to monitor my power usage anymore. Only problem is the dash light stays on (it also causes the drain light and A/T Temp light to stay on). I will wire in the voltmeter and skip the light.
4. Cost
Electric Vacuum Pump - SSBC $375
Alternator (100 amp) - $135
Various fittings and connectors - $10
Three new teeth - $3500
Total - $4020 - only $520 dollars without dental work.
Replacement Mitsubishi Alternator
Special Order - about $600
The cost can be reduced if you are able to find a used electric vacuum pump in a wreckers - they are on E- Bay occasionally but usually cost about $175 I'd rather have new and warrantied for that price.
5. Time.
The vacuum pump took 6 hours to install including trying to figure out where to put it. Removing the old alternator and pump should be1 hour but we had a terrible time trying to get a bolt to thread into the hole for the oil feed. It would probably be easier to block out the other end of the fitting and let it dangle. Installing the new alternator 1 hour. Checking for leaks and checking etc 1 hour.
6. Things I learned.
There is very little space in the engine compartment and under the chassis for mounting additional things. I wanted a belt driven vacuum pump but there is nowhere to put it. Watch out when pulling the alternator it is heavy and gets caught on things. As I was pulling it across me it hit something and swung down and tapped my front teeth breaking three.
People considering mods suchas intercoolers, bigger tturbos, etc should look carefully for space to mount these things before investing in them.
Hope this was useful.
James
- BCDelica
- Posts: 1808
- Joined: Tue Jul 18, 2006 4:12 pm
- Member's Photo Album: http://www.delica.ca/Photos/index.php?cat=10008
- Vehicle: WVO Powered Tuk Tuk
- Location: Central Van Isle
- Location: Somewhere with plenty of sun
Way too bad for your teeth, but good for your Delica. Nice picture post, I'd like to stick it in the FAQ area.4. Cost
Electric Vacuum Pump - SSBC $375
Alternator (100 amp) - $135
Various fittings and connectors - $10
Three new teeth - $3500
Total - $4020 - only $520 dollars without dental work.
Replacement Mitsubishi Alternator
Special Order - about $600
What do the oil feeds do for the existing vacuum pump? Is it just a lube thing for the pump? Do you have a dash wiring diagram, couldn't a person add a second relay into your dash lights, switch by the charging system.
Cheers,
Kevin
Call me BCDelica-less
-
- Posts: 179
- Joined: Mon Nov 06, 2006 12:01 am
- Member's Photo Album: http://www.delica.ca/Photos/
- Location: burnaby
- Contact:
-
- Posts: 77
- Joined: Thu Feb 15, 2007 9:13 pm
- Member's Photo Album: http://www.delica.ca/Photos/
- Location: Prince Albert, Saskatchewan
- Contact:
Alternator
What was wrong with your stock alternator, why did you replace it.
Was it too small to run your foglights?
That's my big worry right now.
What kind of output does a stock alternator have?
Should I be worried about mine calving under the strain of 700 watts of fog lamps, stereo etc.?
Did the new alternator fit well on the old bracket?
What the hell does the vacuum pump do anyway?
Thomas
Population Density; One person per square kilometre. Just the way I like it...
-
- Posts: 406
- Joined: Sat Jul 22, 2006 2:48 pm
- Member's Photo Album: http://www.delica.ca/Photos/
- Vehicle: Deliless...
- Location: Prince Rupert
Kevin,
The oil feeds only lubricate the vacuum pump. I think it sort of floats in the oil being as when I put my finger in the drive it has a lot of side to side slack and no signs of bearings.
I don't have the dash wiring diagram, but a voltmeter was cheap and is a simple install (not done yet though )
Go ahead and move the post to the FAQ's.
Thomas,
I had the voltage regulator replaced 3 times in the stock alternator. It blew the third one in the shop. The shop figured there was a short inside the windings and the alternator was NFG. I ran for 6 months with a volt reading from my inverter (thanks for something good out of Canadian Tire ) just adjusting the fans, lights, defrost, and monitoring RPMs closely just to keep my batteries from overcharging - did lose one though. Some friends who have diesel cruisers suggested a belt driven pump and cheap (important cheap - a 60 amp alt is $65) alternator. I like the idea of being able to get an alternator anywhere cheap.
The stock alternator is 75 amps, I chose a 100 amp for a few reasons. The more power the better, 1200 watt stereo (careful not to turn it to loud), driving lights to come, third battery, fridge, bigger inverter, and whatever else needs to be added. Going higher than 100 amps doubles the price of the alternator.
I lucked out on the alternator I got :lol: . The dimensions happened to be similar to the stock one and no spacing of the mount or pulleys was required. There are many different alternator cases and one may be able to find an alternator similar to the stock one without the vacuum pump. The vacuum pump adds to the cost.
The vacuum pump, most importantly, makes your power brakes work. It also helps control the idle and may be used if one wanted to add cruise control. Disconnect your vacuum pump and it is very hard to push the brake pedal - tried it for fun - not good for stopping.
James
-
- Posts: 868
- Joined: Mon Jul 24, 2006 8:44 pm
- Member's Photo Album: http://www.delica.ca/Photos/
- Vehicle: L300 poptop gasser
- Location: Vancouver, bC
- Location: Vancouver, BC
James,
I am wondering where the pics are of the teeth replacement. You know just incase any of us attempt the same repair and make the same mistake :P . Just kidding. That sucks about your teeth. Although my wife had one of her teeth knocked out two summers ago, and the replacement looks perfect. So now you are on your way to a million dollar smile right?
Josh
-
- Posts: 77
- Joined: Thu Feb 15, 2007 9:13 pm
- Member's Photo Album: http://www.delica.ca/Photos/
- Location: Prince Albert, Saskatchewan
- Contact:
Vaccum Pump/Alternator
Could you not have used the stock vacuum pump anymore? What did you do with the stck one?
My mechanic said I could have my stock alternator rewound to bring up the amperage to 100+. Could you have done this or no?
Cheers,
Thomas
P.S. Should I be paranoid about my charging system, etc. because of the install of these big fog lights? I stopped at six...just about had eight.
My mechanic said I could have my stock alternator rewound to bring up the amperage to 100+. Could you have done this or no?
Cheers,
Thomas
P.S. Should I be paranoid about my charging system, etc. because of the install of these big fog lights? I stopped at six...just about had eight.
Population Density; One person per square kilometre. Just the way I like it...
-
- Posts: 236
- Joined: Wed Mar 14, 2007 8:39 am
- Member's Photo Album: http://www.delica.ca/Photos/
- Vehicle: Subaru Sambar SC
- Location: Owen Sound Ontario
nice write up and pics...
<shiver> broken teeth?!?! OUCH!! <shiver>
thanks
<shiver> broken teeth?!?! OUCH!! <shiver>
thanks
http://www.luxuryimports.ca JDM imports
http://www.crushersrule.com restorations and trip reports
http://www.luxuryimports.ca/faq/importinfo.php import your own Cruiser
http://www.ivoac.ca separating the rumours from the truth. join today
http://www.crushersrule.com restorations and trip reports
http://www.luxuryimports.ca/faq/importinfo.php import your own Cruiser
http://www.ivoac.ca separating the rumours from the truth. join today
-
- Posts: 406
- Joined: Sat Jul 22, 2006 2:48 pm
- Member's Photo Album: http://www.delica.ca/Photos/
- Vehicle: Deliless...
- Location: Prince Rupert
About the teeth,
The amazing thing is there was no pain. It was a very light tap with a corner of the alternator being removed and it just hit them right. Purely fluke.
Thomas,
The stock alternator has a splined shaft out of the back that drives the vacuum pump. Regular alternators do not have the shaft. I could have had the alternator rewound, but felt that the ease of finding another alternator for significantly less money would be worth the efforts I went through. If you are worried about drawing to much, 700 watts of lights draws 58 amps (amps=watts/voltage), but I found that the biggest draws are the heater fans. They worked great to control the voltage. You could get a 150 watt inverter like my Canadian Tire one with a digital voltage readout and plug it into the lighter and watch what happens to your volt output as you turn things on and off at idle and at cruising speed. Once your voltage falls below 13.2V you are starting to draw on the batteries to make up power.
James
-
- Posts: 77
- Joined: Thu Feb 15, 2007 9:13 pm
- Member's Photo Album: http://www.delica.ca/Photos/
- Location: Prince Albert, Saskatchewan
- Contact:
Voltage etc.
Thank you so much.
I had no idea how much my fog lights were drawing. I will get that voltmeter thingy to plug into my lighter - only my rear lighter works for some reason.
Can you send me a pic of your voltmeter, maybe a model number. How much $ roughly? Don't have to hook it to the battery/alternator?
Cheers,
Thomas
P.S. Your poor teeth...
Population Density; One person per square kilometre. Just the way I like it...
- username
- Posts: 100
- Joined: Thu Dec 28, 2006 12:11 am
- Member's Photo Album: http://www.delica.ca/Photos/
- Vehicle: 1991 super exceed
- Location: clearwater
Re: 100 Amp Alternator Install - Long
Replacement Mitsubishi Alternator
Special Order - about $600
Good job on the mod, however I'd like to point out that any local JDM dealer (Mardy, or Max overdrive, Japanoid etc) will sell you a replacement for $250 or less.
I'm assuming you called a Mitsubishi dealer?
Special Order - about $600
Good job on the mod, however I'd like to point out that any local JDM dealer (Mardy, or Max overdrive, Japanoid etc) will sell you a replacement for $250 or less.
I'm assuming you called a Mitsubishi dealer?
-
- Posts: 406
- Joined: Sat Jul 22, 2006 2:48 pm
- Member's Photo Album: http://www.delica.ca/Photos/
- Vehicle: Deliless...
- Location: Prince Rupert
Re: 100 Amp Alternator Install - Long
When I did this parts were much more difficult to find ( no Glenn or Marty). I also just like to play around with things so really didn't try hard to get an alternator. The alternator for my new gasser is easily available at NAPA for $200.
James
1989 Delica P24W Exceed
Panasonic CQ-TX5500W
Our online fabric shop: http://www.fishskinfabric.com
1989 Delica P24W Exceed
Panasonic CQ-TX5500W
Our online fabric shop: http://www.fishskinfabric.com
Re: 100 Amp Alternator Install - Long
lol, yeah, I guess...i just realized I'm responding to a post from 2007 :)