Say hello to the new Mud Monkey (Long overdue updates on P8)
- dfnder
- Posts: 526
- Joined: Wed Mar 05, 2008 9:36 pm
- Member's Photo Album: http://www.delica.ca/Photos/
- Vehicle: '91 Exceed
- Location: Squamish
Re: Say hello to the new Mud Monkey (this one is for keeps!)
Love your work Bruce, there is something about a craftsman and their desire for things to be perfect. They go hand in hand :)
- Chewy
- Posts: 403
- Joined: Tue Nov 21, 2006 8:56 pm
- Member's Photo Album: http://www.delica.ca/Photos/
- Vehicle: 1995 Suzuki Every VW
- Location: Victoria/ Nanaimo B.C.
Re: Say hello to the new Mud Monkey (this one is for keeps!)
christ on a bike Bruce, that is so cool! perfection or bust!
FS: ' 95 Suzuki Every VW Kombi EFI.
- mararmeisto
- Posts: 3276
- Joined: Wed Sep 19, 2007 10:00 am
- Vehicle: 2018 Ram EcoDiesel
- Location: Dartmouth, NS
Re: Say hello to the new Mud Monkey (this one is for keeps!)
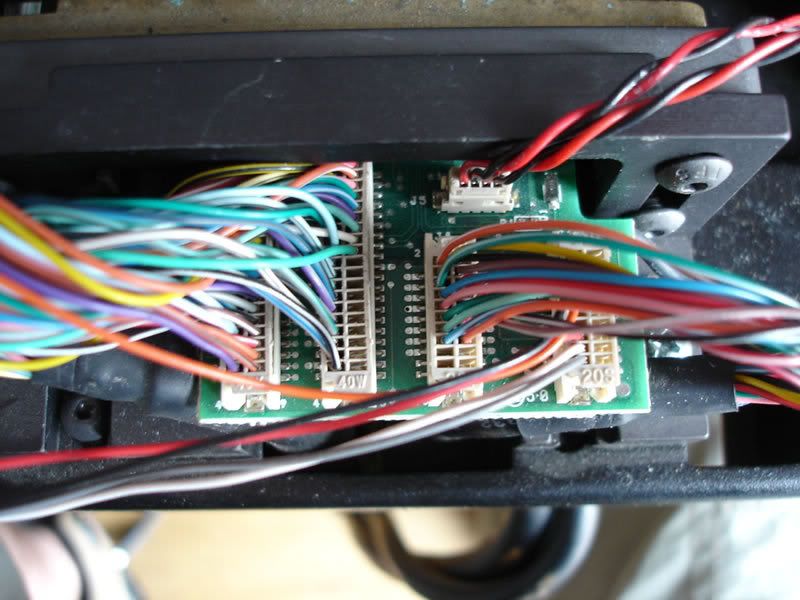
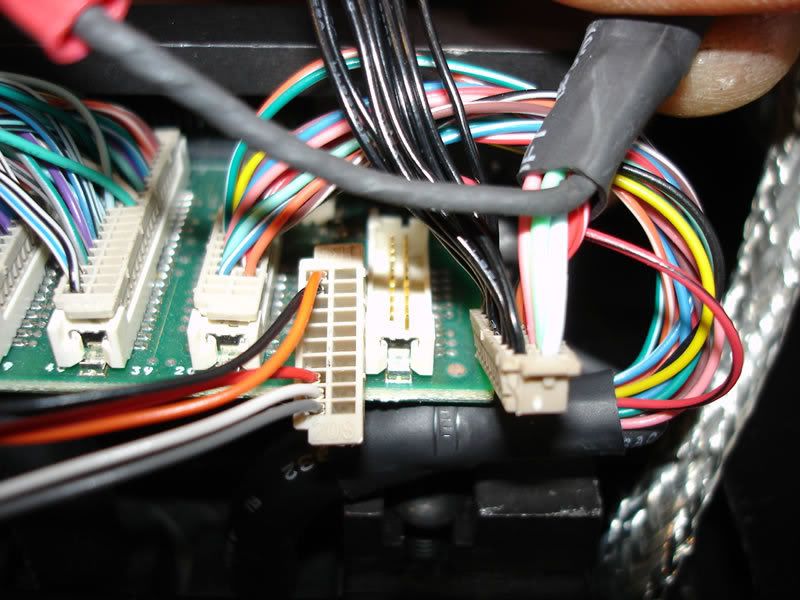
Okay Bruce, it's been a couple of months now... what is the electronic thingy you were working on? The thing that was going to be "pretty special" once you got it sussed out? Did you get it to work? Where is that board? There aren't too many of them in these buses but I don't know where they all are, so what are you working on?Mystery Machine wrote:Yeah - I just about managed to find some time to put it back in the box where it has stayed ever since!mararmeisto wrote:BTW Bruce, how's your model coming along? Putting any time into those?
Playing with the full sized things is taking up all my spare time at the moment - I'm currently trying to make sense of all this lot as part of the next 'mod'
Lots of testing and swapping of wires, but it should be pretty special once its all worked out!
JPL
I still miss my '94 Pajero!
I still miss my '94 Pajero!
- delicat
- Posts: 2331
- Joined: Thu Jul 26, 2007 6:26 pm
- Member's Photo Album: http://www.delica.ca/Photos/
- Vehicle: '92 Exeed '93 Safari '94 Pajero
- Location: New Westminster, BC
- Location: New Westminster, BC
Re: Say hello to the new Mud Monkey (this one is for keeps!)
J.Paul,
I think I've witnessed first hand Bruce little mystery electronic thingy... When we went out on our ride, Bruce had just configured some funky GPS unit that could communicate with other GPS in the group. It had Topo maps, tracking... pretty cool toy! I think it came off from some US police unit thingy.
Falco has something similar but his runs from a laptop and doesn't have the inter-communication capability from what I can tell. It still comes very handy!
Still on your appetite J.Paul?
'93 Nissan Patrol
'94 Mitsubishi Pajero
"If it ain't broken, modify it!"
'94 Mitsubishi Pajero

"If it ain't broken, modify it!"
- mararmeisto
- Posts: 3276
- Joined: Wed Sep 19, 2007 10:00 am
- Vehicle: 2018 Ram EcoDiesel
- Location: Dartmouth, NS
Re: Say hello to the new Mud Monkey (this one is for keeps!)
So the circuit board in the pictures is not from the van, but from the device? I thought he was changing one of the dials in the instrument panel, which is something I've thought of (maybe a digital water temp gauge or an LED fuel gauge, for example). Just some of the ideas I've had rattlin' around inside my head...
JPL
I still miss my '94 Pajero!
I still miss my '94 Pajero!
-
fexlboi
- Posts: 1671
- Joined: Thu Jun 19, 2008 11:28 pm
- Member's Photo Album: http://dinoevo.de
- Vehicle: -
- Location: -
- Contact:
Re: Say hello to the new Mud Monkey (this one is for keeps!)
Hi Bruce,Mystery Machine wrote:Right - there has been no proper updates for 2 whole weeks....and that is because I have been a 'little bit' busy on a major part of the Mud Monkey project (along with lots & lots of other bits & pieces)
The major part of the current work is 98% finished now, so I thought it time to post a run-down of what I've been up to! Tackling the interior.
Because of my job I need to keep the interior as a van, as functional as possible and as practical as possible. The last Mud Monkey had the floor boarded with ply which was very handy, but I wanted to go one stage further with this interior.
To cut a long LONG story short, I started out with the intention to board the back out with a few 'tie-down' points added in for securing loads, but one thing led to another and I ended up creating a major MAJOR refit which actually took me over 100hrs to complete rather than the 8 or 9 hours I'd originally anticipated.
The following photos do NOT show the amount of work, measuring, research, measuring, swearing, measuring, cutting, measuring, templating, measuring, fabricating, measuring, trimming etc....it took to complete this interior (did I meantion about the amount of measuring??)
The starting point - a stripped out L300 7 seater interior:
On the day I went searching high & low for tie-down points I came across this 'track' which I figured would be VERY handy for my needs. 3 x 10ft lengths later, I headed home and cut strips of thin galvanised sheet to sit behind/under the track. This would stop small objects from dropping through the track and rolling up & down the ribs in the floorpan. Things could still drop into the track - but they could go no further and I could then pick them out easily. The bottom track shows (just) the ribs in the floor through the holes. The middle track shows the galv. plate underneath and the top track shows the galv. plate coated in black vinly to make things easier to spot in the track.
Next was to start to measure, cut, trim and fit the track into the back of the motor. It took many hours of measuring to ensure that the track sat in the right places, that I could get rivets in the best (strongest) places, that the sides would line up with the floor sections and that everything was evenly spaced and 'square' to the rest of the car! Each piece of track was riveted to the body/floor and double checked that the rivets were correctly secured.
Lots of cutting/shaping was needed to get the track to fit correctly around trim and other parts of the interior like the rear seatbelts
Other parts needed reinforcing to ensure that the end of the track was secured and not ‘floating’ in mid air
Now that some of the main elements of the track are installed I can start measuring/templating/cutting the floor panels to fit in between the tracks. I had chosen a special ‘Phenolic’ plywood with a resin coated textured surface and water resistant adhesives to bond the layers together. More tricky to cut/shape but the end result should look neat and most importantly be VERY hard wearing & durable!
My aim was to get the panels to fit as neatly as possible (+/-0.5mm tolerance ideally) and decided to try and achieve this with just a jigsaw rather than using a circular saw!! I won’t explain my reasons here, but suffice to say that after a LOT of careful measuring (measure 10 times, cut once) I managed to achieve an almost perfect fit (within my tolerance) and no chips in the phenolic surface. One VERY pleased person was the result! You can see my templates in the foreground and my amazing al fresco workshop in the background! Who needs fancy machinery??
Once all the floor panels were test fitted and just how I wanted them, I finished fitting the rest of the side tracks while the ‘raw’ cut edges of the ply were painted black to make them look neater (purely for aesthetics seeing as this ply is waterproof anyway! Maybe I was being a little pedantic about the finish!!! Lol)
Next up was a layer of foam insulating material to act as a sound deadener and also to make the rear a little warmer when camping in the back.
At this point I then spent a whole day bonding (re-bonding) the inner and outer panel skins together on the sides of the bodywork to stop them drumming/vibrating and making a horrible noise. I also made sure that the floor was fully sealed and any small holes filled with silicone so that once the floor was riveted down, there would be no need to pull it back up again.
The floor was then fitted and fixed into place. No photos because I forgot to charge my camera batteries!
!
I'll rip out the carpet of our Delica as well and use plywood as flooring. The ‘Phenolic’ plywood sounds very interesting. Try to find it in Vancouver. After a few month of using Mud Monkey would you do anything different to the flooring?
Thanks
-
Mystery Machine
- Posts: 510
- Joined: Fri Dec 08, 2006 12:06 pm
- Location: Bristol (UK)
Re: Say hello to the new Mud Monkey (this one is for keeps!)
So it's been a good few years since I updated this thread and a lot has happened to the motor!
Let's just say that is no longer resembles the L300 I bought back in 2008. I've still got lots of things lined up for it and it's been through a few different guises in the past 12 months.
Here are a couple of teaser shots of it in it's 'previous' guise. This was back in July this year and it's undergone some changes since.
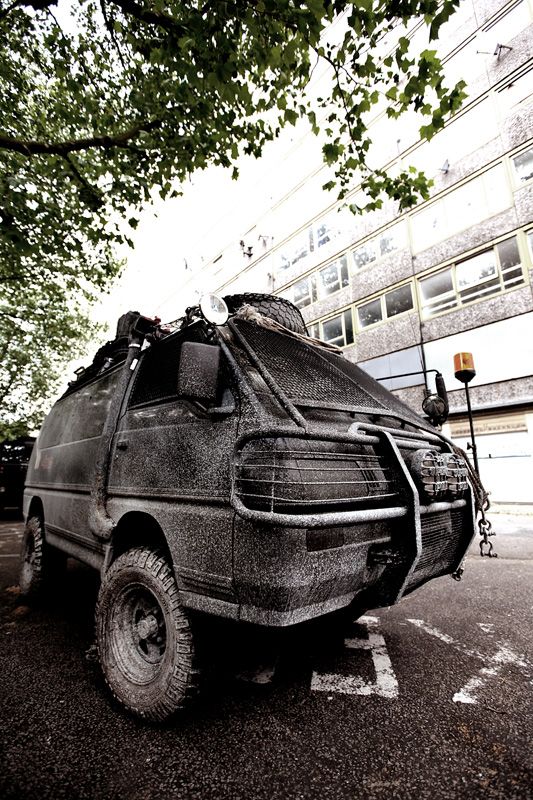
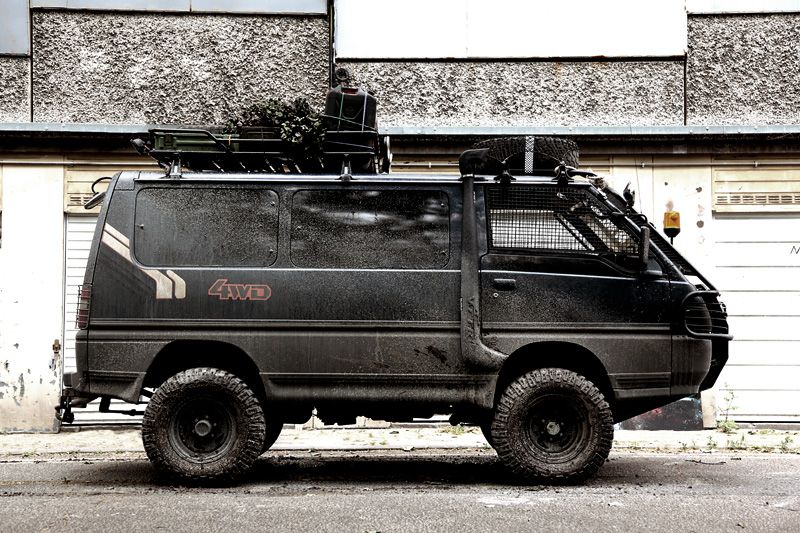
I'll add some proper updates when I get chance - filling in all the blanks along the way hopefully.
Let's just say that is no longer resembles the L300 I bought back in 2008. I've still got lots of things lined up for it and it's been through a few different guises in the past 12 months.
Here are a couple of teaser shots of it in it's 'previous' guise. This was back in July this year and it's undergone some changes since.


I'll add some proper updates when I get chance - filling in all the blanks along the way hopefully.
L300 Mystery Machine (High Altitude Edition  )
)
L300 MudMonkey ($400 bargain banger!! )
)
L300 MudMonkey ($400 bargain banger!!

-
fexlboi
- Posts: 1671
- Joined: Thu Jun 19, 2008 11:28 pm
- Member's Photo Album: http://dinoevo.de
- Vehicle: -
- Location: -
- Contact:
Re: Say hello to the new Mud Monkey (Long overdue updates on P8)
Two words: KICK ASS.
Richard Dagenais
-
Mystery Machine
- Posts: 510
- Joined: Fri Dec 08, 2006 12:06 pm
- Location: Bristol (UK)
Re: Say hello to the new Mud Monkey (Long overdue updates on P8)
Thanks for the link Fexlboi, I've put a response in that thread just to answer some of the comments etc....
I'll get some updates going on this thread with the other mods just to keep everything in one place.
It's good to be back :)
I'll get some updates going on this thread with the other mods just to keep everything in one place.
It's good to be back :)
L300 Mystery Machine (High Altitude Edition  )
)
L300 MudMonkey ($400 bargain banger!! )
)

L300 MudMonkey ($400 bargain banger!!

- jrman
- Posts: 506
- Joined: Thu Aug 16, 2007 12:29 pm
- Member's Photo Album: http://www.delica.ca/Photos/
- Vehicle: 1991 MMC Delica Exceed - Scoobus
Say hello to the new Mud Monkey (Long overdue updates on P8)
I wondered many times where you might have gone, what interests might have caught your fancy.....but you don't disappoint - MM looks great.
Looking forward to seeing more!
Cheers,
JR
Looking forward to seeing more!
Cheers,
JR
Sean in North Van
1991 Delica Exceed - Scoobus
1991 Delica Exceed - Scoobus
-
jwboard
- Posts: 18
- Joined: Fri Feb 26, 2010 8:29 am
- Member's Photo Album: http://www.delica.ca/Photos/
- Vehicle: l300 2.5td 4wd camper
Re: Say hello to the new Mud Monkey (Long overdue updates on P8)
Well thats a pretty AWSOME looking van!! men when i was in Afghanistan i have seen special modificated specialforces cars that diddnt look as cool as yours :D
-
Mystery Machine
- Posts: 510
- Joined: Fri Dec 08, 2006 12:06 pm
- Location: Bristol (UK)
Re: Say hello to the new Mud Monkey (Long overdue updates on P8)
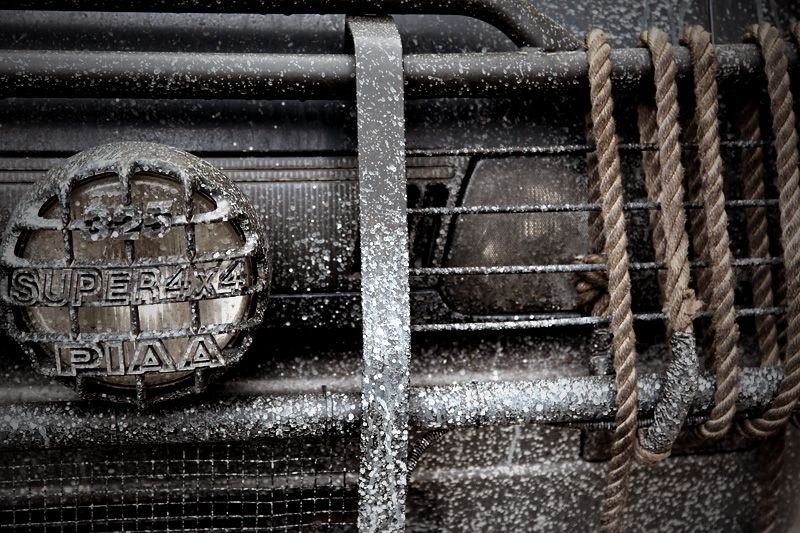
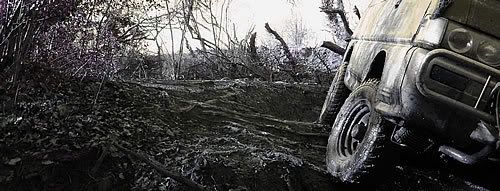
I've just added an update to the 'Post Apocalyptic' thread with actual production shots from the set: http://www.delica.ca/forum/post-apocaly ... -8528.html
My fave one being this one of course:

My fave one being this one of course:

L300 Mystery Machine (High Altitude Edition  )
)
L300 MudMonkey ($400 bargain banger!! )
)

L300 MudMonkey ($400 bargain banger!!

- Pete and Jackie
- Posts: 47
- Joined: Thu Oct 05, 2006 1:02 pm
- Member's Photo Album: http://www.delica.ca/Photos/
- Location: Comox
Re: Say hello to the new Mud Monkey (Long overdue updates on P8)
Hi Bruce, thats an awfully nice find for that kind of $, did you take advantage of some innocent bluehair? haha Pete and Jackie
-
fexlboi
- Posts: 1671
- Joined: Thu Jun 19, 2008 11:28 pm
- Member's Photo Album: http://dinoevo.de
- Vehicle: -
- Location: -
- Contact:
Re: Say hello to the new Mud Monkey (Long overdue updates on P8)
Please upload photos straight to delica.ca: http://www.delica.ca/forum/please-uploa ... -9383.htmlMystery Machine wrote:I've just added an update to the 'Post Apocalyptic' thread with actual production shots from the set: http://www.delica.ca/forum/post-apocaly ... -8528.html
My fave one being this one of course:
