Say hello to the new Mud Monkey (Long overdue updates on P8)

Driving a shiny 91 Delica Super Exceed? This is the section to show and tell!
Mystery Machine
Posts: 510
Joined: Fri Dec 08, 2006 12:06 pm
Location: Bristol (UK)

Say hello to the new Mud Monkey (Long overdue updates on P8)

Post by Mystery Machine »

Within 24hrs of my low roof L300 going to a new home in Bristol, another L300 appears on my drive!

Bought for $800 - I just had to have it!

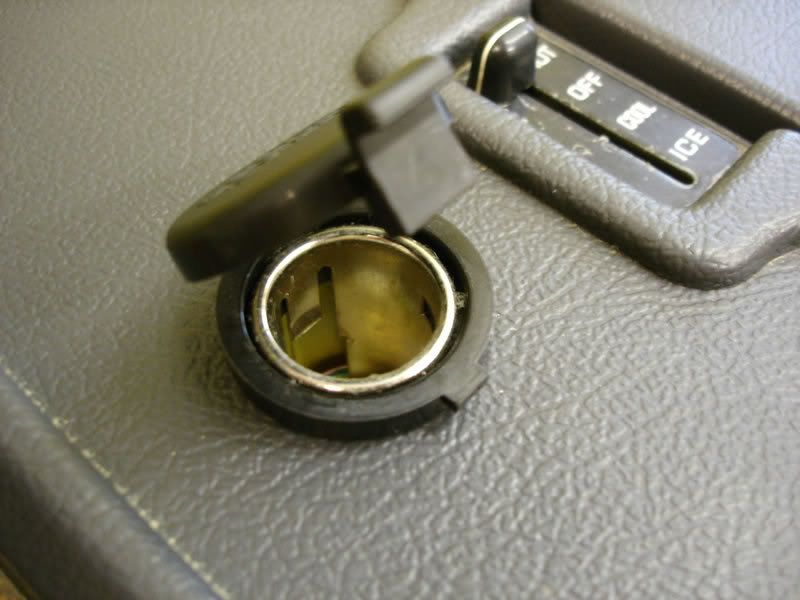
A 1994 low roof model with water cooled turbo, LSD, 'super-quick' glow plug system and 74,000 miles on the clock.

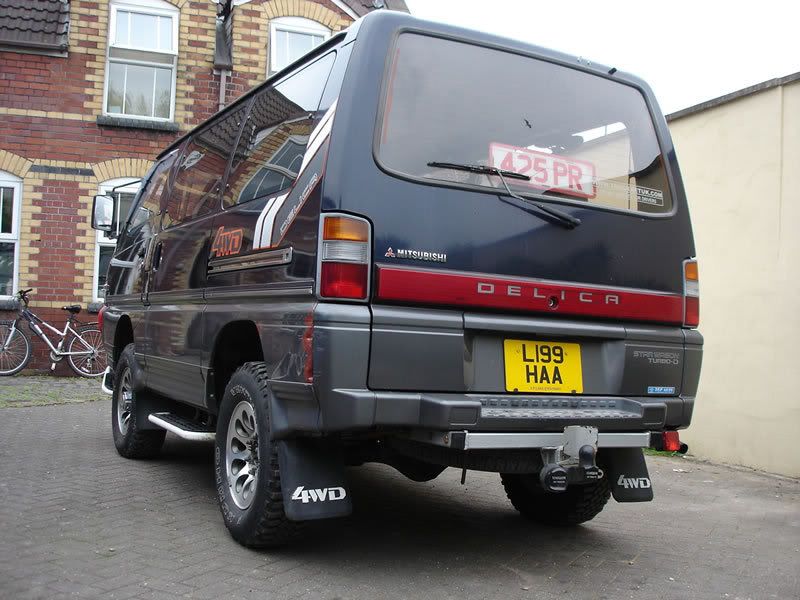
It came with the bonus of some decent mud's fitted (although these will be swapped with the 31's from the original Mud Monkey) and is in absolutely superb condition! No smoke at all, drives like a dream and is probably one of the tidiest, nicest L300's I've seen in a long time! (except for a scrape in the rear panel on the passenger side)

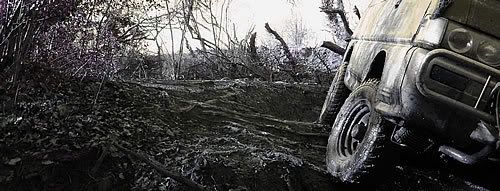
This will replace the Mud Monkey as my off-road weapon and will also double as my 'back-up' work van for when I need to carry more than my new 'teeny' work van is capable of. (which will be about 25% of my work). It will also adopt the name 'Mud Monkey' when it is on the road after I've finished stripping it and preparing it.

Here it is the day I got it home, so you can see it in its 'original' state before I get my grubby hands on it.....

Image
Image
Image

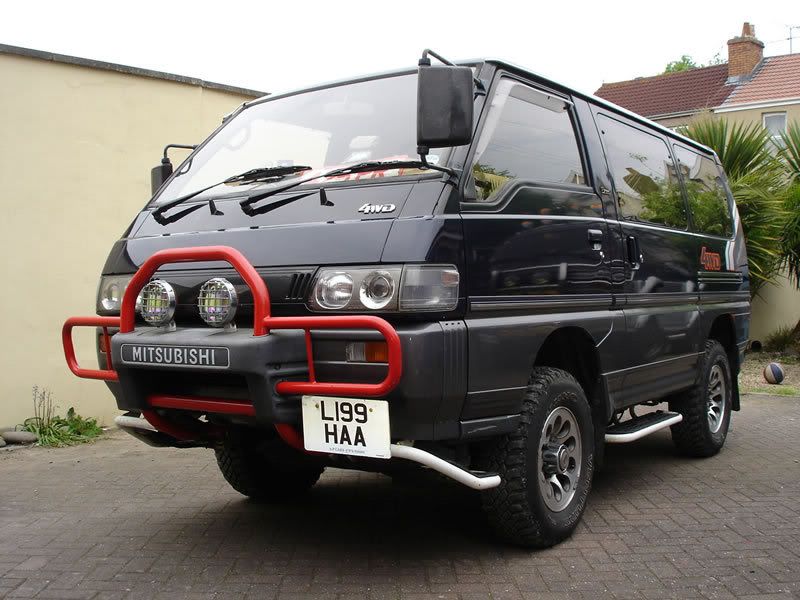
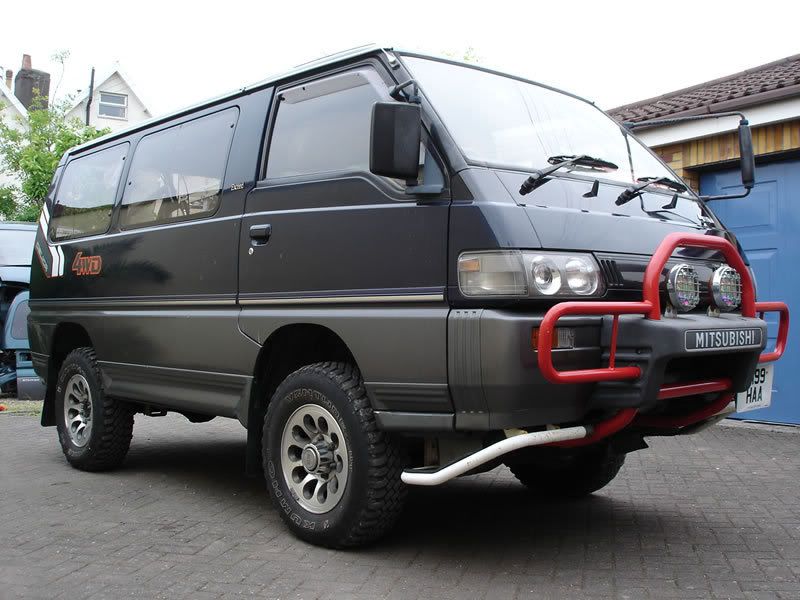
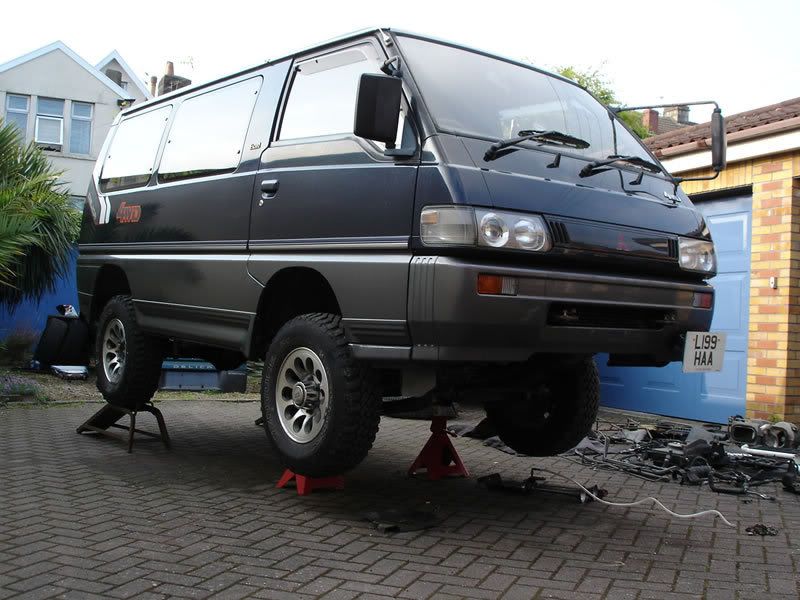
And here it is within a day of getting it:

Image

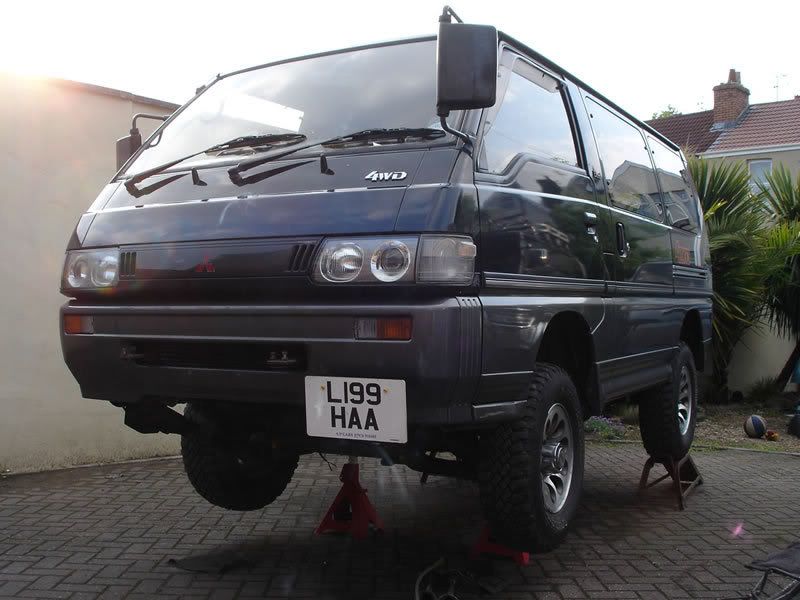
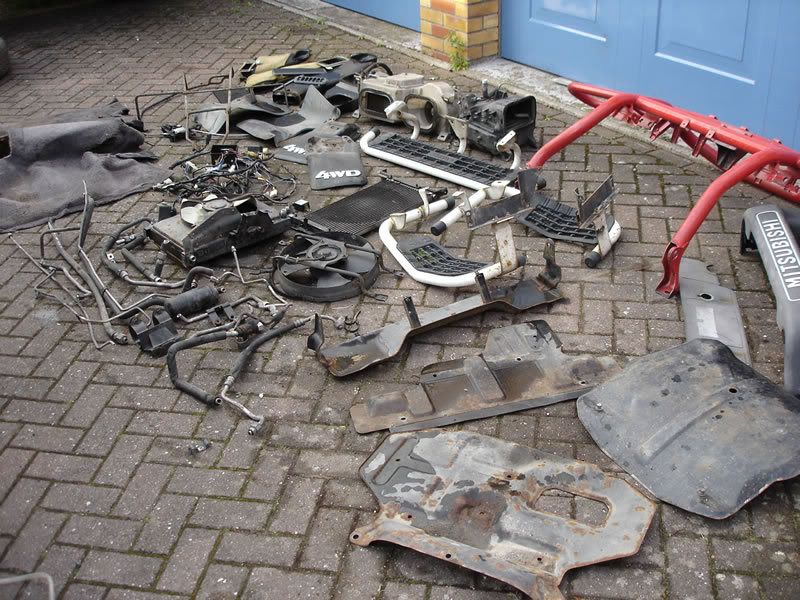
The red bull bars (big YUK!!) will be getting a dose of black because I really don't like the clown look of the current colour! I'll be adding some 8" IPF spot lamps to replace the cheesy fake PIAA ones and it'll be getting the full strip-down and mini-lift as seen on the original Mud Monkey.

I've got a lot of new ideas for this one, already collected quite a few parts for it (low roof Terzo for starters) and things should start to take shape over the next week to get it ready for some serious off-roading.

More updates to come as the mods start happening.

Watch this space....
L300 Mystery Machine (High Altitude Edition 8-) )
L300 MudMonkey ($400 bargain banger!! :!: )


Image
Green1
Posts: 3257
Joined: Wed Jul 19, 2006 9:18 pm
Member's Photo Album: http://www.delica.ca/Photos/
Vehicle: 1994 L400 Royal Exceed PF8W
Location: Calgary Alberta Canada
Contact:

Re: Say hello to the new Mud Monkey (this one is for keeps!)

Post by Green1 »

Bought for $800 - I just had to have it!
I am REALLY starting to think I live in the wrong country!!! the cheapest Delica I've seen over here was about $7,500... and it was hardly in the condition you seem to find for mere pennies in comparison.

As for the red bull-bars... I actually kinda like 'em... gives it a unique flavour...
User avatar
patty
Posts: 713
Joined: Sat Jun 16, 2007 1:45 pm
Member's Photo Album: http://www.delica.ca/Photos/
Vehicle: delica chamonix
Location: Whistler/Prince George

Re: Say hello to the new Mud Monkey (this one is for keeps!)

Post by patty »

I really like the red bullbars. I was thinking of doing mine yellow or bright orange.
josh
Posts: 868
Joined: Mon Jul 24, 2006 8:44 pm
Member's Photo Album: http://www.delica.ca/Photos/
Vehicle: L300 poptop gasser
Location: Vancouver, bC
Location: Vancouver, BC

Re: Say hello to the new Mud Monkey (this one is for keeps!)

Post by josh »

Top notch Bruce, I cant wait to go for a spin in it with you... one day I will visit, its only fair.

Josh
User avatar
mararmeisto
Posts: 3276
Joined: Wed Sep 19, 2007 10:00 am
Vehicle: 2018 Ram EcoDiesel
Location: Dartmouth, NS

Re: Say hello to the new Mud Monkey (this one is for keeps!)

Post by mararmeisto »

By my count, that makes F I V E !

I think you might have a problem, Bruce. They have groups for people with conditions like yours. :o

The red bull bars wouldn't look bad if there was some other accenting to go with it. But if you're not going to be doing some detailing, then you're justified in your dislike for them. Do you have another set you can put in their place?

Whatcha gonna do with the others? The spares? The stripped-down ones? Could you put them in a box and mail 'em over here? I agree with the other post, we don't see anything like your 200£, or the 400£, or now the 800£ offerings you've been picking up. Even at 800£, that's a steal over here - only about 1800$.

LATE NIGHT EDIT: Okay, only F O U R still. Quick turnaround on the sale of the other one, before you got this one, though I see. This fifth one in better shape than the fourth? Must have been - you paid double for it!
JPL
I still miss my '94 Pajero!
Mystery Machine
Posts: 510
Joined: Fri Dec 08, 2006 12:06 pm
Location: Bristol (UK)

Re: Say hello to the new Mud Monkey (this one is for keeps!)

Post by Mystery Machine »

mararmeisto wrote:Even at 800£, that's a steal over here - only about 1800$.

This fifth one in better shape than the fourth? Must have been - you paid double for it!
Read it again JP - $800....not £800! (I try to keep the currency correct for you guys) which means it cost me £400 which is the same as the 'fourth' one.... :-D

Take a look here: New Mud Monkey on eBay he paid $8,000 in 2004 and I got it for 1/10 that! 8-)

That makes me a happy guy.
L300 Mystery Machine (High Altitude Edition 8-) )
L300 MudMonkey ($400 bargain banger!! :!: )


Image
Mystery Machine
Posts: 510
Joined: Fri Dec 08, 2006 12:06 pm
Location: Bristol (UK)

Re: Say hello to the new Mud Monkey (this one is for keeps!)

Post by Mystery Machine »

Some update/progress shots:

Image

Well, the complete AC system is now removed - along with the whole loom (which was a LOT more than I expected!) and all the associated relays, fuses etc....I didn't get time to chop the arches yet because I got distracted on another 'project' for the motor!

Here is the pile of bits removed so far:

Image

Most of this wiring is the loom for the AC!

Image

Anyone who knows what a standard L300 looks like underneath will appreciate these two photos:

Image

Image

(I've got to make some panels up to seal those huge holes!)

The space where the rear heater & ducting used to be is now pretty empty too.....

Image

And behind the glovebox is a study in minimalism (compared to the spaghetti of wires and relays normally found there!)

Image

So the motor is now a good 50kg lighter and there is a lot less to go wrong/fix/get smashed off-road.

Weather is against me at the moment (AKA hurricane mates with monsoon over Bristol) so things are at a bit of a standstill which is annoying because I have taken a week out to work on the motor! Oh well.....
L300 Mystery Machine (High Altitude Edition 8-) )
L300 MudMonkey ($400 bargain banger!! :!: )


Image
User avatar
BCDelica
Posts: 1808
Joined: Tue Jul 18, 2006 4:12 pm
Member's Photo Album: http://www.delica.ca/Photos/index.php?cat=10008
Vehicle: WVO Powered Tuk Tuk
Location: Central Van Isle
Location: Somewhere with plenty of sun

Re: Say hello to the new Mud Monkey (this one is for keeps!)

Post by BCDelica »

Hi Mud Monkey.

Bruce, do you plan to remove the ac compressor and belts too; free up a couple of hp?

Have you ever added add-a-gasket, or such to the timing belt cover? How about diff breathers?

Looking forward to those future action shots!!

Cheers,
Kev
Image Call me BCDelica-less
docsavage
Posts: 406
Joined: Sat Jul 22, 2006 2:48 pm
Member's Photo Album: http://www.delica.ca/Photos/
Vehicle: Deliless...
Location: Prince Rupert

Re: Say hello to the new Mud Monkey (this one is for keeps!)

Post by docsavage »

I haven't looked at these AC compressors yet, but can the be converted to run as an onboard air compressor. I know the Dodge/Chrysler/AMC ones of this era were great for that, not sure if these are the same.

James
James

1989 Delica P24W Exceed
Panasonic CQ-TX5500W

Our online fabric shop: http://www.fishskinfabric.com
User avatar
BCDelica
Posts: 1808
Joined: Tue Jul 18, 2006 4:12 pm
Member's Photo Album: http://www.delica.ca/Photos/index.php?cat=10008
Vehicle: WVO Powered Tuk Tuk
Location: Central Van Isle
Location: Somewhere with plenty of sun

Re: Say hello to the new Mud Monkey (this one is for keeps!)

Post by BCDelica »

Wow, never heard of that; the ac compressor would be one wire switched to a electric activator/solenoid the you'd just need to add a small tank along with a relieve valve. Not a small tank, looking at Bruce's pics you could fit 15 gallon in a long air tank where the rear heat plastic was.

Did some searching, but couldn't find if an ac compressors volume and pressure's enough for light air tools.
Image Call me BCDelica-less
Mystery Machine
Posts: 510
Joined: Fri Dec 08, 2006 12:06 pm
Location: Bristol (UK)

Re: Say hello to the new Mud Monkey (this one is for keeps!)

Post by Mystery Machine »

Hey guys,

The AC compressor was the first thing out! The system worked perfectly before I got my hands on it, so I ripped out the compressor to keep as a spare for the Mystery Machine.

Diff breathers etc....not fitted but already planned (gearbox, transfer box etc...)

James, I had considered the AC to charge a good sized receiver under the floorpan somewhere, but the Mitsy ones use oil in the gas to lubricate them and running them just on air will kill them in no time at all! I am considering some other form of compressor/reciever set-up though so I can run an air line, tools, tyre pump etc...

I was also thinking of using the AC compressor mounting bracket to fit the power steering pump to (relocate it there) so that I could mount the alternator up where the power steering pump is/was. This is to protect the alternator much more because (as you well know) they can be quite vulnerable where they are, they aren't too keen on being submerged too much and they are a pig to get to! Just an idea at the moment, but hoping to make it a reality at some point?
L300 Mystery Machine (High Altitude Edition 8-) )
L300 MudMonkey ($400 bargain banger!! :!: )


Image
User avatar
BCDelica
Posts: 1808
Joined: Tue Jul 18, 2006 4:12 pm
Member's Photo Album: http://www.delica.ca/Photos/index.php?cat=10008
Vehicle: WVO Powered Tuk Tuk
Location: Central Van Isle
Location: Somewhere with plenty of sun

Re: Say hello to the new Mud Monkey (this one is for keeps!)

Post by BCDelica »

Thanks Bruce.

From http://jeep.off-road.com/jeep/article/a ... ?id=257801
Not shown are the intake port components. Why aren't they shown? Well because they're not finished. What needs to happen on the intake side is that you need a way to filter the air and then a way to provide oil for the compressor. What I will use is a lawn mower air filter and a standard tool oiler. I will probably purchase an adjustable oiler so that I can provide the right amount of oil (not too much or not too little, but just right...) These can be hooked up with heater hose or another hose capable of resisting oil and heat. They do not have to be pressure hose.
I'm stuck on this idea, it's like half the work of a WVO conversion.
Image Call me BCDelica-less
docsavage
Posts: 406
Joined: Sat Jul 22, 2006 2:48 pm
Member's Photo Album: http://www.delica.ca/Photos/
Vehicle: Deliless...
Location: Prince Rupert

Re: Say hello to the new Mud Monkey (this one is for keeps!)

Post by docsavage »

Thats a bummer that the compressor is gas lubed. This is the style I know works.

http://www.offroaders.com/info/tech-cor ... rd-air.htm

They are getting hard to find, at the wreckers, and new ones are probably a lot of bucks. Kevin's link is an interesting variant. It doesn't hurt air tools to get oil from the air but it would cook the cutting tips on the plasma cutter in a hurry ( the plasma would help when we get locked in campgrounds!!!).

If I didn't like having ac for all the gravel roads I would remove mine and put my auxiliary vacuum pump in that space and wouldn't need the electric one.

James
James

1989 Delica P24W Exceed
Panasonic CQ-TX5500W

Our online fabric shop: http://www.fishskinfabric.com
Mystery Machine
Posts: 510
Joined: Fri Dec 08, 2006 12:06 pm
Location: Bristol (UK)

Re: Say hello to the new Mud Monkey (this one is for keeps!)

Post by Mystery Machine »

Hmmm - the whole onbaord air thing had got me intruigued!!

Apparently that compressor was fitted to Range Rovers (dealer fit AC) from 1982 - 1986, so there may be chance of finding one over here. We also seem to have more Volvo's than you guys (nearer Sweden I guess?) so there is also chance of finding one there.

I think I may have to do this to mine....very handy, and as Kev says....there is all that space under the floor where the rear heater/ac unit used to be. Thanks for the info guys.

Here is another update for you:

I removed the passenger seat and split the backrest off. After carefully undoing the metal hoops along the bottom, peeled off the seat fabric to reveal the frame, foam and mechanism.

Image

What I am hoping to achieve here is a passenger seat that will flip as fully forward/flat as it can go (the reason for this is to remain TOP SECRET for the time being! :twisted: ) As it is, it will only flip forward a few degrees - I guess there is no real need for it to flip forward any further in most cases?

Here is the mechanism in standard form. The 'flat' section between the two 'humps' acts as a stop for the seat mechanism. This needs to be removed in order to allow the seat to tip further forward. (Many thanks to Michael Fry-Foley from MDOCUK for the tip-off of which bit to look for! :wink: )

Image

Here is the mechanism after attacking it with my Dremel (got to love those things!! 8-) ) You can see how much I have chopped out in order to allow the seat to pivot much further through its arc. You can also see where I have cut out a bit of the bracket to the top left - this allows the seat to go even further.....almost flat. Not the prettiest of jobs, but it is an awkward area to attack due to the seat foam & frame getting in the way and it all gets hidden when the cover goes back on anyway.

Image

That's all I can show for this mod at the moment because any more shots will give the game away! (you're gonna LOVE it when it's finished! :D :D )

The rest of the work done on the seat was quite involved and incorporated a LOT of head scratching and HUGE amounts of swearing, but I am very pleased with the results so far!

P.S. Mag tipped screwdrivers are ace for pulling out all the burrs/filings from the cutting. The slot was a lot cleaner after doing this (I also 'hoovered' the driveway with the screwdriver to save Jed's paws!)

Image
L300 Mystery Machine (High Altitude Edition 8-) )
L300 MudMonkey ($400 bargain banger!! :!: )


Image
Mystery Machine
Posts: 510
Joined: Fri Dec 08, 2006 12:06 pm
Location: Bristol (UK)

Re: Say hello to the new Mud Monkey (this one is for keeps!)

Post by Mystery Machine »

The other day (like today too) it was absolutely chucking it down out there and blowing a fair old gale too, so work on the drive had ground to a halt!

I decided to tackle a few smaller indoor 'tweaks' instead to keep myself moving on this project.

The cigar lighter socket on the dash is always used to power my PDA GPS, so is pretty much 'taken' which leaves me little option for charging my phone if I need to (unless I use one of those splitter things which I really HATE!! They look so nasty stuck somewhere with all the wires trailing...)

This is the socket on the dash.....can you guess what my plan is?? :wink:

Image

Yes, you've guessed right - chop a hole in the 'blank' next to it and fit another socket in there. You might just see that I've also opened up the original hole a little bit? My dremel was dead handy again for this.... :D (it was only after chopping the holes that I found my step cutter which would have made a MUCH neater & quicker job of it! :? )

Image

The reason for enlarging the original hole: to fit the illuminated 'lens' socket from an L400 (on the left) and I also had an illuminated lens socket from a Pajero (on the right) but this is a white/orange colour, so I am currently looking for another green lens to make them match better (despite being a budget build, I am still allowed my attention to detail you know? :lol: )

Image

In order for 2 of the new style rear housings to fit, they need to be arranged like this on the back. Wiring will be neatly adapted to work on both with a low load fuse to prevent too much current draw (I'll only be running the PDA and phone charger anyway)

Image

While I was at it, I decided to attack the glovebox from the original Mud Monkey which will find its way into the new L300.

Image

Now I had found the step cutter, making the hole was MUCH easier, neater and quicker.

Image

An extra large hole was made in the back of the panel to accomodate the main housing (dremel had to be used for this one) and an equal sized hole cut through the steel faceplate on the body of the coolbox.

Image

One Pajero 'accessory' socket installed in the coolbox:

Image

The wiring will be neatly hidden inside the box and run up under the dashboard into the main loom. Now my passengers can charge their phones too or I can charge my camera batteries etc....anyone who has been away for a long weekend will know how handy spare sockets are....

Image

So that's three 12v sockets now in the front - and all have an OEM look about them....no ugly splitters to be seen! :D

I'm also going to be mouting a socket in the back of the glove compartment so that I can charge things 'out of sight' when the motor is parked up (I'll have a permanent 12v feed on this socket with a switch to isolate it when not in use)
L300 Mystery Machine (High Altitude Edition 8-) )
L300 MudMonkey ($400 bargain banger!! :!: )


Image
Post Reply

Return to “Member Rides”