Page 2 of 3
Sunroof rust repair: Madness may ensue, as usual.
Posted: Wed Jun 21, 2017 3:57 am
by Growlerbearnz
sinjin wrote:So...I have a 96 L400 LWB with some rust on the middle of the roof between the windshield and the front sunroof. What should be done about it?
Right now, as I bleed from various cuts and smart from weld burns, my inclination is to say "burn it to the ground and claim the insurance"

Is the rust bubbling through from the inside, or has it started from paint damage on the outside?
From inside- don't ignore it (like I did), remove the roof lining and figure out what you're dealing with. If you catch it in time you might be able to clean it up, paint it with a rust-converting epoxy, and then hose it down with rust preventative wax spray.
From outside- clean, remove all rust, prime with rust killing primer, and spray with a colour matching top coat.
Sunroof rust repair: Madness may ensue, as usual.
Posted: Wed Jun 21, 2017 6:13 pm
by NewDelica91
Growlerbearnz wrote:Leaks are usually just clogged drains, the two in the front are easy to get to, but the ones in the back are hidden behind the roof lining. The ones in the back are also the ones that rust out.
I'm circumventing the leaks by gluing the glass directly into the body, like a bonded on windscreen. It won't open, but I'll keep the sunshade so it won't be too hot. As well as reducing the risk of leaks, I'm also gaining an extra 30mm of headroom by deleting the opening mechanism. I might even redirect the rear aircon forwards and over the glass to help cool it down on hot days.
Hey is there anything in the manuals for locations of the drain lines for the sunroof?
Sent from my iPhone using Tapatalk
Sunroof rust repair: Madness may ensue, as usual.
Posted: Thu Jun 22, 2017 3:02 pm
by Growlerbearnz
I don't think so. The rubber hoses run above the roof lining and down the rear pillars, and down the B-pillars. You can see them sticking out just behind the wheels (both front and rear). The front lines can be cleared out without removing anything (open sunroof, point compressed air at visible drain hole), but the rear lines require removal of the rear headlining.
I'd take a picture for you, but mine have been removed and satisfyingly flung in a corner.
Sunroof rust repair: Madness may ensue, as usual.
Posted: Thu Jun 22, 2017 8:56 pm
by NewDelica91
Growlerbearnz wrote:I don't think so. The rubber hoses run above the roof lining and down the rear pillars, and down the B-pillars. You can see them sticking out just behind the wheels (both front and rear). The front lines can be cleared out without removing anything (open sunroof, point compressed air at visible drain hole), but the rear lines require removal of the rear headlining.
I'd take a picture for you, but mine have been removed and satisfyingly flung in a corner.
No worries buddy! I bet you were happy to toss them to the corner?
Sent from my iPhone using Tapatalk
Sunroof rust repair: Madness may ensue, as usual.
Posted: Fri Jun 23, 2017 12:02 am
by Growlerbearnz
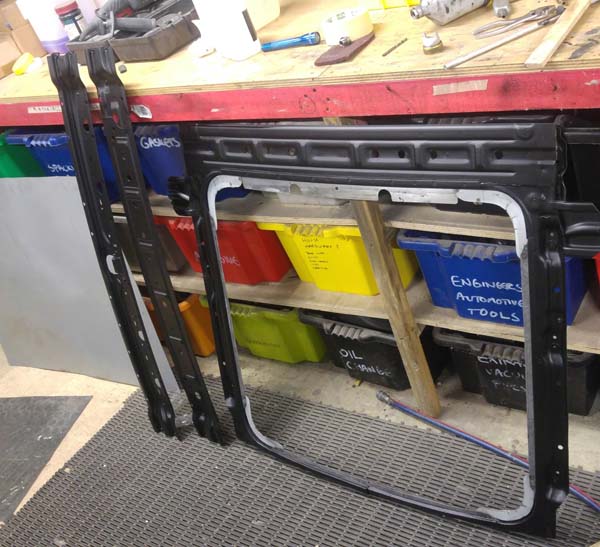
And we're making progress: the new roof panel is fitted and welded in place. It doesn't look like much work, but it's taken 3 days and the workshop is a mess.
Everything aligned and held in place with Cleco temporary fasteners:
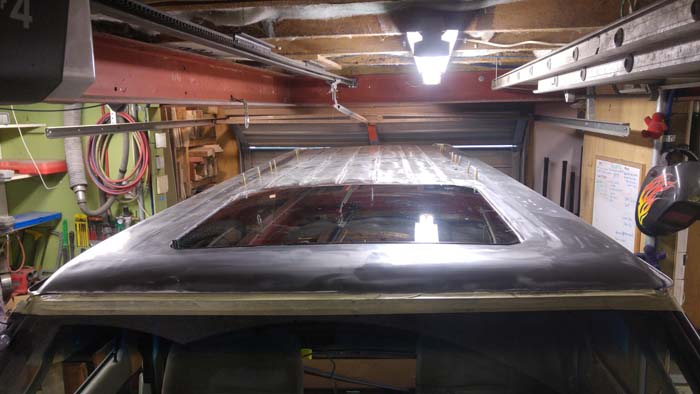
- Ready.JPG (58.49 KiB) Viewed 12241 times
Rather than a proper butt joint, I'm making a joggled lap joint. It's a bit amateur and can create a rust trap if not sealed properly, but the roof panel is incredibly flimsy and a butt joint would create more distortion than I'm willing to deal with.
Plug welds along the seam:
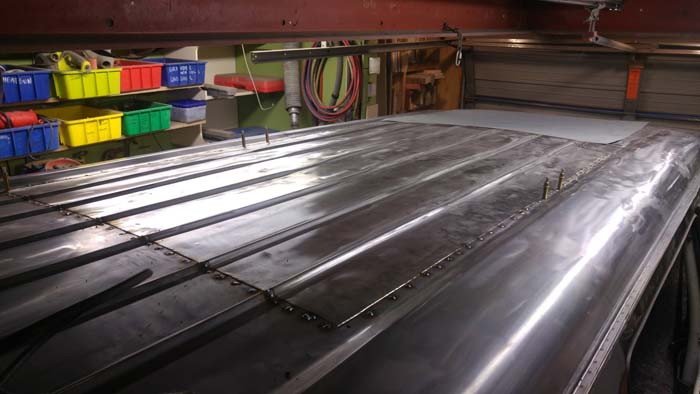
- Welded.JPG (56.73 KiB) Viewed 12241 times
Grind the welds back until everything is smooth again:
- ground2.JPG (59.61 KiB) Viewed 12241 times

- ground.JPG (63.01 KiB) Viewed 12241 times
Now I just (just!) have to prime everything, reassemble with panel adhesive, and then I might be able to install the glass and then paint it.
Sunroof rust repair: Madness may ensue, as usual.
Posted: Fri Jun 23, 2017 10:45 am
by NewDelica91
Looks awesome!
Sent from my iPhone using Tapatalk
Sunroof rust repair: Madness may ensue, as usual.
Posted: Sat Jun 24, 2017 12:02 am
by Growlerbearnz
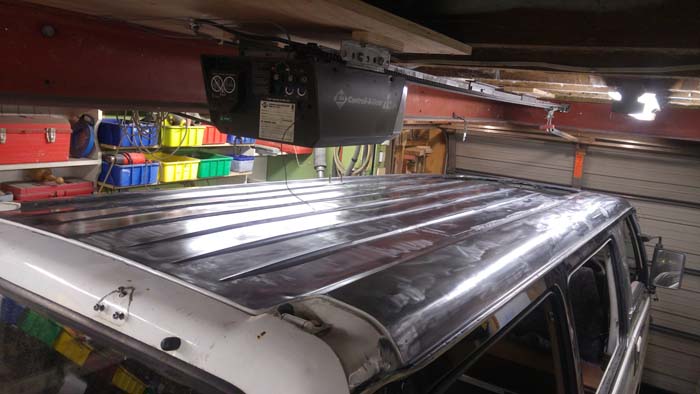
All scrubbed, masked (with newspaper because of course I ran out of masking film), and primed with epoxy.

- 20170624_144755 copy.JPG (46.42 KiB) Viewed 12218 times
- 20170624_171113_HDR copy.JPG (45.84 KiB) Viewed 12218 times
Now we let it cure for a day or two, and then glue in the roof bows and other structural bits (which are also primed and ready to go)
- 20170624_164134 copy.JPG (87.39 KiB) Viewed 12218 times
Sunroof rust repair: Madness may ensue, as usual.
Posted: Sat Jun 24, 2017 9:35 pm
by NewDelica91
Whatever works buddy!
Sent from my iPhone using Tapatalk
Sunroof rust repair: Madness may ensue, as usual.
Posted: Tue Jun 27, 2017 8:18 am
by javabob
That is looking fantastic Growler!
What panel adhesive are you going to use?
Sunroof rust repair: Madness may ensue, as usual.
Posted: Tue Jun 27, 2017 3:24 pm
by Growlerbearnz
javabob wrote:What panel adhesive are you going to use?
I've used Sikaflex 221 (moisture-curing polyurethane adhesive sealant) for adhering the roof bows to the roof skin, and for seam sealing the lap joints on the inside. Like all urethane adhesive/sealants it's flexible, has great bonding, and is paintable with any paint system.
The glass is installed with Sika Tack-Drive windscreen adhesive. Being an OEM product and airbag rated it's probably overkill for a sunroof, but I really don't want it to leak. The downside is it requires use of Sika's special surface prep/cleaner, and special primer- so your reasonably-priced $20 tube of windscreen goo turns into $100 of single-use products. Ugh.
EDIT FROM 2 YEARS IN THE FUTURE: Don't use Sikaflex 295UV. It's not designed to adhere to glass. Ask me how I know. Ugh.
Once the roof is painted I'll fill the gap between glass and panel with Sikaflex 295UV, a marine-rated UV resistant sealant. It should make a pretty looking filler strip, and not break down in the sun.
Sunroof rust repair: Madness may ensue, as usual.
Posted: Wed Jun 28, 2017 12:00 am
by Growlerbearnz
Sunroof rust repair: Madness may ensue, as usual.
Posted: Mon Jul 03, 2017 8:42 am
by NewDelica91
That is some awesome work!
Sent from my iPhone using Tapatalk
Sunroof rust repair: Madness may ensue, as usual.
Posted: Mon Jul 03, 2017 3:54 pm
by Growlerbearnz
The work is not feeling particularly awesome right now. This has been my life for the last 5 days:
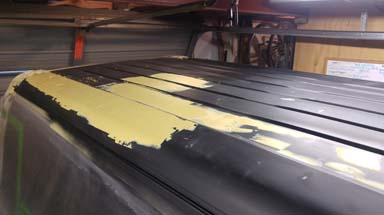
- 20170703_112400 copy.JPG (27.85 KiB) Viewed 12127 times
Ugh. Using filler feels like defeat, but this roof panel is just ridiculously flimsy. You can dent it with your thumb. Shrink out one dent just a fraction too far and another pops in a foot away. Shrink out a large dent and you change the curvature across the whole roof, which makes the ridges look like buckled train tracks.
I'm nearly at the point where my irritation exceeds my standards, which means it's almost time for paint!
Sunroof rust repair: Madness may ensue, as usual.
Posted: Mon Jul 03, 2017 4:40 pm
by NewDelica91
It's looking awesome! Great things take time.
Sunroof rust repair: Madness may ensue, as usual.
Posted: Fri Jul 07, 2017 1:29 am
by Growlerbearnz
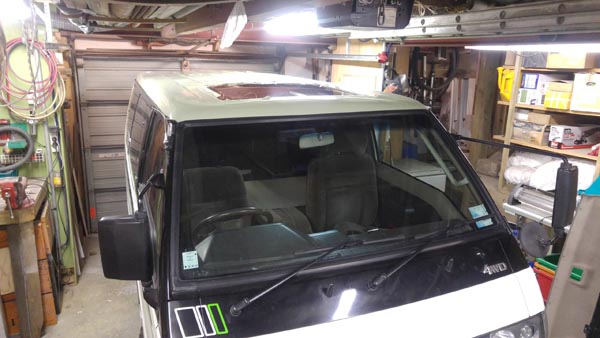
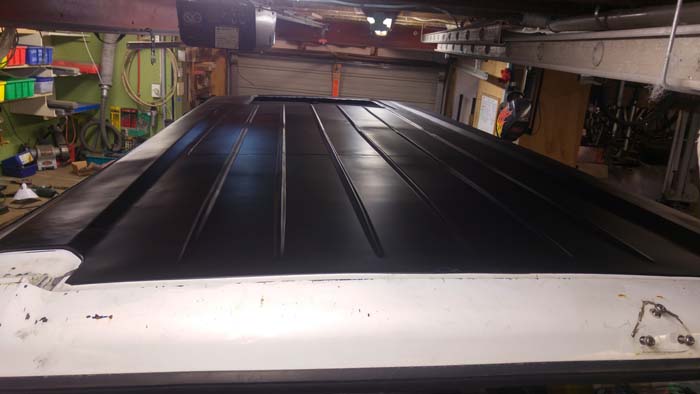
- Primer.JPG (62.78 KiB) Viewed 12089 times
The roof is finally in (gorgeous mint green) primer, ready for paint. And of course the painter is away on holiday until next week.
Time to work on the interior then.
Not pictured: fitting the sun shade. Basically, I took the old sunroof mechanism, removed anything that wasn't needed any more (motor, sliders, massive steel brackets) leaving just the sunshade, and screwed that to the inside of the roof. More pictures later.
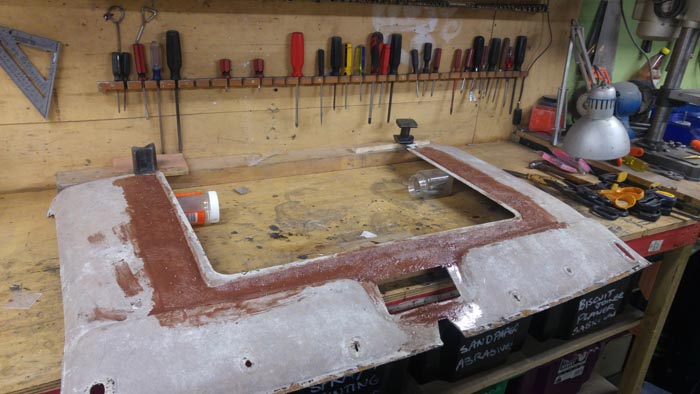
I'd previously measured the roof lining, and it looked like I could reconfigure it to make it work, rather than having to make a whole new liner from scratch. Time to find out if my measurements were correct...
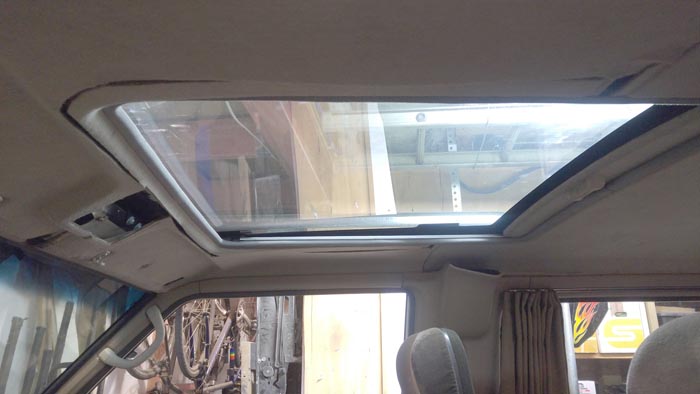
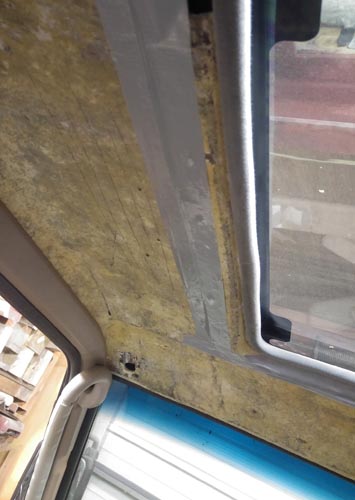
- FrankenLiner1.JPG (49.37 KiB) Viewed 12089 times
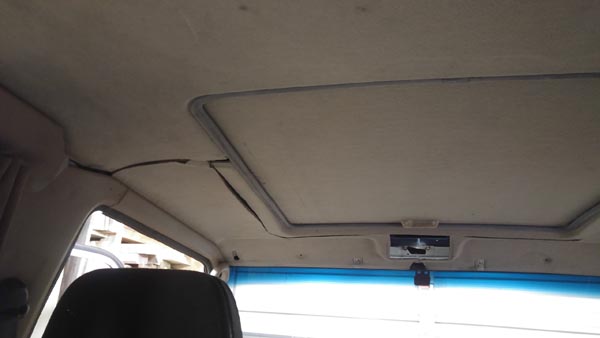
- Frankenliner2.JPG (28.99 KiB) Viewed 12089 times
Hey! Not bad! Right. Duct tape first, to hold the fibreglass in:
- Tape.JPG (44.56 KiB) Viewed 12089 times
Steel plates to hold the edges in alignment
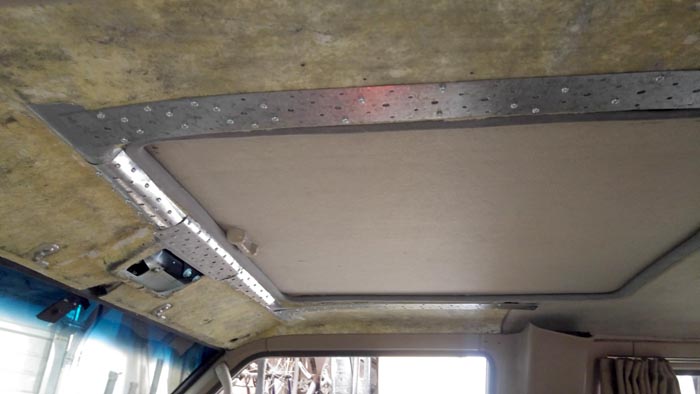
- screwed.JPG (48.41 KiB) Viewed 12089 times
Fill the gaps from behind with chocolate frosting... errr, epoxy with fairing filler
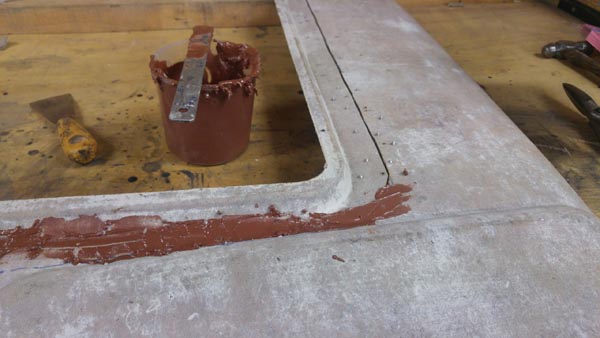
- Filler.JPG (49.07 KiB) Viewed 12089 times
And fibreglass.
- Fibreglass.JPG (71.9 KiB) Viewed 12089 times
Neat! We'll find out tomorrow if it worked.