Page 3 of 4
Re: L300 Head replacement and timing belt DIY, step by step
Posted: Sat Jul 11, 2015 8:54 pm
by DexterH
Hi Tojo. I was hoping to catch your reassembly and timing on this project, but it doesnt seem I will.
Well, not when I need it most that is. I have to admit this is the best instruction diy project on this topic Ive seen. The photos are exceptional as well. The thing is, Tomorrow morning Im hoping to get that crank bolt off and prepare for reassembly/timing. Got some cleaning up on the head to do and replacing the old rocker arm assembly with a new one. I doubt I'll complete this job by end of the day but hoping to get as much done as possible. Oh! I have to thank you for the pic on how you rigged up the breaker bar using the 2x4

. I took out my starter hoping to find a threaded bore on the flywheel to lock it in place but was surprised there wasnt any.
Your method has put a smile on my face man
Hope you get going on this project again soon. It sure is extremely helpful and very comprehensive.
Thanks Tojo!
Re: L300 Head replacement and timing belt DIY, step by step
Posted: Wed Jul 15, 2015 4:09 pm
by Tojo
I'm back! Thanks for the comments. Needed to take a break to work on the house, rebuild a 1974 Husqvarna L65 and some chill out time in this heat wave we're having.
A very old but sturdy saw. Something about these older saws, they are heavy with all metal parts and don't have a safety brake, but they have great torque and are ideal for chainsaw milling.
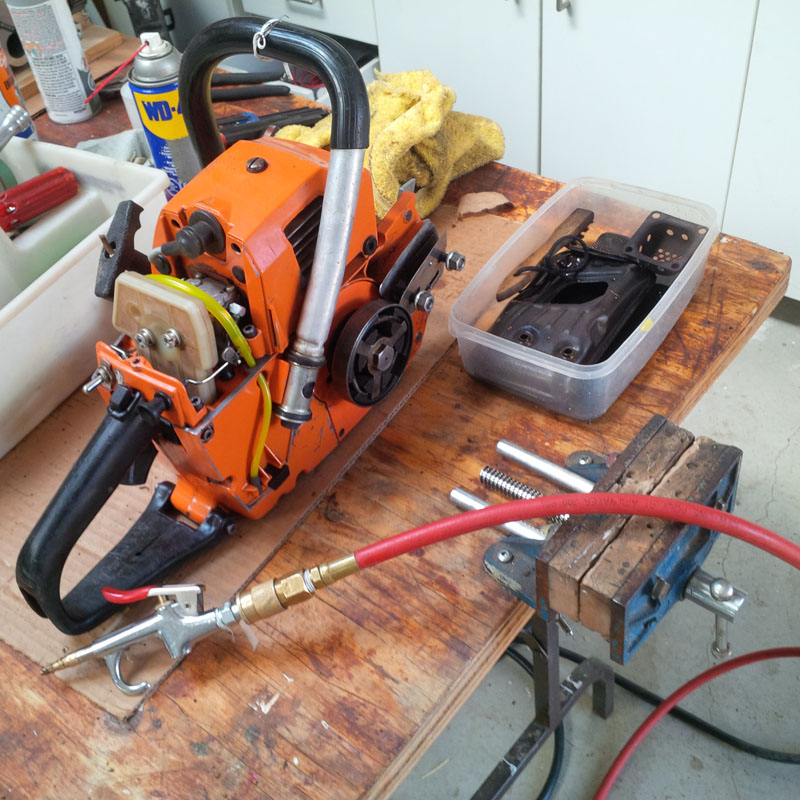
- IMG_20150504_134541.jpg (480.46 KiB) Viewed 16132 times
But I digress. Now, onwards and upwards!
Water pump is Hyundai OEM.
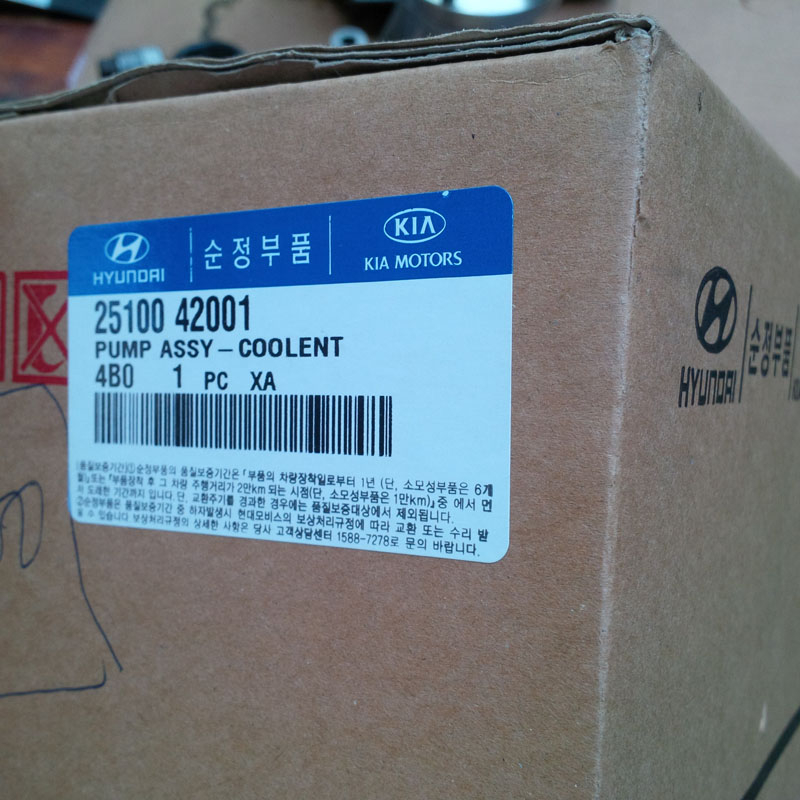
- IMG_20150421_090114.jpg (367.92 KiB) Viewed 16132 times
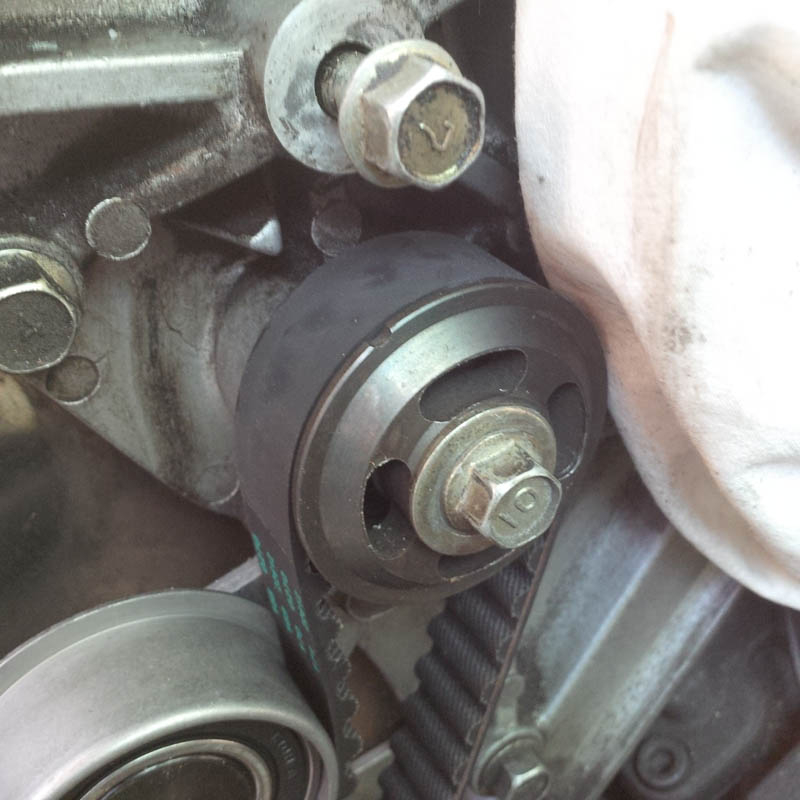
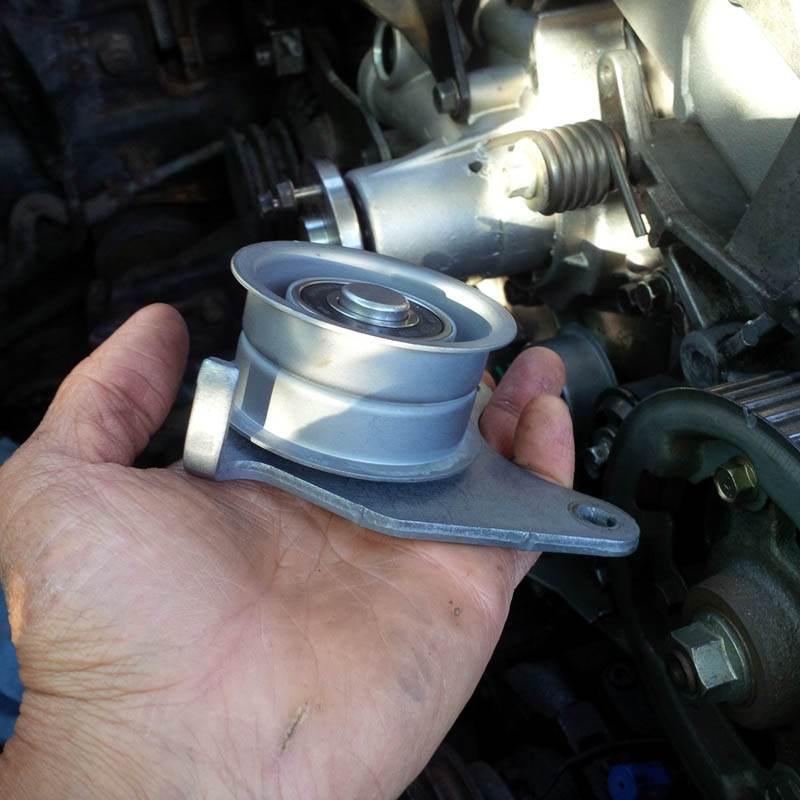
Time to deal with the balancer belt. Remove the two bolts that hold the tensioner and remove it.
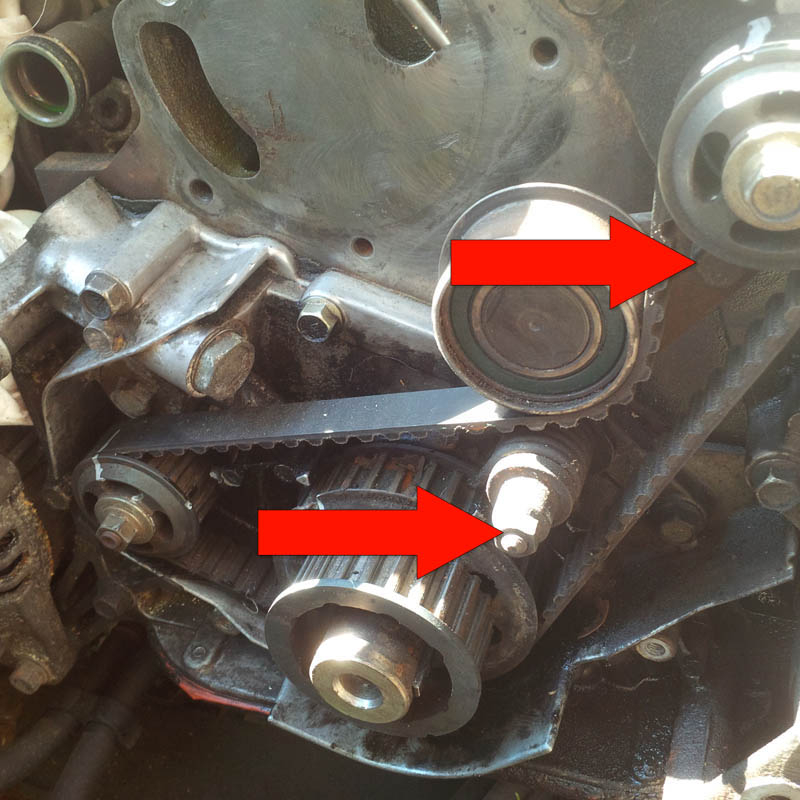
- IMG_20150714_160658.jpg (328.95 KiB) Viewed 16132 times
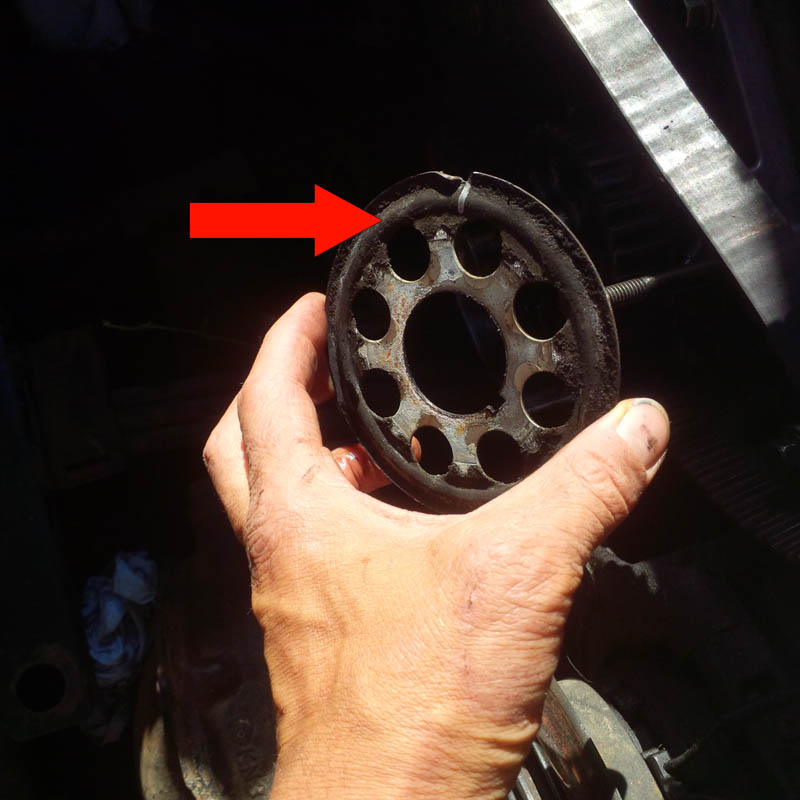
Pull off both crank gears. Here is a picture of the outer one which the timing belt goes around.
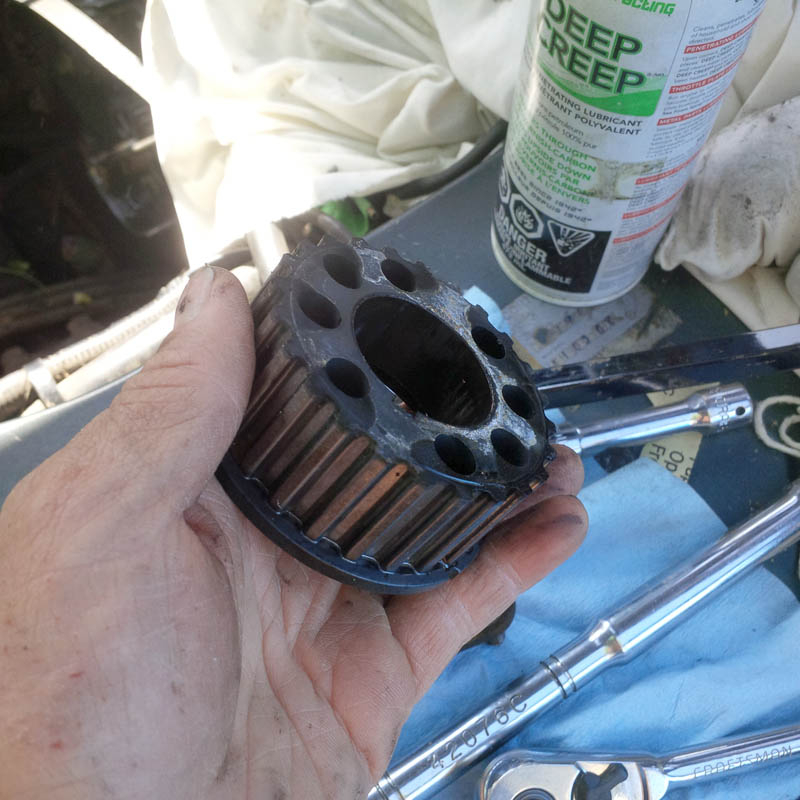
- IMG_20150714_161455.jpg (328.4 KiB) Viewed 16132 times
Note that there is a spacer between them where the convex profile faces outwards.
- IMG_20150714_161528.jpg (242.63 KiB) Viewed 16132 times
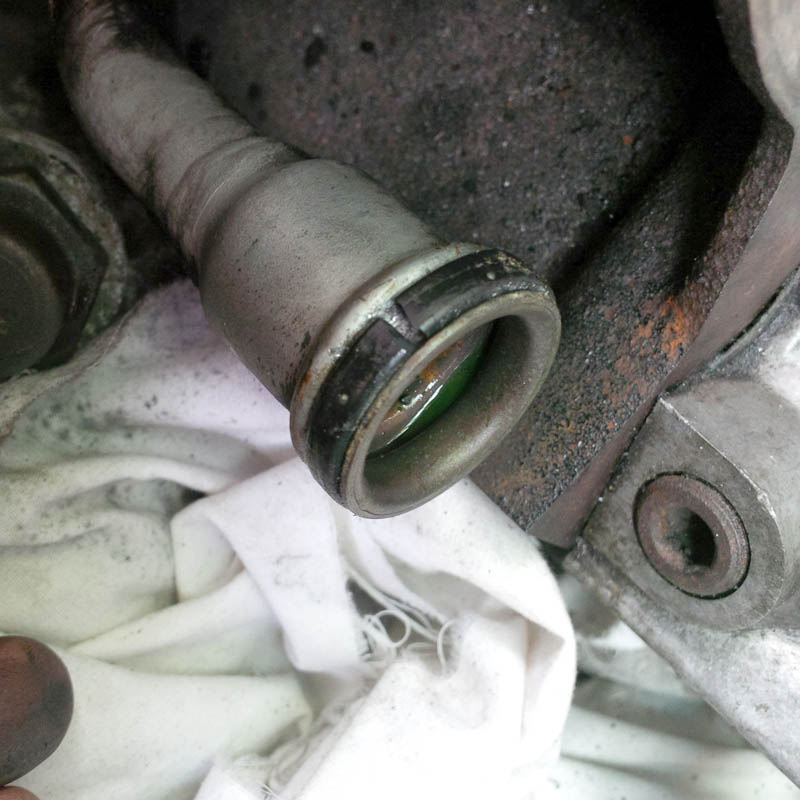
You can see that there is a bunch of oil around the crankshaft, so it's a good time to replace the seal.
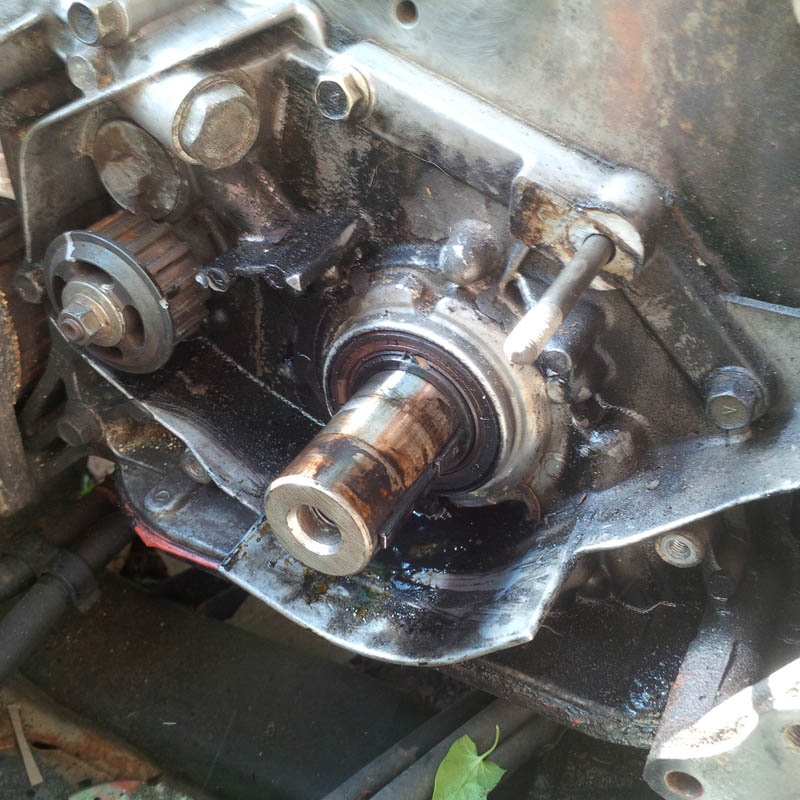
- IMG_20150714_161716.jpg (385.88 KiB) Viewed 16132 times
Re: L300 Head replacement and timing belt DIY, step by step
Posted: Wed Jul 15, 2015 4:21 pm
by Tojo
I made my own balancer gear removal tool. Just two bolts with a larger hole in the middle for the socket.
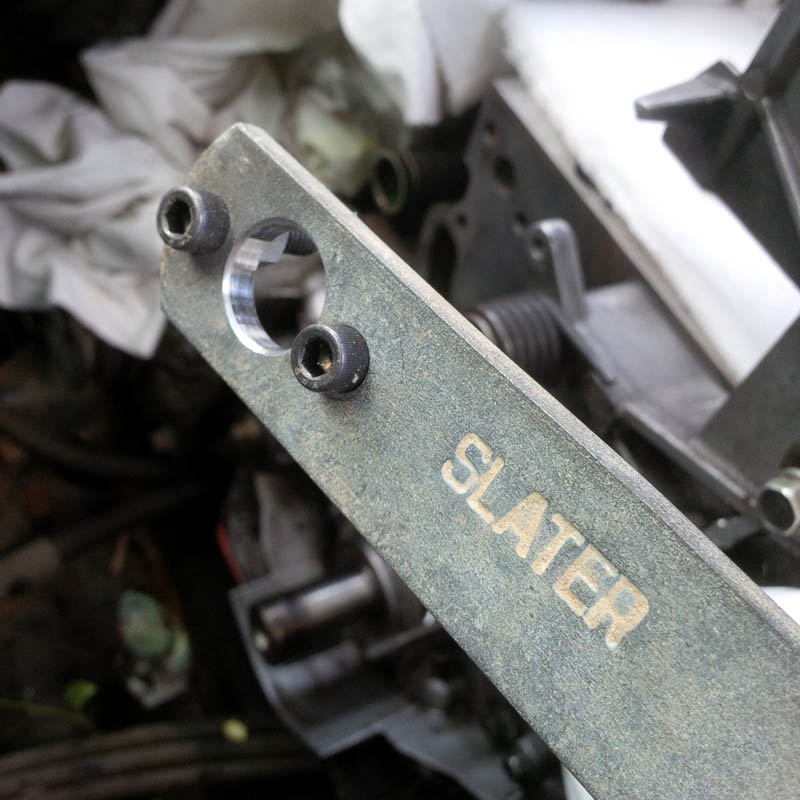
- IMG_20150714_162911.jpg (279.26 KiB) Viewed 16132 times

- IMG_20150714_162920.jpg (253.47 KiB) Viewed 16132 times
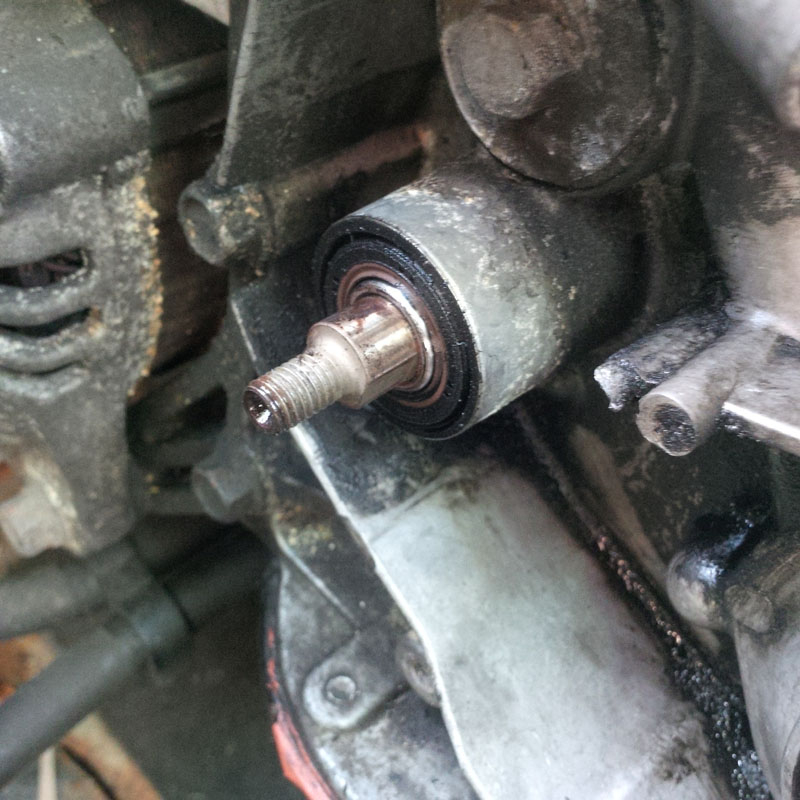
Use the improvised tool and cranked the upper balancer shaft gear loose.

- IMG_20150714_165136.jpg (304.56 KiB) Viewed 16132 times
And this is what it looks like underneath.
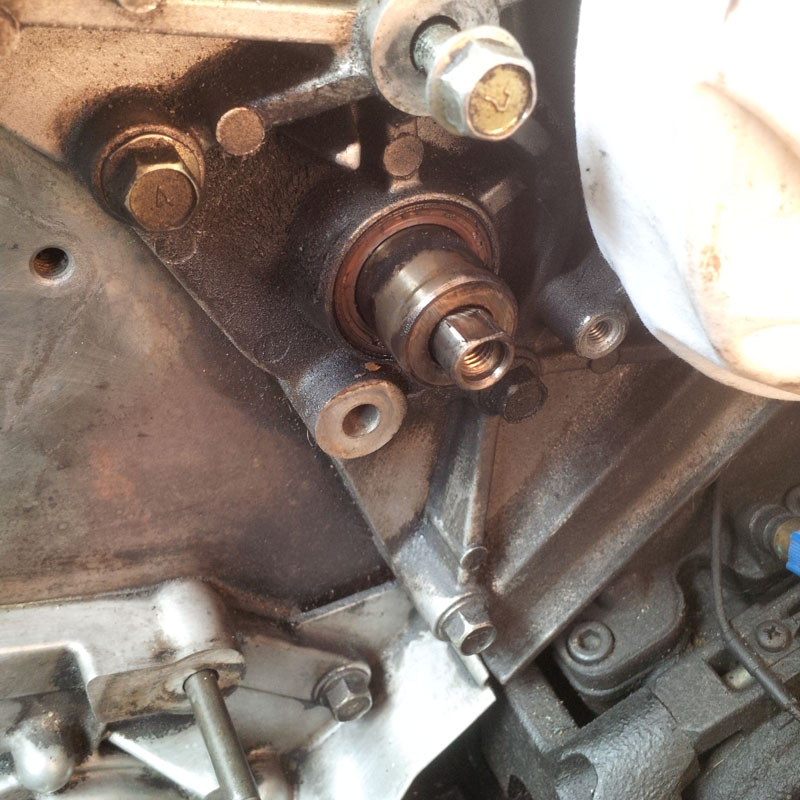
- IMG_20150714_165400.jpg (388.91 KiB) Viewed 16132 times
Used the tool again to remove the lower balancer shaft gear.
- IMG_20150714_165408.jpg (354.79 KiB) Viewed 16132 times
Pull off the upper balance shaft bushing and remove the oil seal, then replace with new ones. The reason to do this is because a groove gets worn into the bushing over time and causes a slow leak. Even if you just replace the oil seal the chances of it leaking are high if you decide to re-use the old bushing. My philosophy with this entire rebuild is to replace everything critical because the reality is that the major cost is your time. The parts themselves are small and relatively cheap for the most part, except for the timing belt and water pump (and the head of course!).
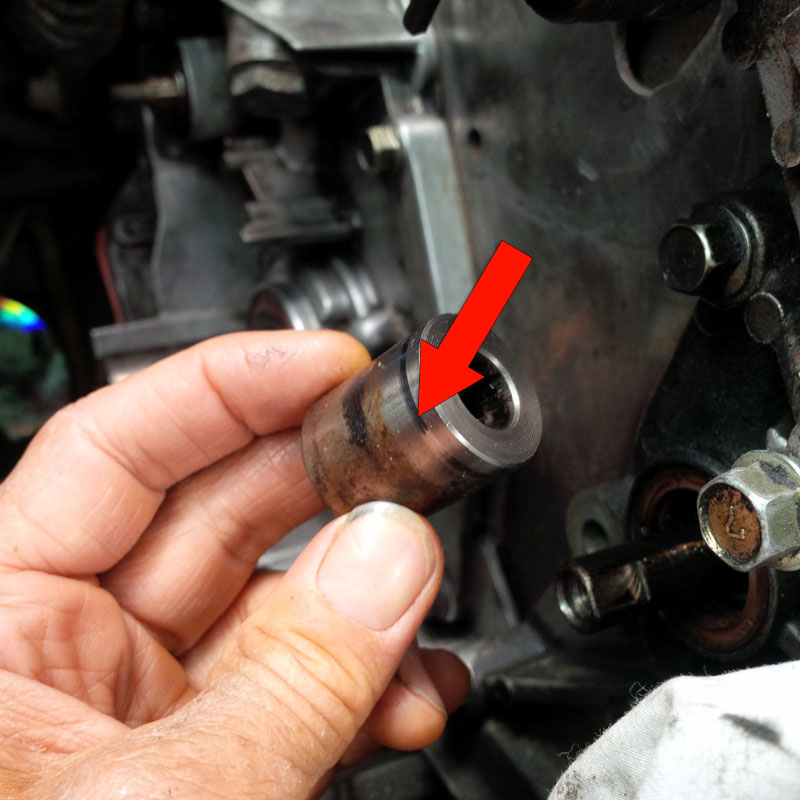
- IMG_20150715_133713.jpg (316.26 KiB) Viewed 16132 times
Nice and shiny! Used a large socket to press in the new oil seal.
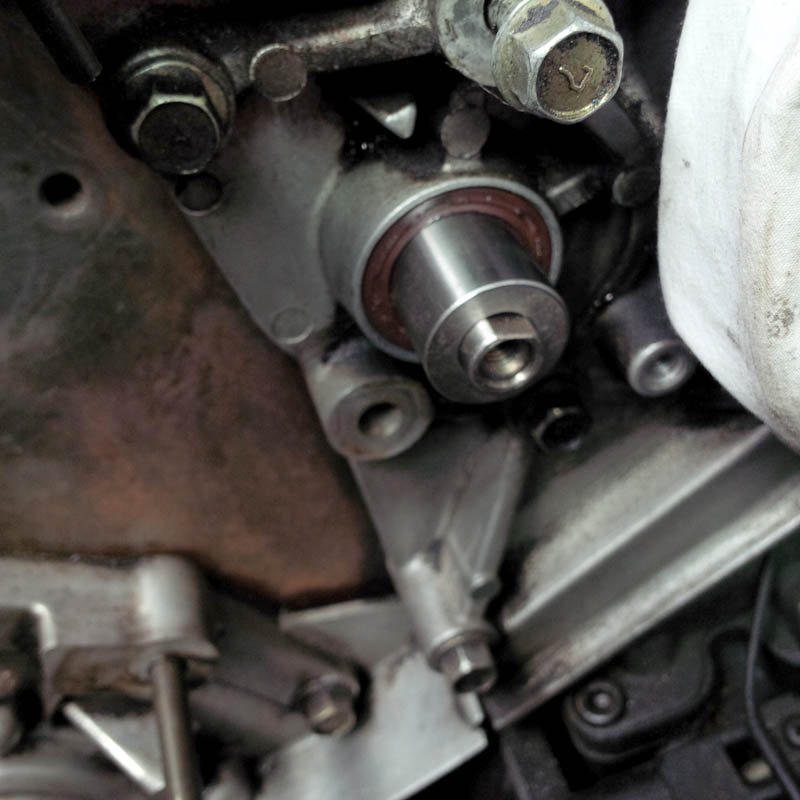
- IMG_20150715_135342.jpg (230.98 KiB) Viewed 16132 times
Re: L300 Head replacement and timing belt DIY, step by step
Posted: Wed Jul 15, 2015 4:41 pm
by Tojo
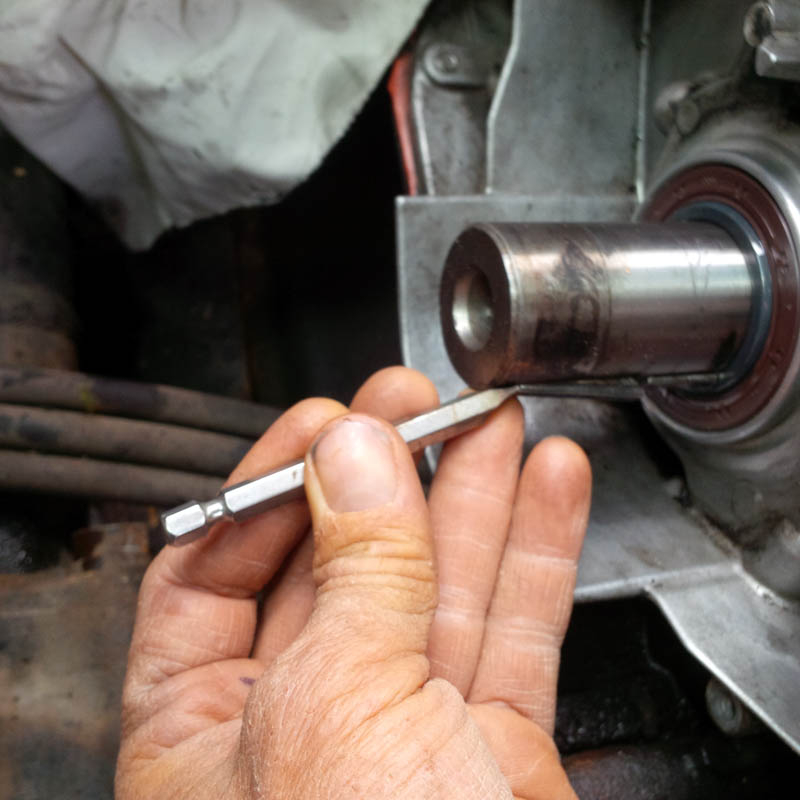
By the way. Use a small 1/16" drill bit to make holes in the oil seals then drive a tiny screw into the hole and use needlenose pliers (bentnose preferred) to remove the seal. Just don't drill into the shaft or aluminum housing!
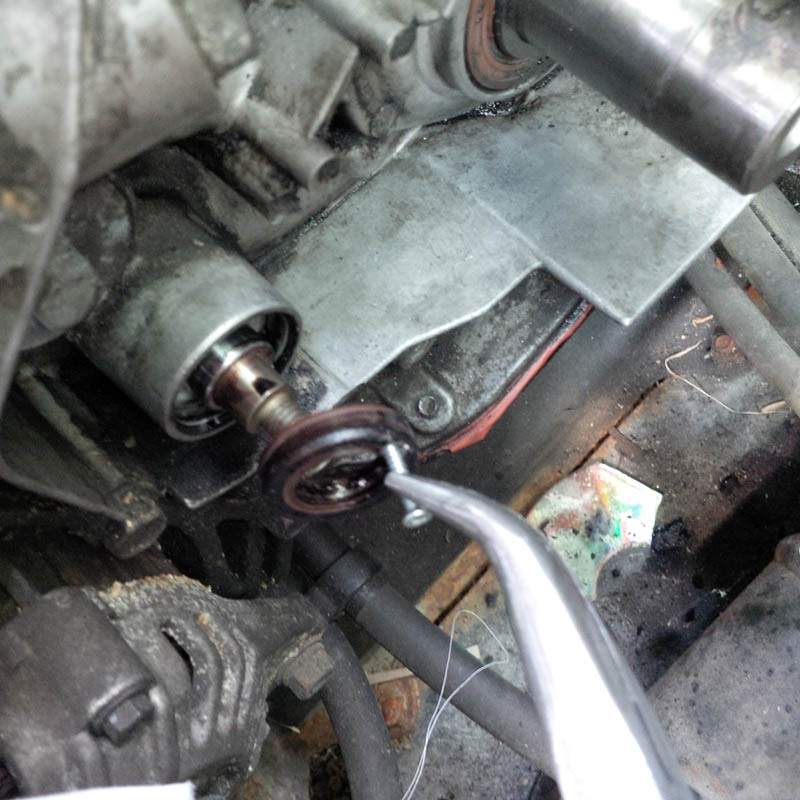
- IMG_20150715_135913.jpg (302.61 KiB) Viewed 16129 times
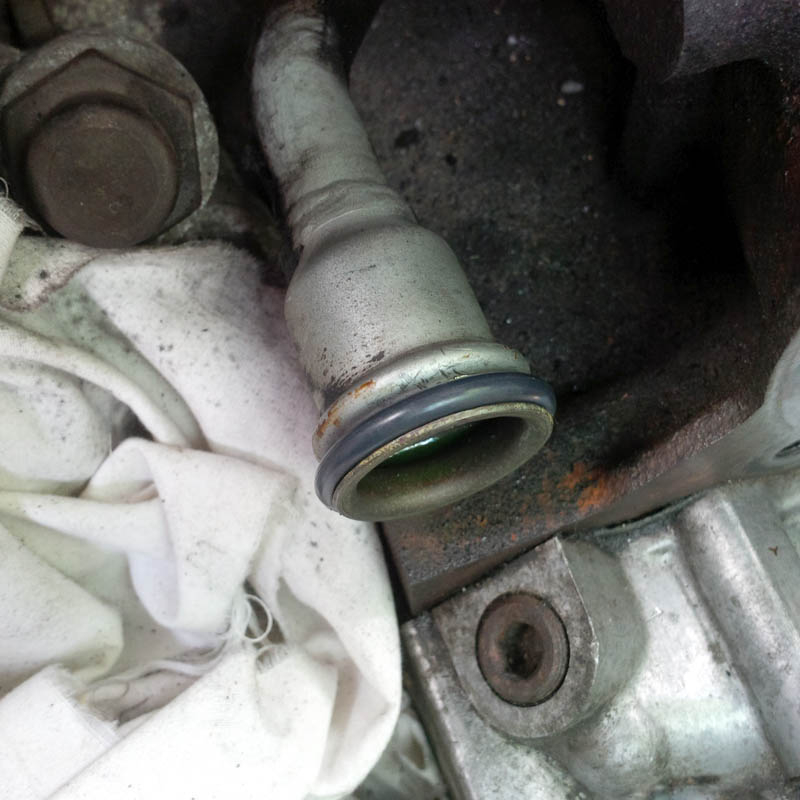
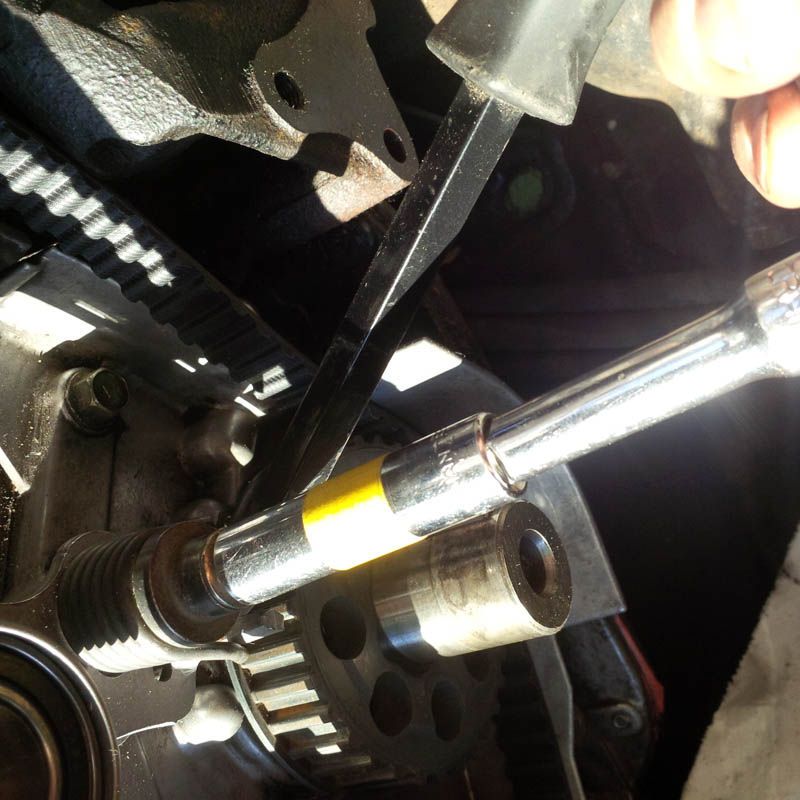
Use the same method to remove the crank oil seal.
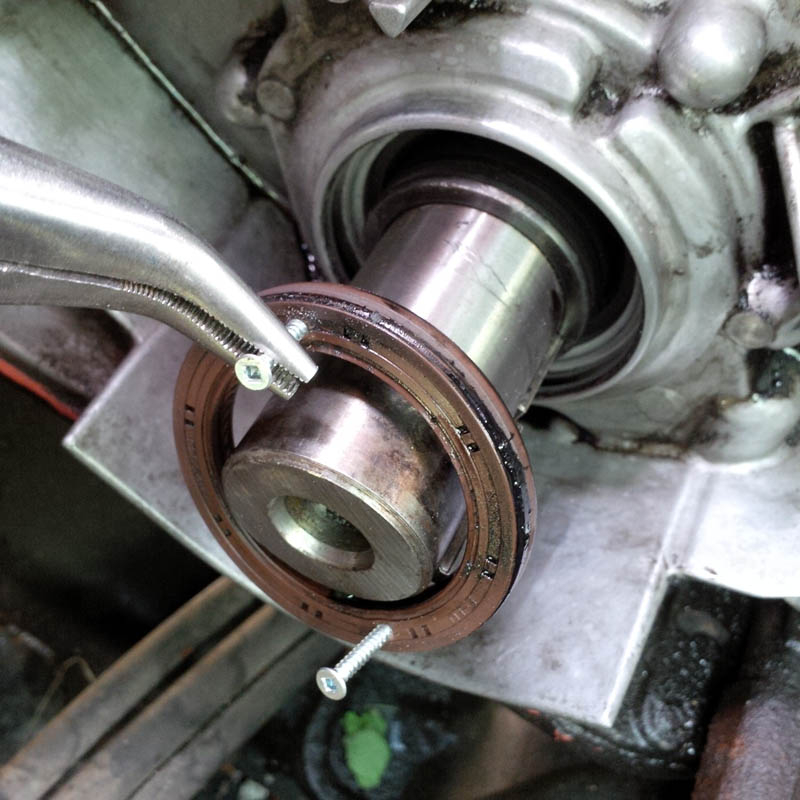
- IMG_20150715_141420.jpg (309.19 KiB) Viewed 16129 times
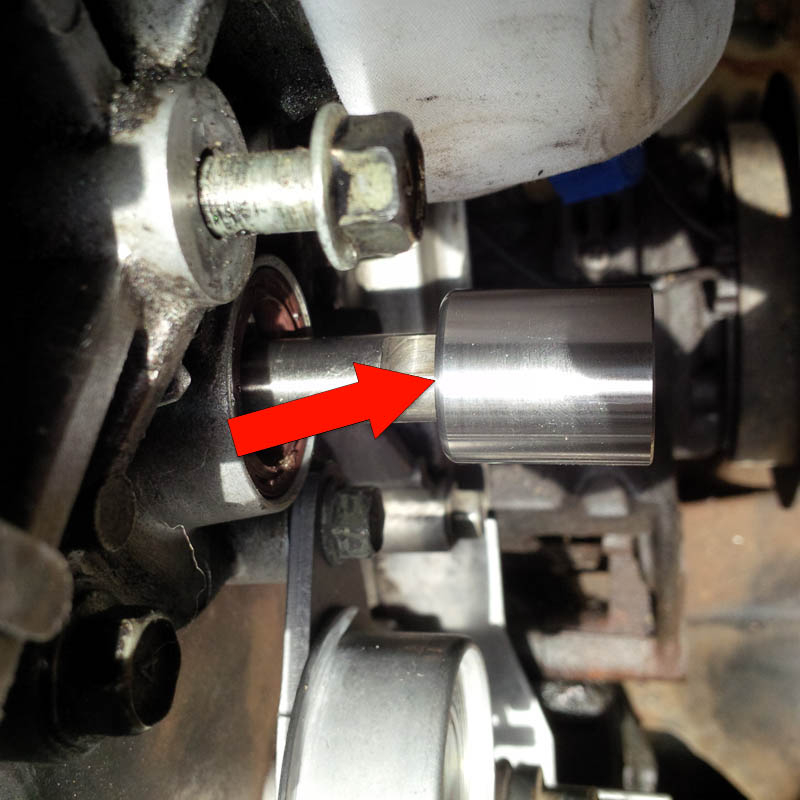
Pull out the oil pump drive gear sleeve. Again because of the worn in groove that lets oil past as well as the teeth can get worn out. In this case the gear teeth look fine, but whatever, I replace anyways.
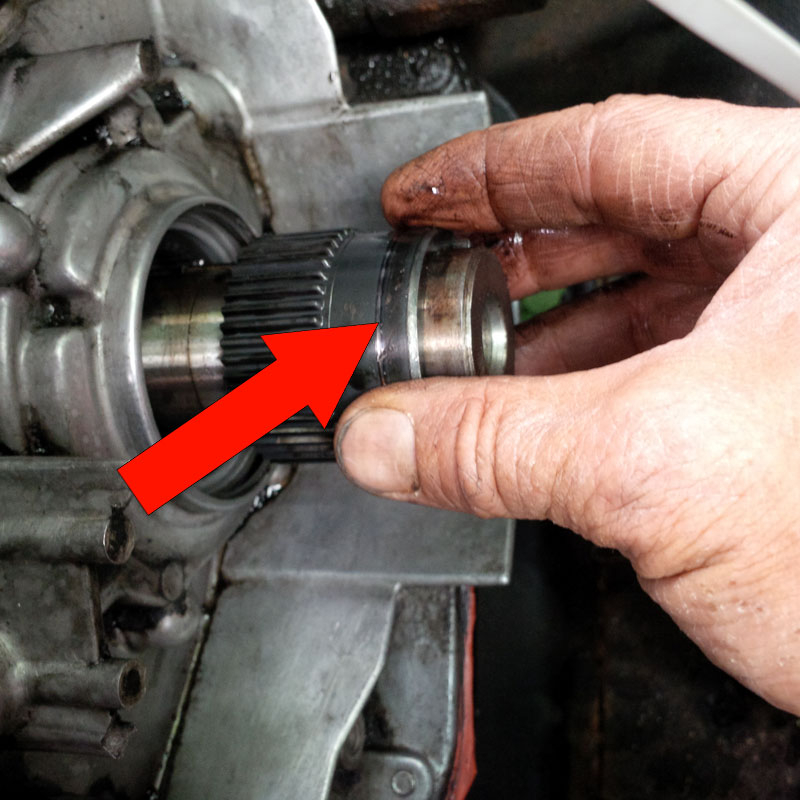
- IMG_20150715_141543.jpg (350.72 KiB) Viewed 16129 times
New oil pump drive gear sleeve.
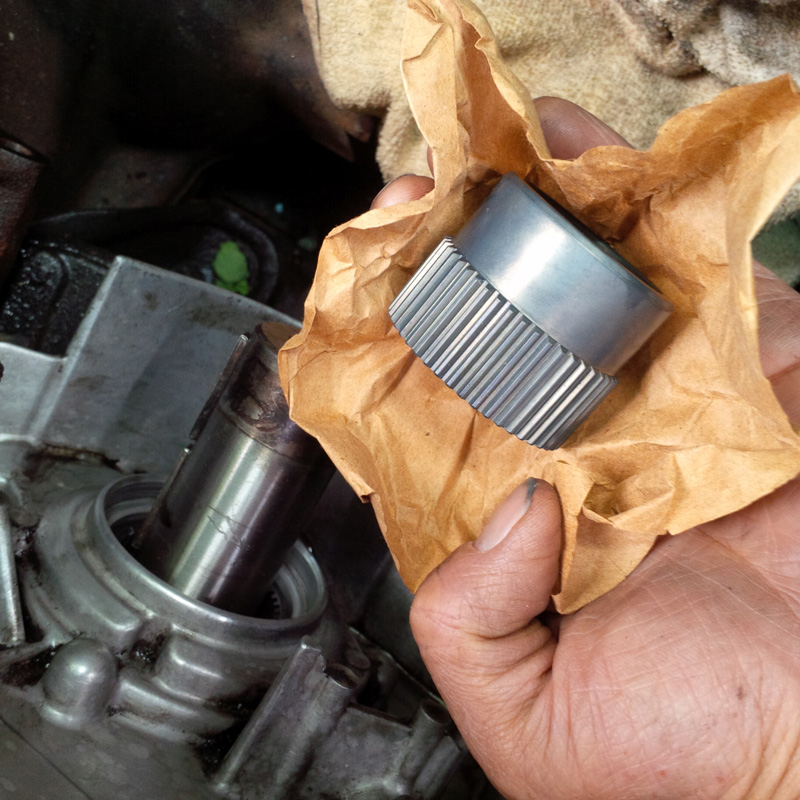
- IMG_20150715_141656.jpg (505.12 KiB) Viewed 16129 times
An ABS fitting works really well for press fitting that crank oil seal. 2" to 2.25" outer diameter sleeve is what you're looking for.
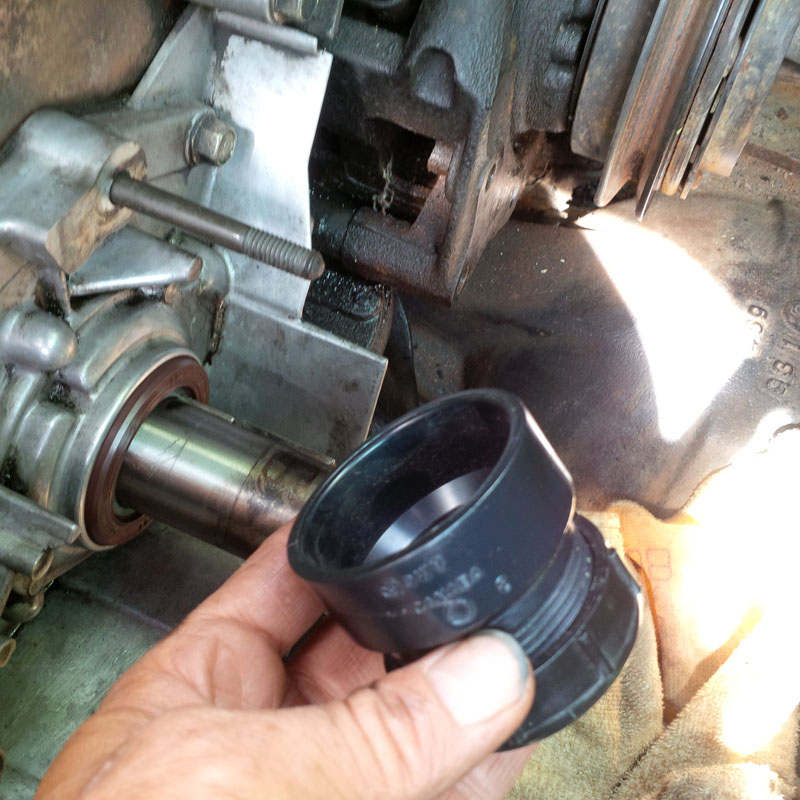
- IMG_20150715_142417.jpg (397.37 KiB) Viewed 16129 times
Looking freshened up.

- IMG_20150715_142833.jpg (318.97 KiB) Viewed 16129 times
Re: L300 Head replacement and timing belt DIY, step by step
Posted: Wed Jul 15, 2015 4:55 pm
by Tojo
Replace the o-ring on the water pump outlet.
- IMG_20150715_143132.jpg (267.35 KiB) Viewed 16127 times
Look at the difference between the old and new. The old one was hard, brittle and flattened. New one is soft, pliable and rounded profile.

- IMG_20150715_143240.jpg (335.07 KiB) Viewed 16127 times
Done. Ready to install the water pump.
- IMG_20150715_143306.jpg (251.48 KiB) Viewed 16127 times
Attach the new balancer belt tensioner.
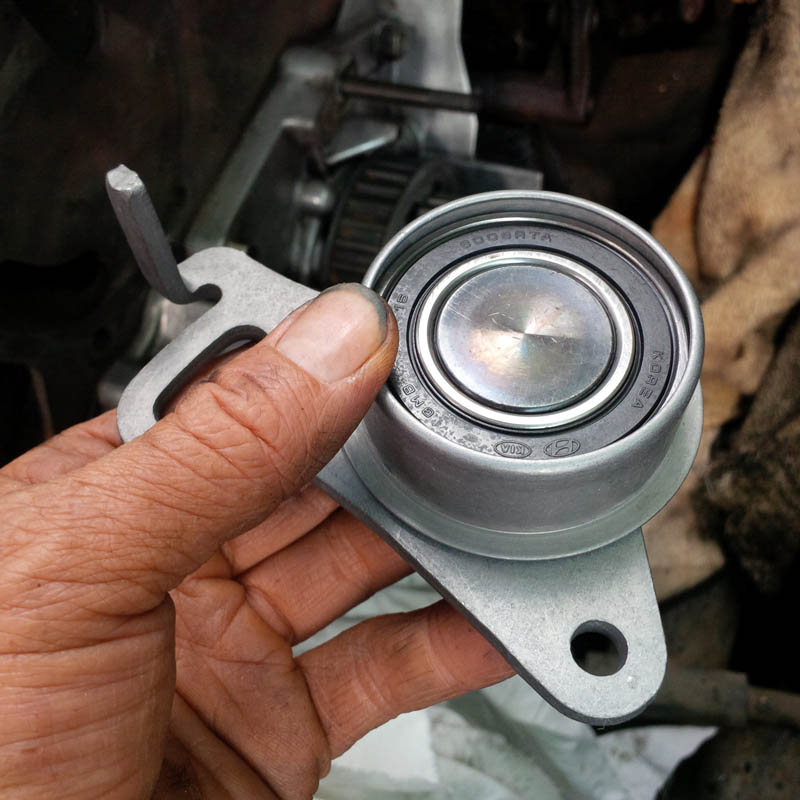
- IMG_20150715_143429.jpg (289.54 KiB) Viewed 16127 times
- IMG_20150715_164905.jpg (350.77 KiB) Viewed 16127 times
Re: L300 Head replacement and timing belt DIY, step by step
Posted: Tue Jul 21, 2015 4:29 pm
by Tojo
Just to backtrack and highlight a few details.
On the upper balance shaft bushing the chamfered edge faces inwards.
- IMG_20150717_145025.jpg (264.85 KiB) Viewed 16107 times
Knock out the woodruff key with a flathead screwdriver bit and place in a new one. Makes for a nice snug fit with the crank sprockets.
- IMG_20150717_145931.jpg (242.27 KiB) Viewed 16107 times
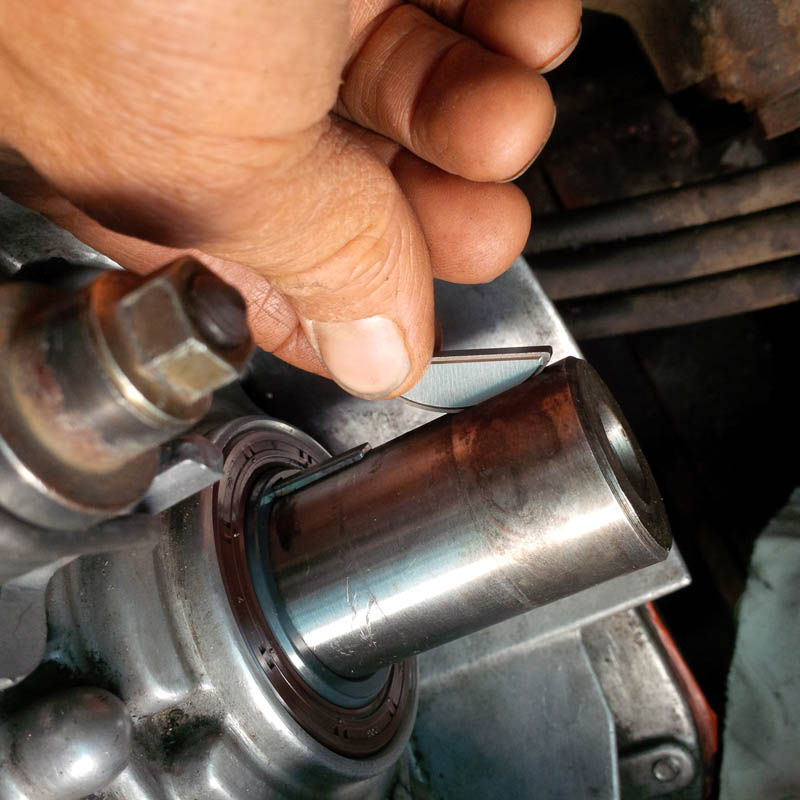
- IMG_20150717_150450.jpg (290.91 KiB) Viewed 16107 times
Next it was time to place the balancer belt. AKA timing belt "B"
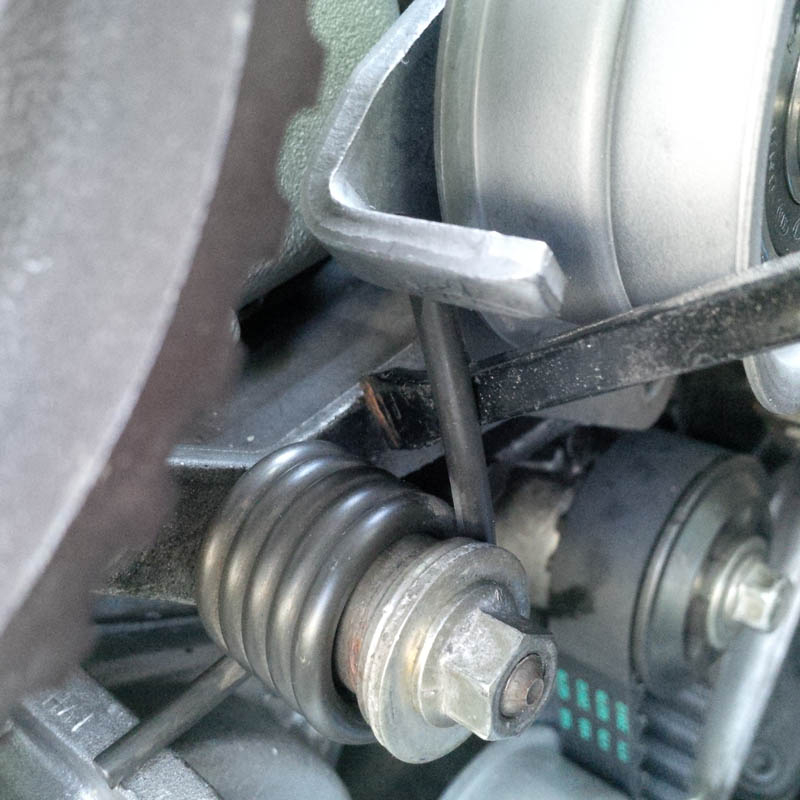
Use a lever bar to push against the tensioner spring and turn the bolts to hold the tensioner in place.
- IMG_20150717_152923.jpg (299.88 KiB) Viewed 16107 times
Align all the timing marks on each sprocket and slip the balancer belt into place. It took a couple of tries to get it to line up.
- IMG_20150717_153352.jpg (244.71 KiB) Viewed 16107 times
Release the tensioner and check for deflection on the right side which should be 4 to 5 mm according to the manual. Note that the belt has direction. This is a clockwise turning motor.
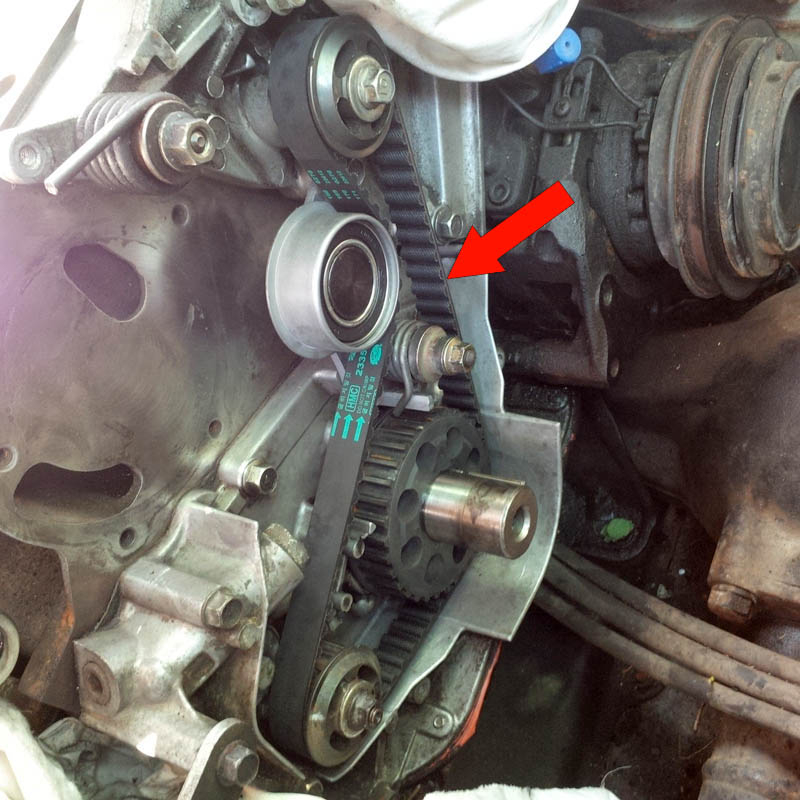
- IMG_20150717_153339.jpg (348.87 KiB) Viewed 16107 times
Re: L300 Head replacement and timing belt DIY, step by step
Posted: Tue Jul 21, 2015 4:32 pm
by Tojo
Re: L300 Head replacement and timing belt DIY, step by step
Posted: Tue Jul 21, 2015 4:39 pm
by Tojo
Fresh dowels on the block.
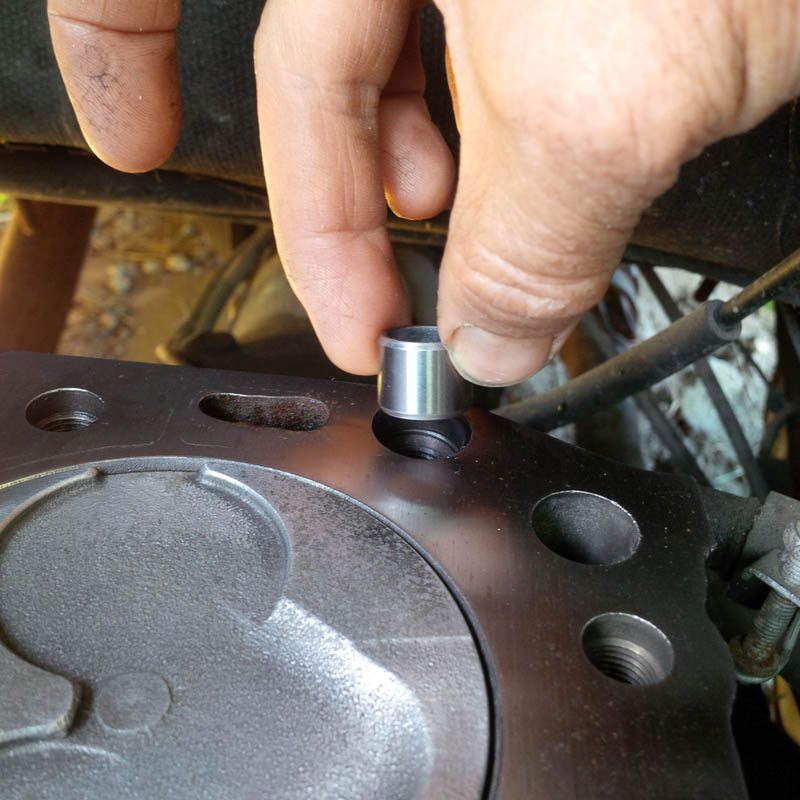
- IMG_20150721_132448.jpg (307.26 KiB) Viewed 16107 times
Clean the mating surfaces with brake cleaner because it evaporates and leaves no residue. Then place the head gasket. Used compressed air to blow out the head bolt holes and clean off the threads in the block.
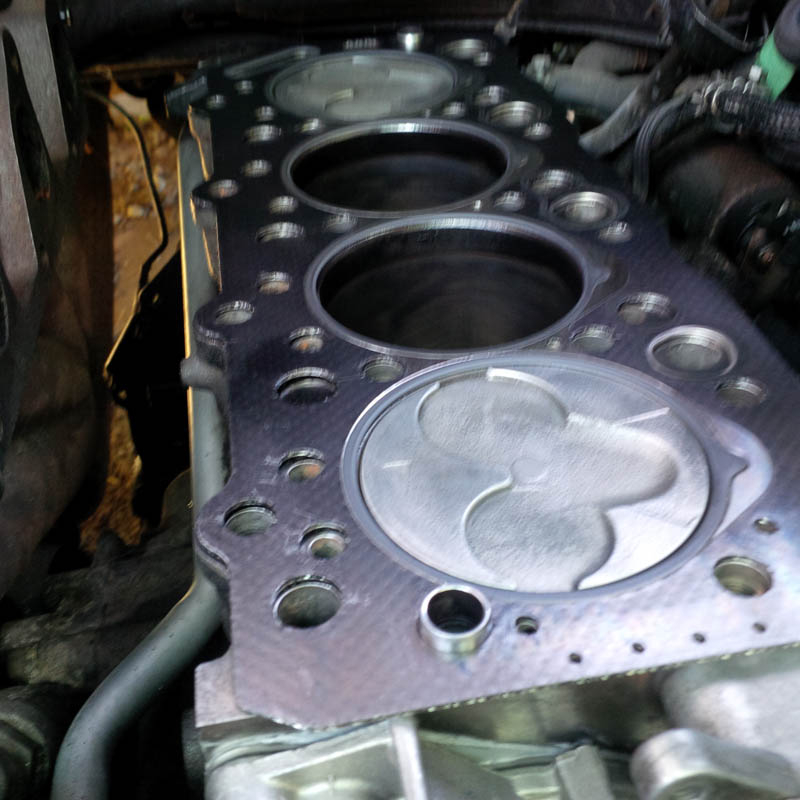
- IMG_20150721_133309.jpg (282.55 KiB) Viewed 16107 times
On goes the head.
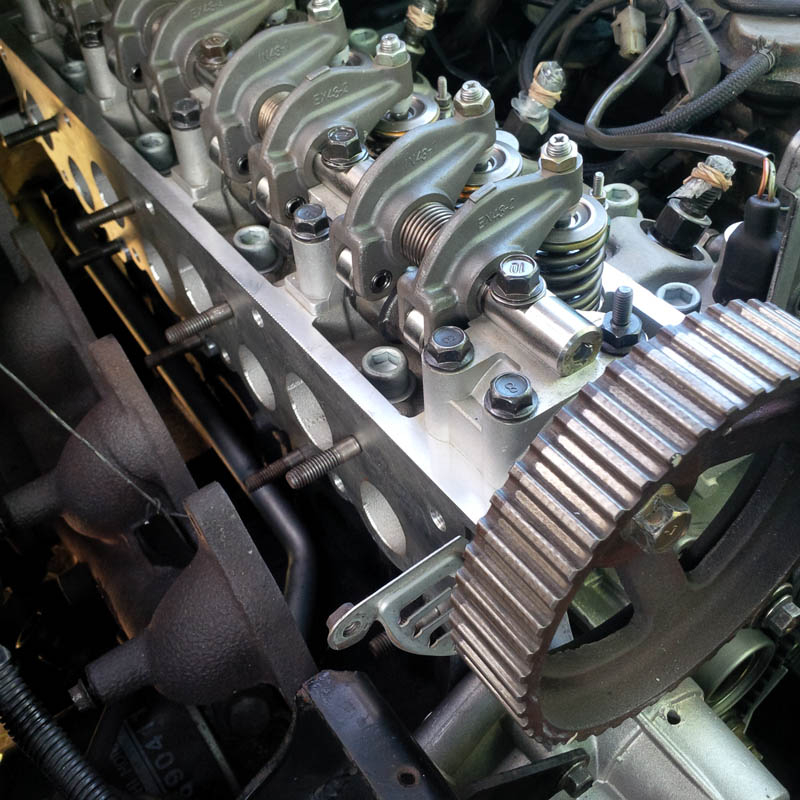
- IMG_20150721_144523.jpg (399.7 KiB) Viewed 16107 times
Take your time and torque to spec which is 113-123 Nm or 83 to 90 ft. lbs. Follow the pattern. Do it gradually and work your way around the pattern several times before reaching your final torque setting.
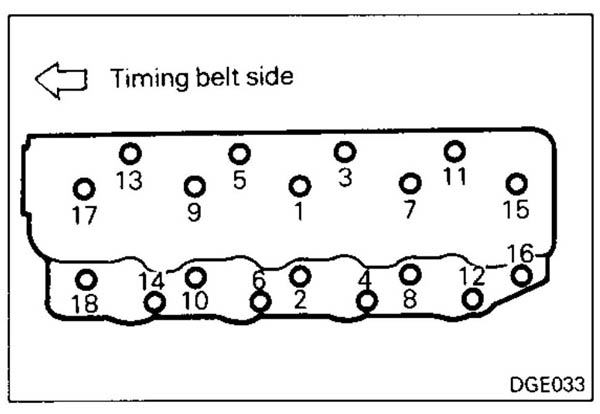
- head bolt install.JPG (56.68 KiB) Viewed 16107 times
Fresh head bolts. Chamfered edge on the washer faces up. I used a small drop of engine oil on the threads. Not too much or it leads to hydraulic lock and stripped threads.
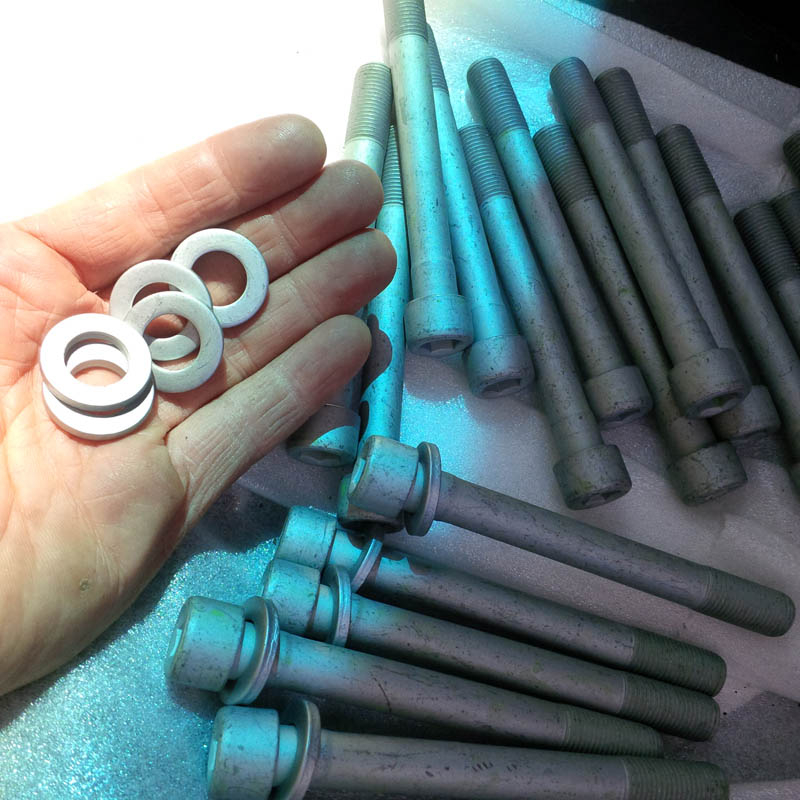
- IMG_20150721_135857.jpg (359.45 KiB) Viewed 16107 times
Ready to start reattaching stuff!
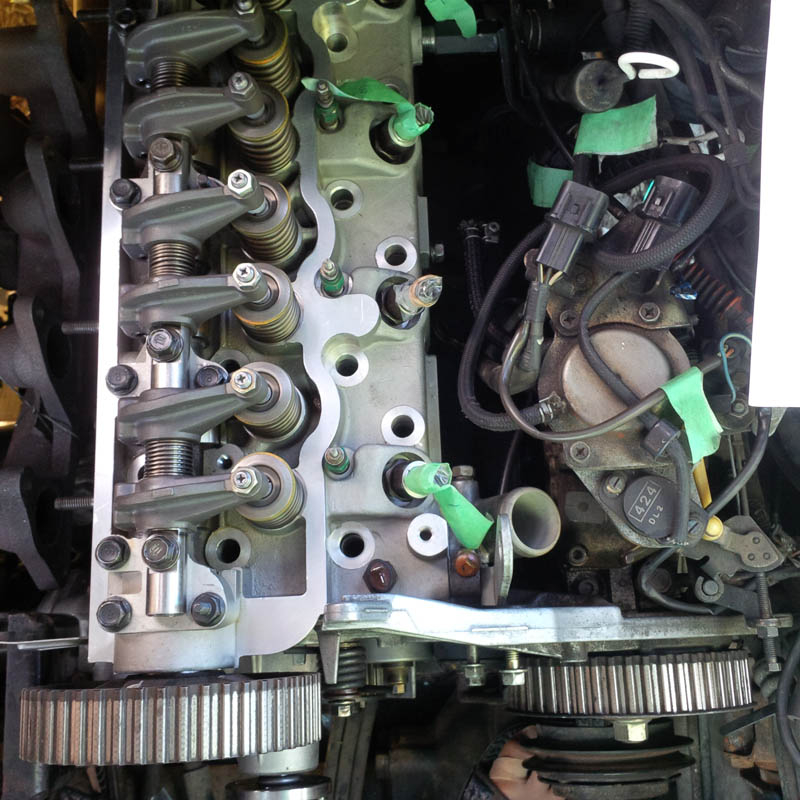
- IMG_20150721_141103.jpg (379.21 KiB) Viewed 16107 times
Re: L300 Head replacement and timing belt DIY, step by step
Posted: Wed Jul 22, 2015 5:19 pm
by Tojo
Timing belt time!
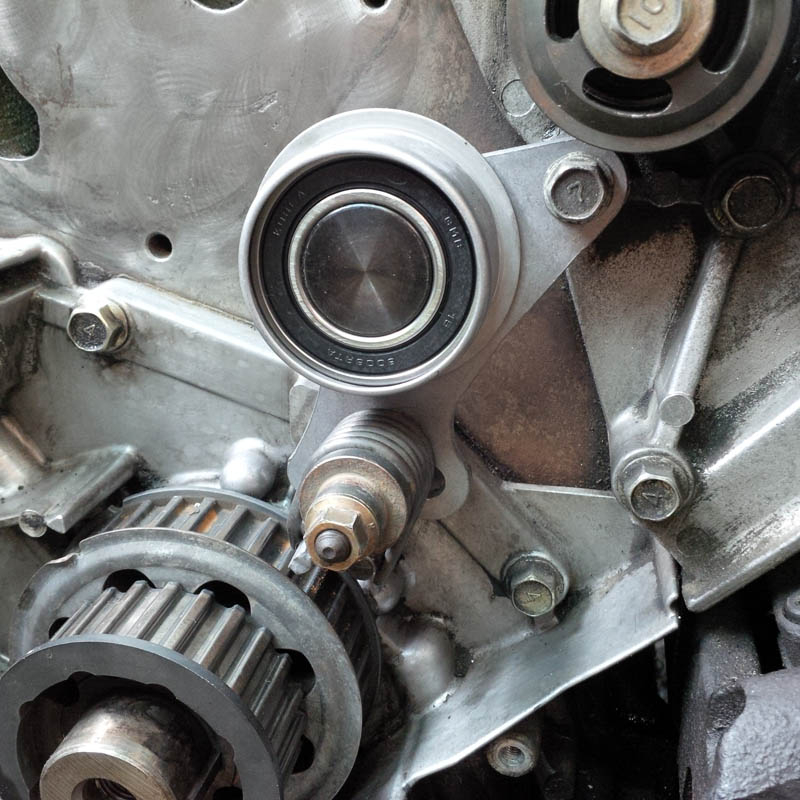
On goes the new tensioner.
- IMG_20150722_094327.jpg (266.5 KiB) Viewed 16093 times
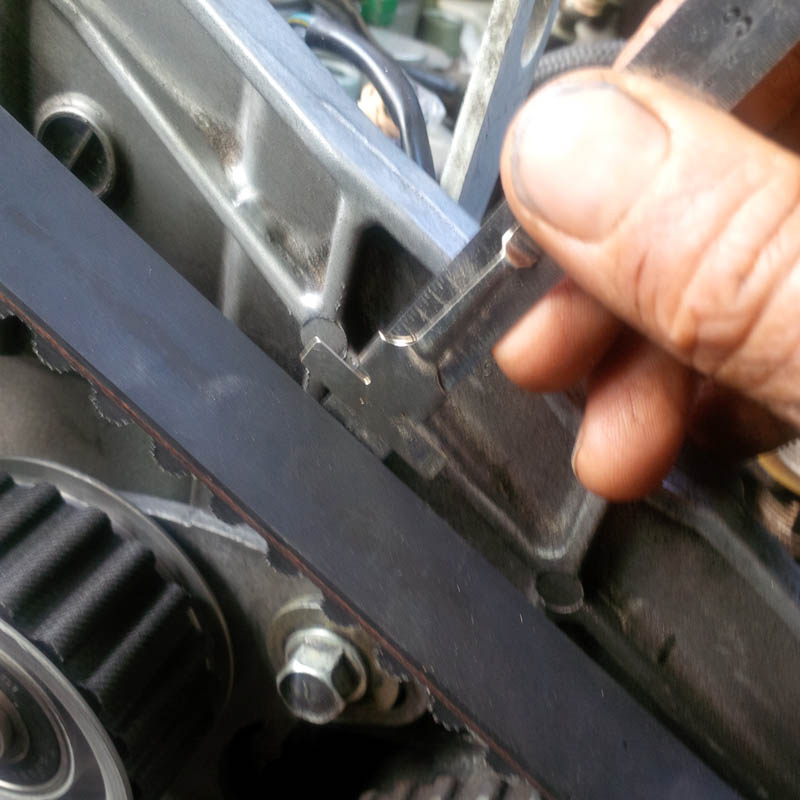
Tricky to get the tensioner and spring into place. Probably a few ways to do this, and this is what I did. Place a small lever bar and push against the spring (towards the drivers side). Pop the spring over the bent metal hook on the tensioner.
- IMG_20150722_095313.jpg (275.19 KiB) Viewed 16093 times
Once the spring is in place and you've replaced the two bolts, move the lever bar to this position on the tensioner and apply some leverage to push against the spring. Tighten the upper bolt on the tensioner to hold it in place so it doesn't rebound. Keep the bottom bolt finger tight.
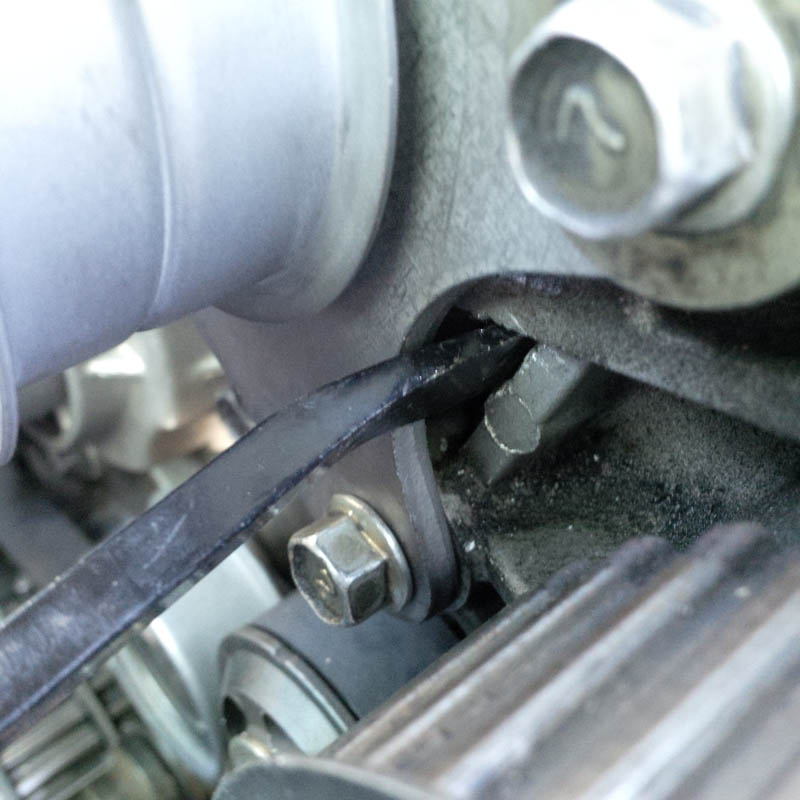
- IMG_20150722_100019.jpg (250.29 KiB) Viewed 16093 times
Align all the marks on the crank, cam and IP sprockets. Clamp the belt in place on the crank sprocket.

- IMG_20150722_120329.jpg (325.3 KiB) Viewed 16093 times
Put a wrench on the IP sprocket and turn it clockwise to align the timing mark, then clamp on the timing belt. There will now be slight tension on the right side of the belt (passenger side).
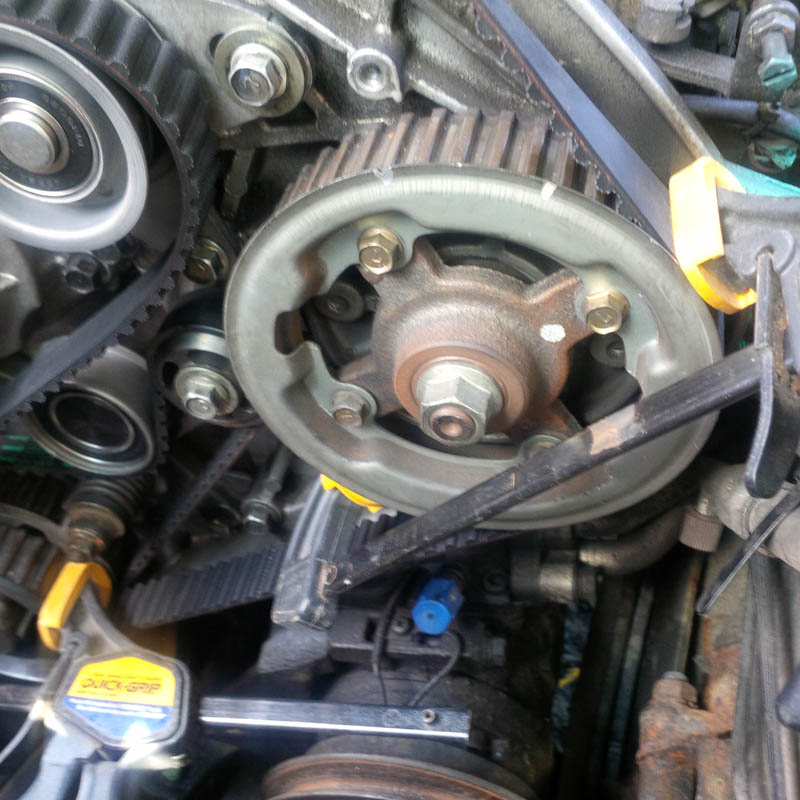
- IMG_20150722_120354.jpg (338.44 KiB) Viewed 16093 times
Ease the belt onto the cam sprocket without moving anything and it should look like this.
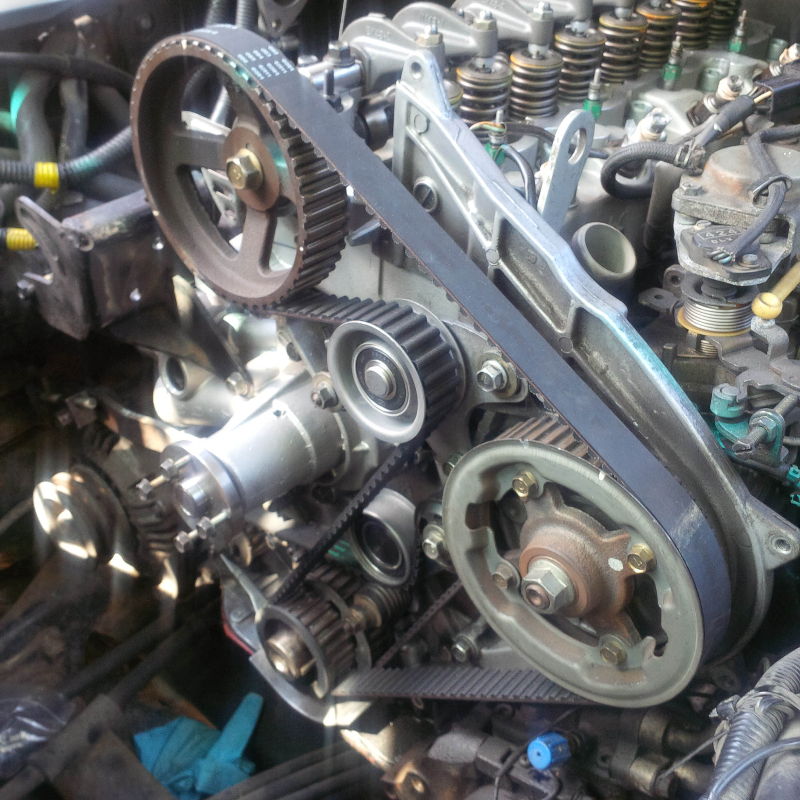
- IMG_20150722_120648.jpg (755.41 KiB) Viewed 16093 times
Release the upper bolt on the tensioner and allow the spring to apply tension to the belt. Torque both bolts down and you're done!
Check deflection, should be 4 to 5 mm.
- IMG_20150722_121109.jpg (263.02 KiB) Viewed 16093 times
Re: L300 Head replacement and timing belt DIY, step by step
Posted: Sun Mar 20, 2016 3:53 pm
by lrp374
Tojo I just reviewed your post on the Head replacement etc. and it even makes more sense than the first time. I didn't remember the replacement section but it will even be more help than the removal. I think you should get some kind of award or @ least a royalty from those who use your great post. Thanks again for the effort I know it really adds a lot of time to your repair.

Re: L300 Head replacement and timing belt DIY, step by step
Posted: Wed Jun 08, 2016 8:28 pm
by ChuckBlack
Excellent! Great work!
L300 Head replacement and timing belt DIY, step by step
Posted: Wed Nov 23, 2016 8:49 pm
by Matt&Kim
Hey guys, I'll be looking to replace my head gasket soon as it's pooched, just curious if it's entirely necessary to replace the head bolts when I do it.
Thanks!
L300 Head replacement and timing belt DIY, step by step
Posted: Sun Nov 27, 2016 4:15 pm
by FalcoColumbarius
Matt&Kim wrote:Hey guys, I'll be looking to replace my head gasket soon as it's pooched, just curious if it's entirely necessary to replace the head bolts when I do it.
Thanks!
On extra items, if you have, say, the lug nuts on your wheels ~ if you don't get the torque spot on ~ it's of small consequence, so long as you get it close. However, if you're dealing with the engine ~ you really need to be perfect. You need to appreciate that the engine is operating at an average of around 2,600 RPM at a 21:1 compression ratio. I would think the current head bolts would have stretched over time. How much would you save if you left the old bolts in ~ as compared to the engine's overall longevity and performance integrity? (Rhetorical)
Falco.
L300 Head replacement and timing belt DIY, step by step
Posted: Sun Jul 30, 2017 2:54 am
by mcmastai
Hi everyone,
I just got finished installing my new T belt and other bits, everything is reinstalled - but the engine won't fire, it simply cranks. I know the obvious answer is the timing is off (tear it down again, bleh), but if none of the sprockets moved during installation how can that be? (Save the IP pump sprocket which rotated 360º back to its proper alignment).
Any suggestions before I dig back in would be great..
Thanks!
L300 Head replacement and timing belt DIY, step by step
Posted: Wed Dec 06, 2017 3:42 pm
by weelsey
This is awesome.. Thanks, Tojo! I hope my crank pulley removes so easily.
What do you all suppose is the difference in these belts besides the cost? Top two have images of the belt that have mitsubishi" stamped on them @
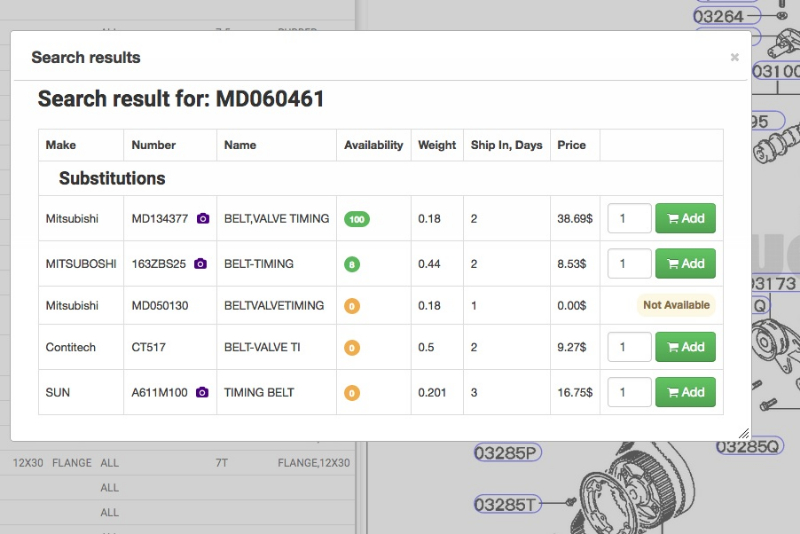
- souq_Time.jpg (210.52 KiB) Viewed 14243 times